

Table of contents
- Overview
- Fees
- The workflow
- Personal order mode
- Direct and batch shipping orders
- Order entry limitations
- US customers only
- FAQs
- The takeaway
Overview
In some cases, you may need to manually input orders for your customers; such as pre-orders, paper orders from proof cards, or replacement orders. The Order Entry feature in GotPhoto allows you to do this while ensuring the order is processed just like an online purchase.
You can also use this feature to place personal orders for testing or promotional use.
Fees
The service fees for the Order Entry form vary by plan:
- Free Plan: $2 / £0.50 / C$3 per order
- Growth Plan: $1 / £0.50 / C$1.50 per order
- Pro / Pro Plus Plan: $0.75 / £0.50 / C$1 per order
- Custom Quote
This replaces the standard service fee.
⚠ Important: Payment must be collected outside GotPhoto. Production and shipping are charged as follows:
- North American customers: Billed directly via lab
- UK customers: Billed via GotPhoto monthly invoice
Service fees are charged immediately if over $50, or added to your monthly invoice if below.
Please note: Manual orders require an approved Stripe Express account.
The workflow
To access the Order Entry form, go to Orders → Order Entry.

Click New order to get started:
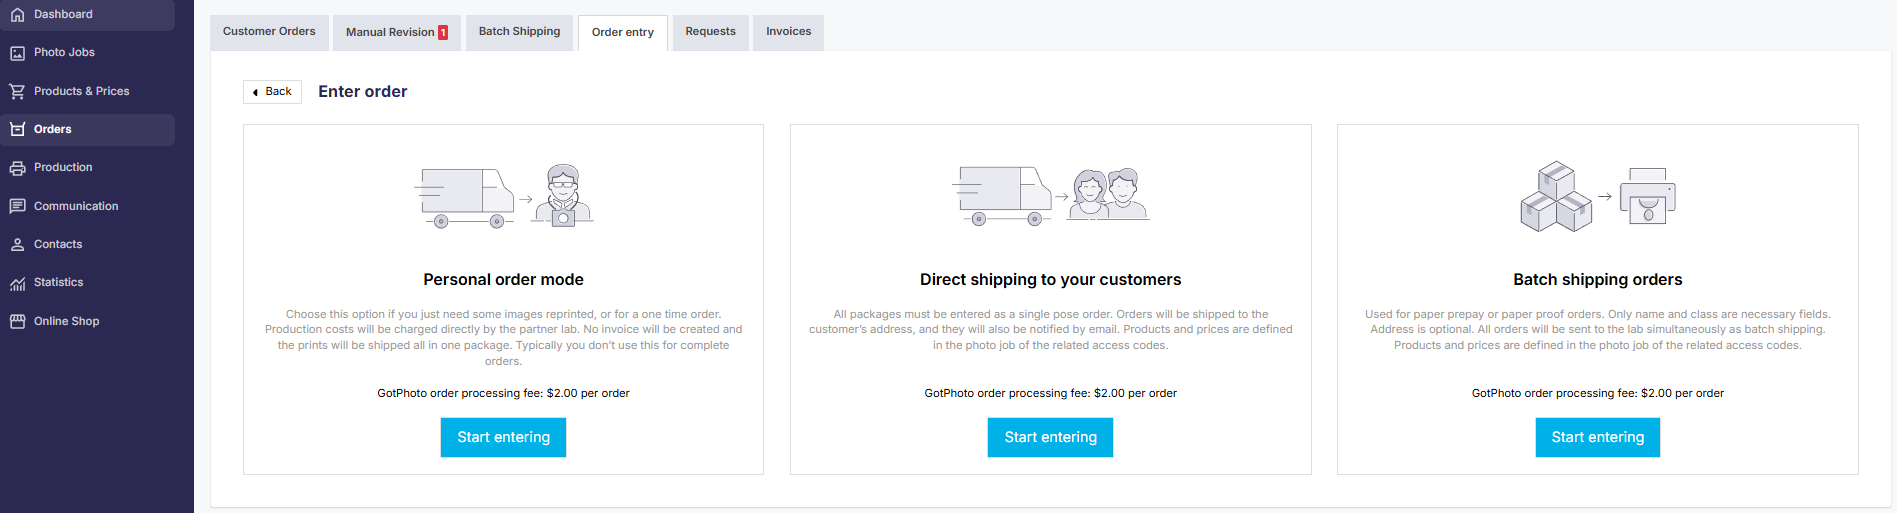
Personal order mode
[Optional] Use this for orders intended for yourself (e.g., marketing samples). These ship directly to you and do not support batch shipping.
- Please note: Personal orders are not invoiced. This may cause a mismatch between order and invoice numbers. We recommend not using this mode for offline customer orders.
Direct and batch shipping orders
Follow these steps to place an order:
- Click Start entering… under your chosen shipping type (Direct or Batch).
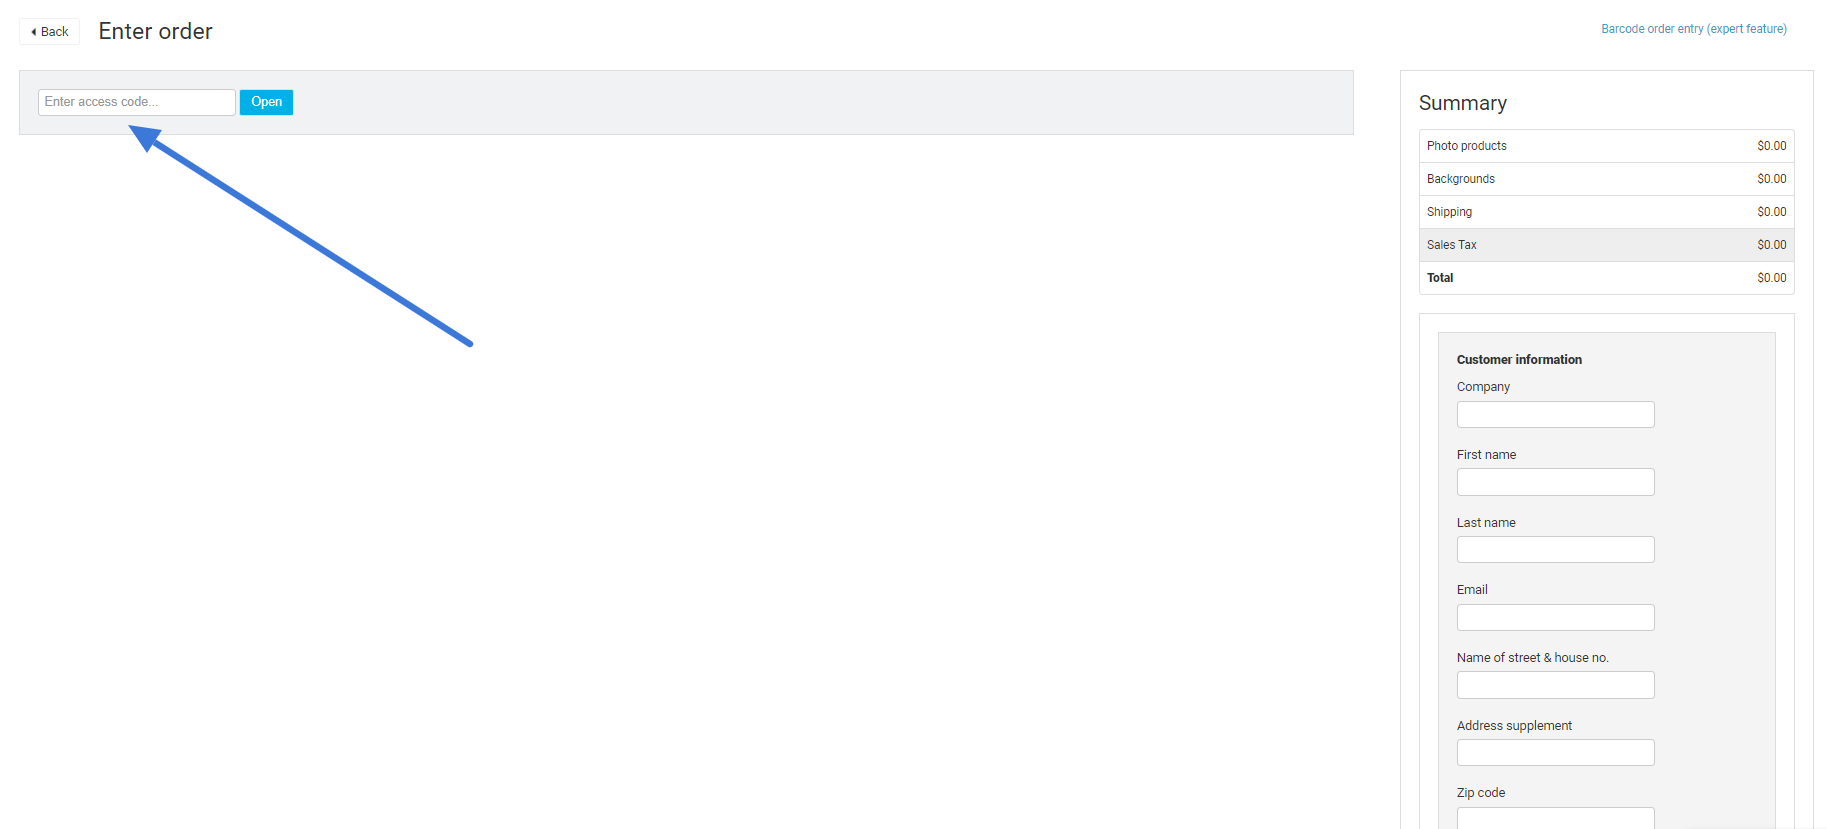
- Enter the customer’s access code.
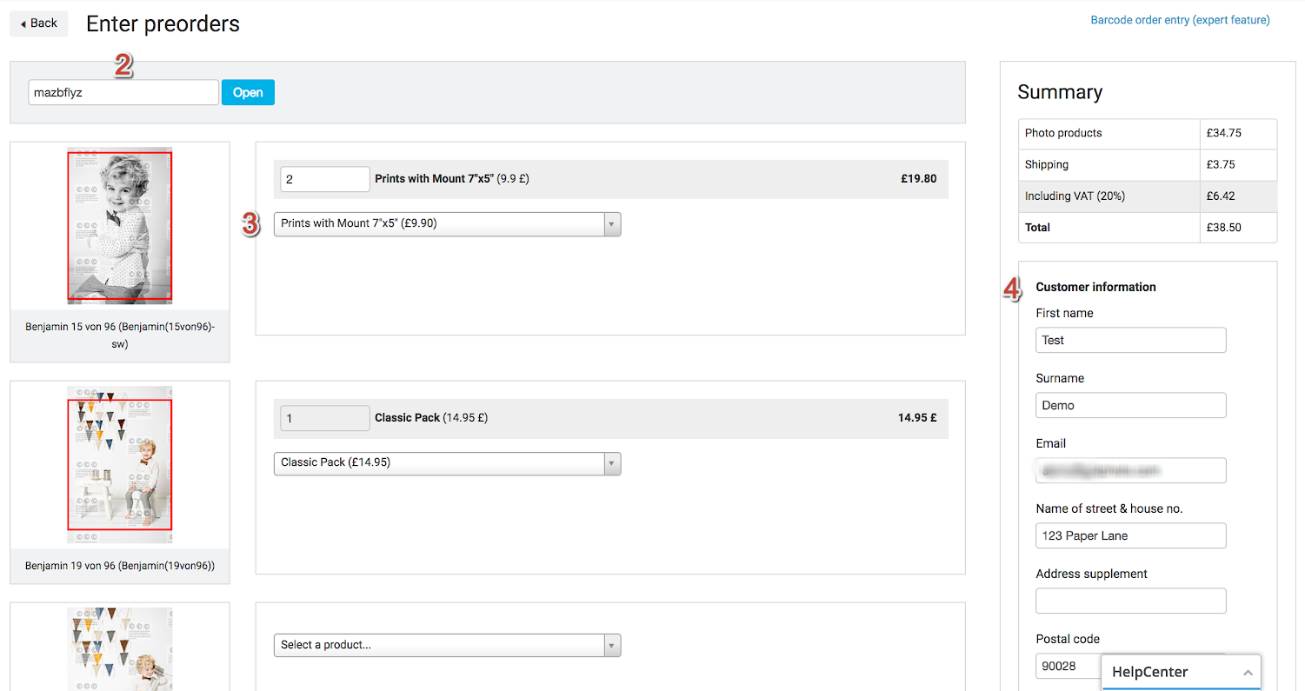
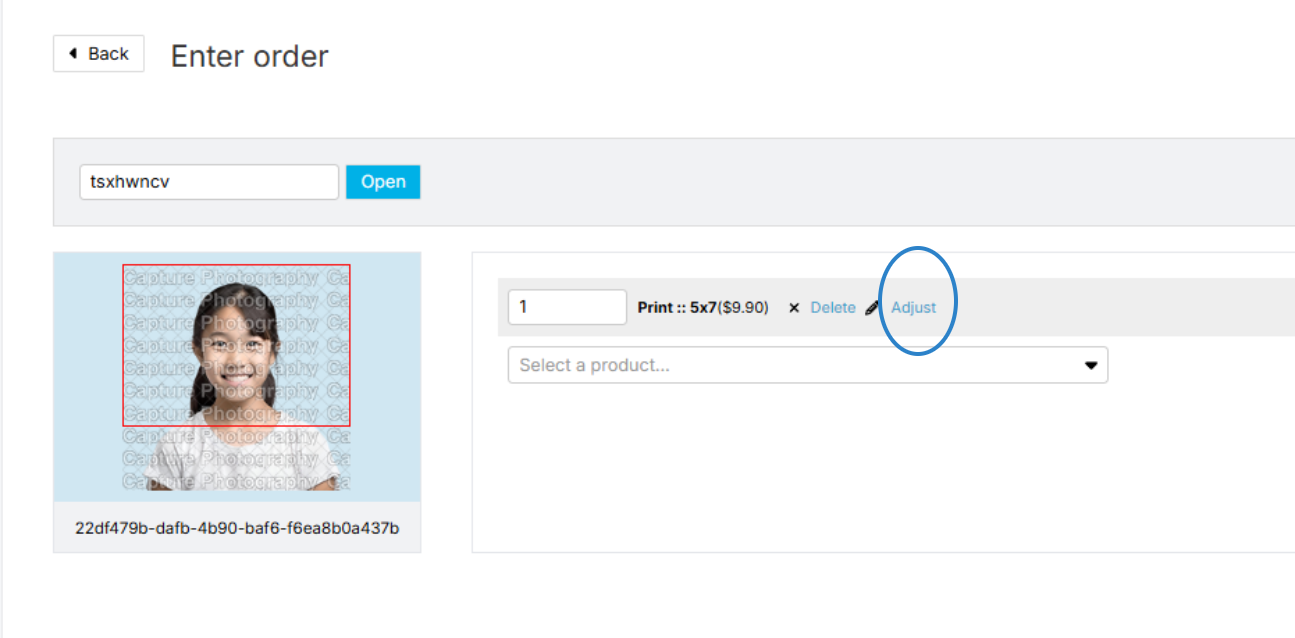
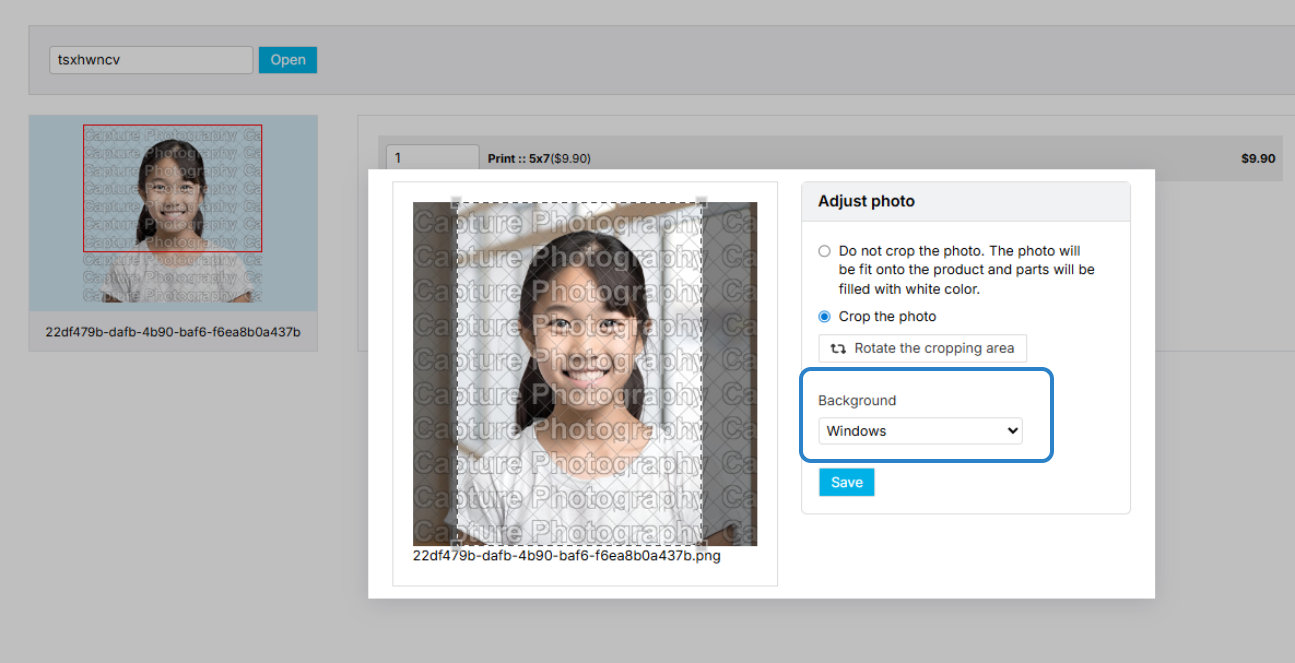
- Select products and quantities per image. Hover to access Delete, Cropping, and Background options.
- [Optional] Use Adjust to change backgrounds for green screen jobs.
- Fill in customer email and billing address in the Summary section.
- Click Confirm order → Add to order collection.
- To continue placing orders:
- Click Place new order from the confirmation popup.
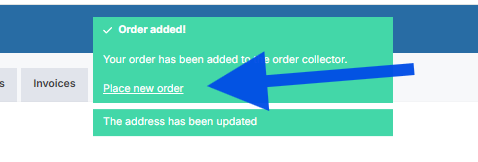
- To add more manual orders for the same job later, return to the Order Entry tab and select your order type again. New entries go to the existing open collection.
- Click Place new order from the confirmation popup.
- Return to the Order Entry page. Incomplete orders show a warning icon. Click Actions → Edit to fix.
- Click Review and create orders → Place order(s) now (for direct shipping) or Add to batch (for batch shipping). Orders may be sent to Manual revision if this option is activated in the job settings.
Order Entry key limitations
Please keep the following system constraints in mind when building manual orders:
Personal order mode limitations
- Only individual physical products are allowed; packages and digital downloads are not available.
- Green screen backgrounds are not supported
Direct or batch shipping limitations
- Package pose limits: Packages are limited to a single pose.
- If you want different poses within your packages, you will need to add products one by one.
- Package crop lines: Crop lines are not displayed for packages during Order Entry. The system automatically applies a default crop to match the product's aspect ratio. If you need to adjust the cropping, enable the Manual Revision option in your job settings. This allows you to adjust the crop after you release it from the Order Entry and before it is transferred to the lab.
- Missing products or backgrounds: If items or backgrounds are missing, or unexpected ones appear, navigate to your Advanced Settings under the category Different price list for Prepay shop and Order Entry to see if an alternate price list override is active.
- Digital downloads: Only individual digital downloads are supported. Bulk options like "Download All" are unavailable.
- Personalized products: There is no text field available to manually enter custom information. To submit personalized customer text, you must visit your online shop as a buyer and use a custom voucher code to input the text during standard checkout.
US customers only
GotPhoto acts as a marketplace facilitator, applying sales tax on direct and batch shipping orders.
In the order entry, you can either let GotPhoto generate invoices (we collect and remit tax) or create your own invoices (you collect tax).
Customer invoice generation
Sales tax settings:
- Batch shipping addresses are used as the default for sales tax calculation.
- If a batch order includes a download, the higher tax rate (billing or shipping) is applied.
Tax and shipping are dynamically calculated at checkout.

When releasing an order collection, choose one of the following:
- GotPhoto generates invoices: GotPhoto collects/remits tax and includes it in your invoice.
- You generate the invoices: You handle tax collection independently.


Note on invoice generation: When invoices are automatically generated, your customer will receive a copy via email. This functions strictly as an order confirmation or proof of purchase; your customer is not being charged or billed again by GotPhoto.
Important: GotPhoto always collects tax and generates invoices for Prepay orders manually added to a prepay collector.
FAQs
How can I delete an order collection in the Order Entry?
To delete an order collection in the Order Entry tab, click Actions in the corresponding row and select Delete. Then confirm the prompt to permanently remove the order collection from the page. This action does not cancel or fully delete the order(s). You will still be able to find them by searching for the order number, but you will no longer be able to review or restore the order content. 
Why do I not see products matching my pricelist?
If the Order Entry is displaying different products than what is configured in your photo job's primary price list, troubleshoot with these checks:
- Alternate price list override in Advanced Settings: In your photo job, navigate to Job Settings → Advanced Settings. Look under the category Different price list for Prepay shop and Order entry to see if an alternate price list is selected. If set, Order Entry defaults to that alternate list instead of the main job price list. To resolve this, swap it to the correct price list.
- Shop-only products: Certain automated products and configurations exist exclusively within the Online shop and cannot be generated via Order Entry. These include the "Download All" option and the "Individual Download with all Backgrounds" option.
- Product restrictions vs. available photos: If a product profile is restricted to a specific photo type (such as group photos or composites) but no matching photo types have been tagged in your album or a specific customer's gallery, the item will remain hidden. Verify that your album has the correct photo types uploaded and tagged accurately.
- Personal Order mode limitations: If you are using Personal Order mode, the system filters out packages, digital downloads, and green screen backgrounds, rendering only individual physical products available.
The takeaway
Efficiently handle offline and pre-orders with GotPhoto’s Order Entry. The step-by-step process ensures ease of use, with features tailored to your plan and shipping preferences. Ensure your Stripe Express account is approved, and you'll be ready to manage orders seamlessly.