
Overview
Looking to create an event gallery that everyone can access with the same code? This article explains how to set up a One Access Code job.
Note: Public photo jobs are no longer available, as they are not supported in the New Shop. One Access Code galleries are the recommended alternative, providing easy access for attendees while requiring a shared access code to protect your gallery from unauthorized access, including automated bots and AI crawlers.
Set up a One Access Code job
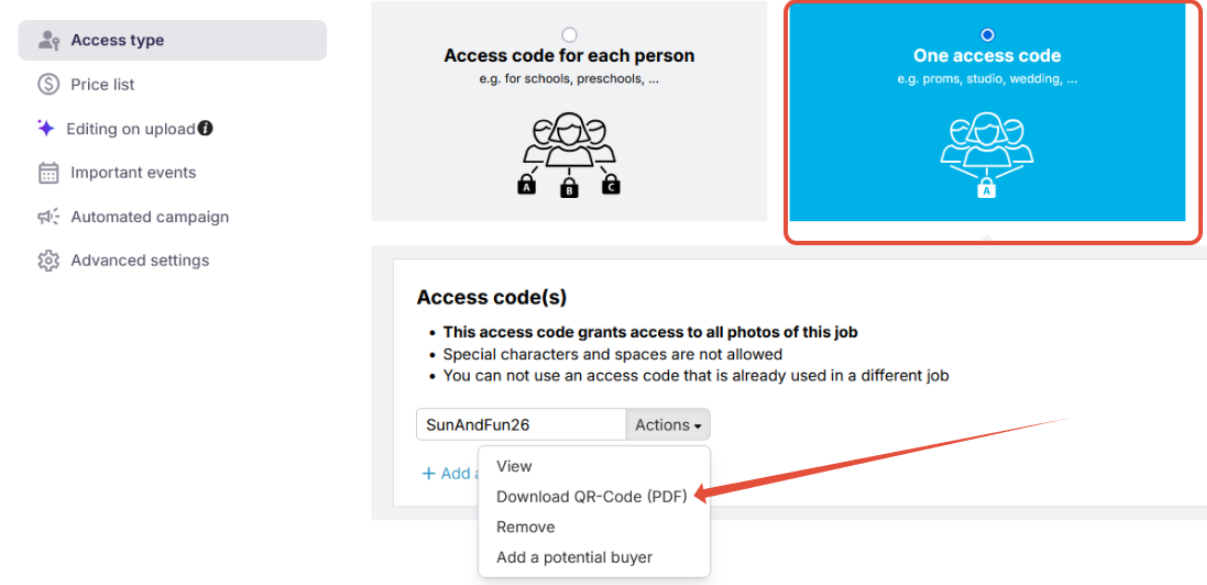
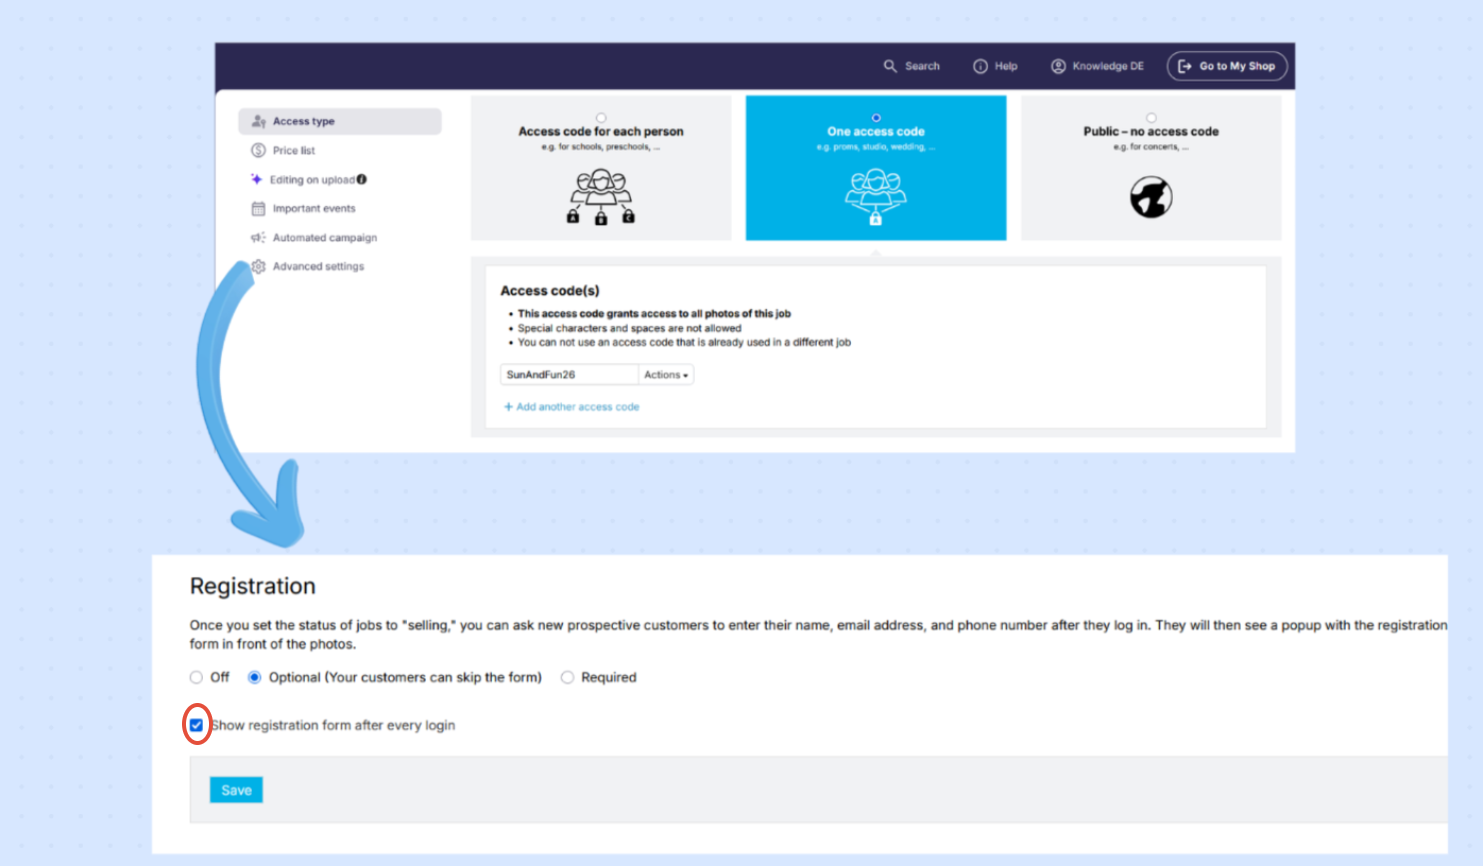
The screenshot below shows the One Access Code settings.
- Create a new job.
- Select the type One Access Code.
- In the Access code(s) section, enter the access code you want attendees to use. This code gives access to all photos in the job. Make sure the access code does not contain spaces or special characters and is not already being used for another job.
How do I share my gallery?
Share your shop URL together with the shared access code before or during the event.
Attendees can also scan the QR code during the event to register for gallery notifications before the photos are published.
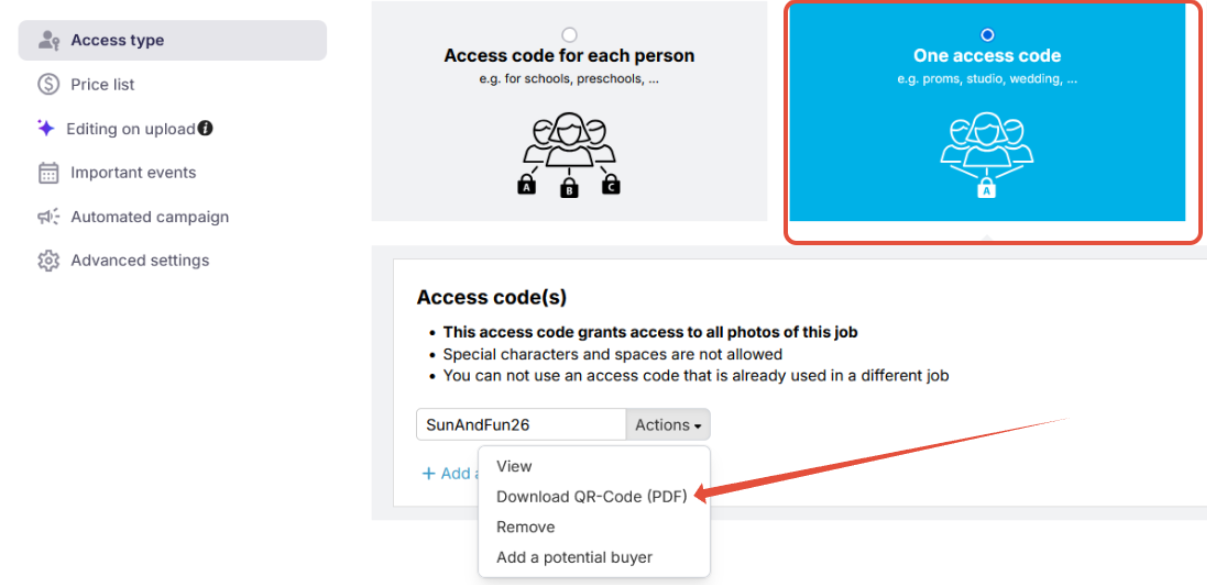
Pro Tip:
Download the QR code as a PDF and print it on flyers, posters, or event signage. Attendees can then:
- Sign up to be notified as soon as the gallery is live.
- Access the gallery later by scanning the QR code with their phone.
Sample poster or flyer: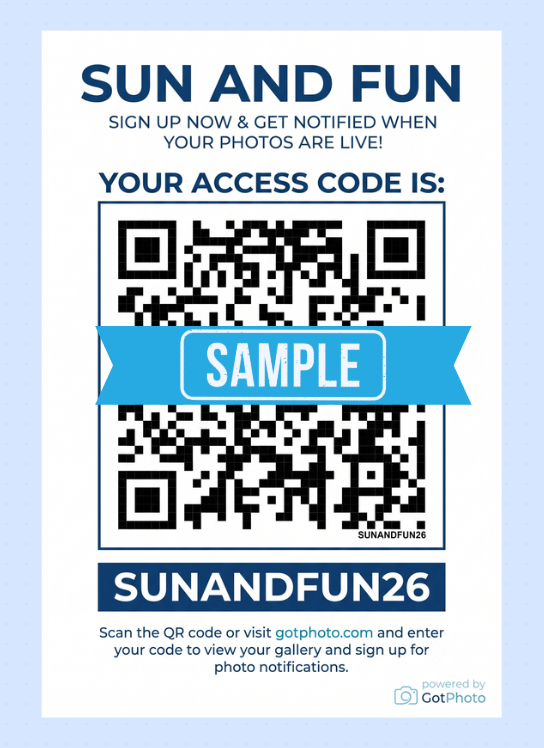
What do customers see before the gallery goes live?
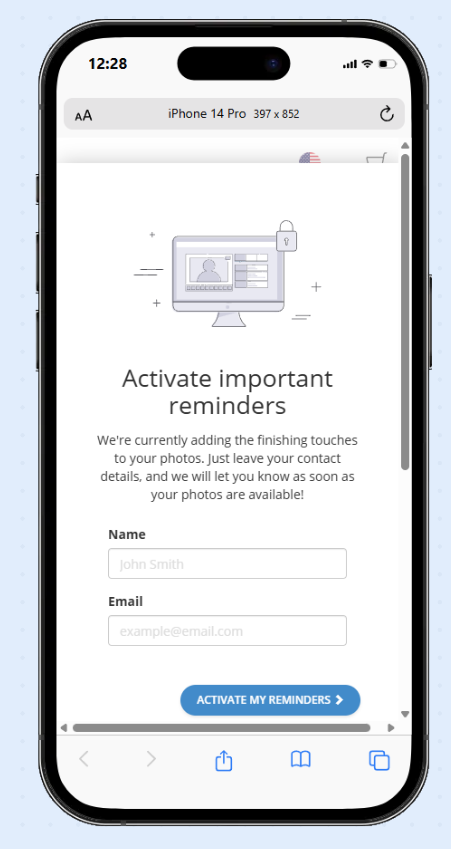
Before you have uploaded the photos and set the job to Selling, customers who scan the QR code will see the registration form instead of the gallery. They can enter their name and email address to sign up for notifications. Once the gallery is published, they will automatically receive an email letting them know their photos are available to view and purchase.
How can I collect contact information once the job goes live?
Once you have created the job, enable customer Registration, either optional or required, in your Advanced Job Settings and configure it to appear after every login.
Important: If the registration form is only shown once, it will only be displayed to the first visitor who accesses the gallery. Setting it to appear after every login ensures every attendee can sign up for gallery notifications.
The collected data is automatically linked to each visitor and can be used for automated campaigns and abandoned-cart reminders.
Can customers browse albums in a One Access Code job?
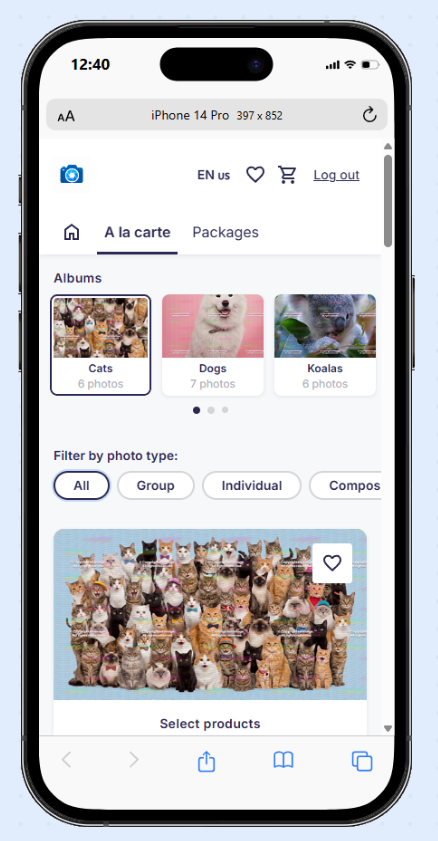
Yes. In the À la carte section (Individual photos section in the UK), customers can browse all available albums in a horizontal carousel at the top of the page. Selecting an album displays the photos it contains.
Customers can also use the photo type filters to narrow the gallery to All, Individual, Group, or Composite photos (if applicable).
These options make it easier for customers to find the photos they are looking for.
How do customers select package photos from a large gallery?
If feasible, split the event into one to three separate jobs. This is recommended for multi-day events or events with different segments.
We're planning to add package wishlist functionality, so customers can fill their packages directly from their saved wishlist items. This will enhance the customer experience by allowing them to browse images by album and add favorites to their wishlist as they go. This is on our roadmap for a future update, though we don't have a timeline to share yet.
Is there any limitation on how many albums can be displayed in the new shop?
No. The new shop has no limit on albums or preview photos, unlike the old shop. All albums appear in a horizontal carousel at the top of the page. However, to keep photo management features in your account running smoothly, we recommend adding no more than 100 albums.
Summary
For larger events, the One Access Code workflow gives everyone access to the same event gallery using a shared code. Simply share your shop URL along with the access code or provide a scannable QR code for quick and easy access.