Table of contents
- Overview
- Step‑by‑step guide to generate QR cards
- Download and open the QR cards
- Using the QR cards to shoot
- The takeaway
- FAQs
Overview
If you're here, we know things haven’t gone as planned, and that’s frustrating. The Entagged method is designed to make things easier, so when technical difficulties get in the way, we’re here to help with a backup solution - quickly transitioning your tagging method to QR codes. This temporary fix will get you through the day, so you can keep shooting and make the most of your photo job. We will of course continue to help you get your Entagged device working for your next Photo Job. As GotPhoto user, you have access to our latest feature, the Name List QR Photo Job Workflow. It enables you to access the job names list within your Entagged app and capture each subject's QR code directly from the app. We suggest utilizing this workflow as it is the most efficient option available.
The following guide discusses an alternative workflow in case you encounter a problem with the Entagged app itself.
Step‑by‑step guide to generate QR cards
Note: This workflow assumes you already are using a list of names.
- Make sure you're in an area with Internet access. This process can even be done on your phone!
- In your camera settings, delete the last barcode that was saved in your camera.
- Log into your GotPhoto account and open your Photo Job.
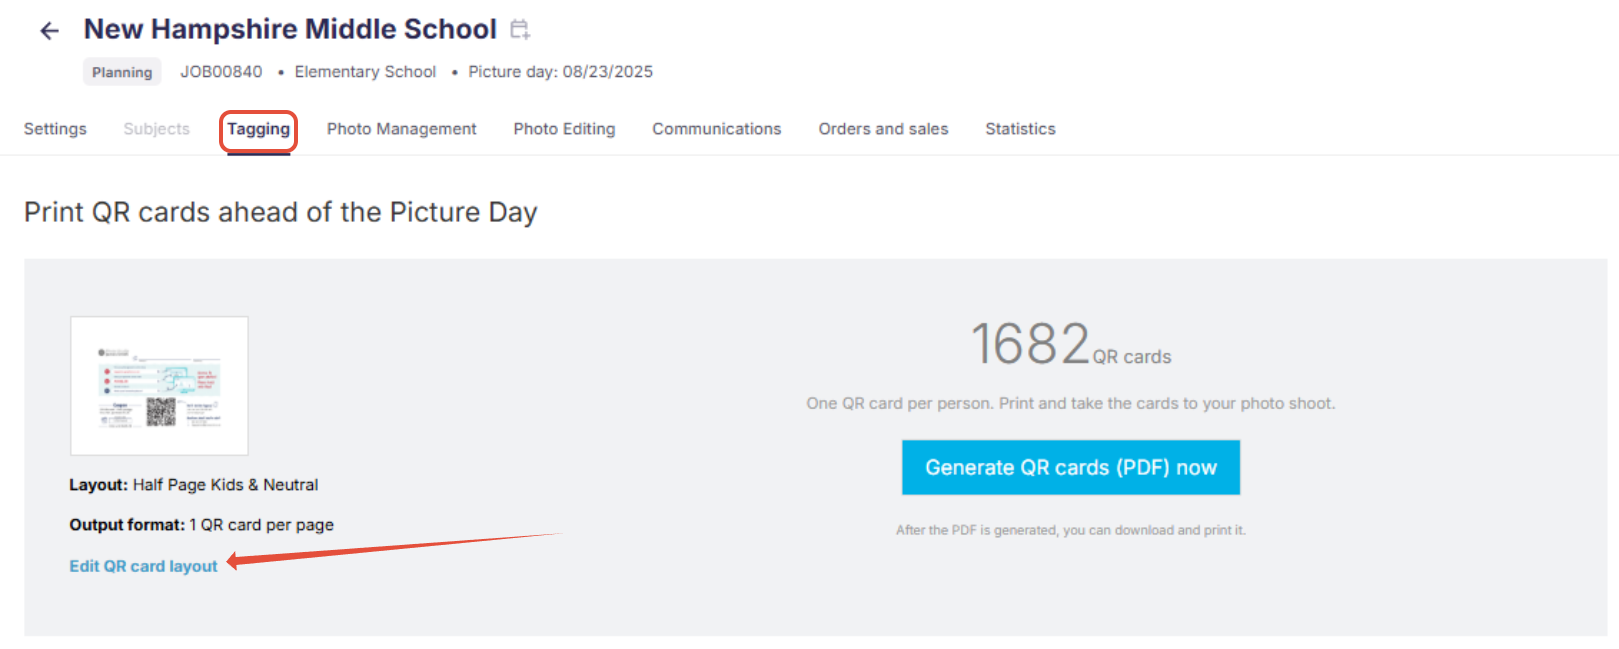
- Click into the Tagging tab, then click on Edit QR card layout.

- On the following page, select Minimal Layout under the design settings, and under Advanced Settings choose Output Format: 1 QR card per page. These settings will be easier to work with from your smartphone/tablet. Click Save.

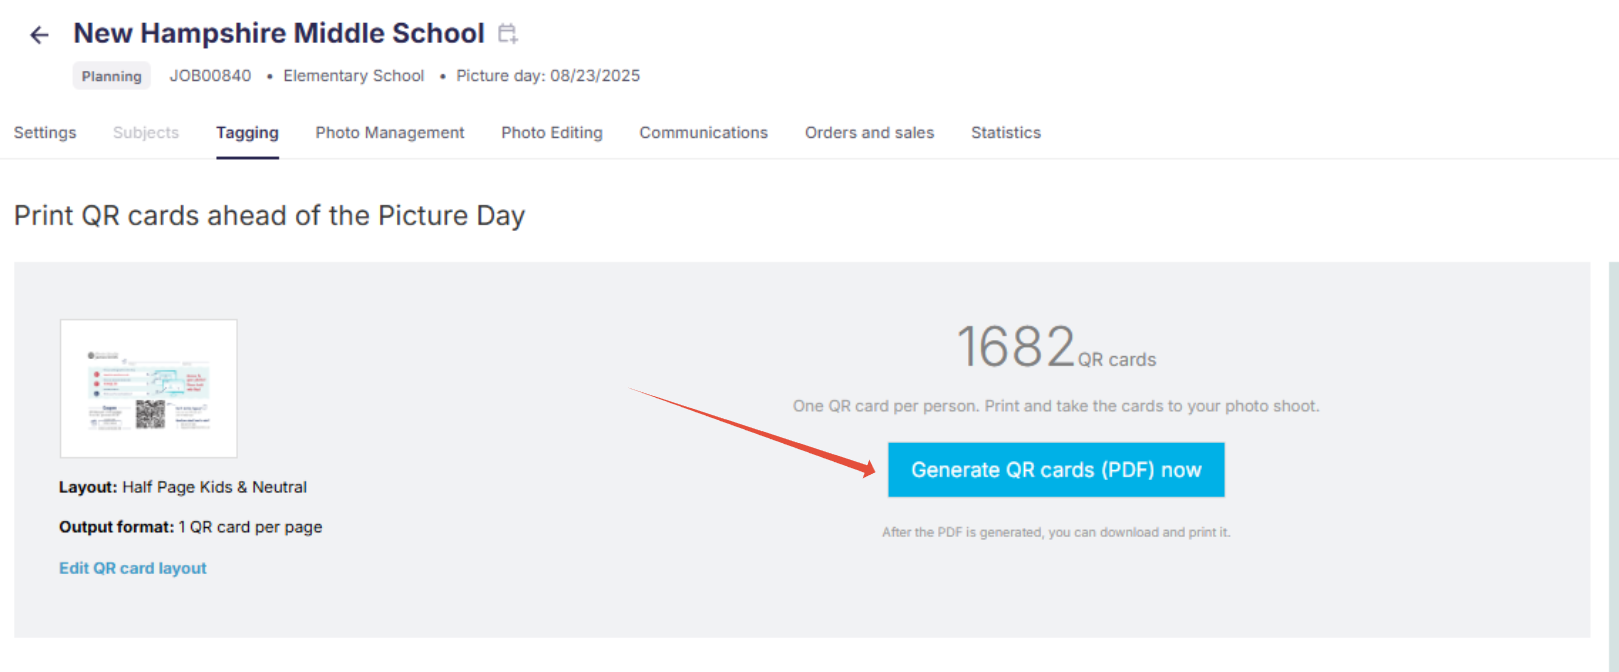
- Click the blue Generate QR Cards (PDF) Now button. If you previously created any QR cards for this Photo Job, please delete them before generating the new cards.

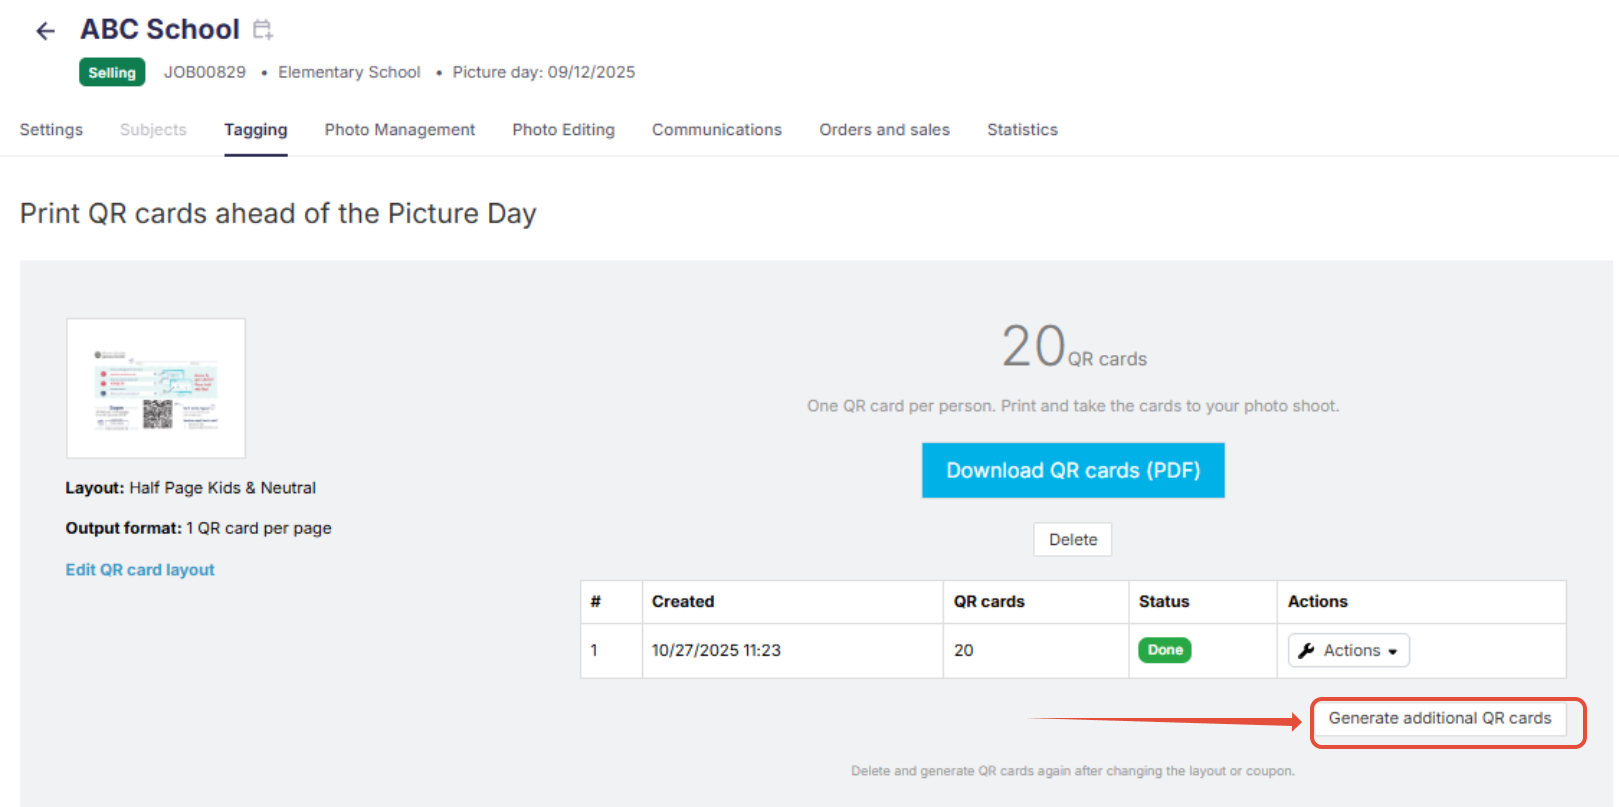
- [Optional] At this point you can also create blank QR cards to be used as spares for unregistered subjects by clicking the Generate Additional QR Cards button.

Download and open the QR cards
- Once the cards have been generated, click the blue Download QR Cards (PDF) button.
- Open the downloaded PDF:
Apple Users: Android Users: - Open the Files app (blue folder icon).
- Tap Browse at the bottom, then select Downloads.
- Tap the PDF file to open it.
Optional: Tap the share icon to save it, share it, or open it with other apps.
- Open the Files app (may be named My Files or File Manager).
- Tap Downloads or search “PDF” if needed.
- Tap the PDF file to open it with a PDF viewer (like Google PDF Viewer or Adobe Acrobat).
Optional: Tap the menu (three dots) to save, share, or move the file.
Using the QR cards to shoot
- You now have a PDF file on your device with QR cards for your subjects. You are ready to go ahead and take pictures:
- Group Photos: These photos will be accessible to all subjects in the group, so no QR cards are needed.
- Individual Photos:
- Take a photo of the subject's QR card (Make sure that full name, group, and QR code are visible). View QR code shooting best practices
- Take all of that subject's individual shots. All photos that come after the QR card (and before the next subject's QR card) will be automatically linked to that code.
- Proceed to the next subject by taking a picture of their QR card.
The takeaway
With these steps, you should be set to capture each shot without missing a beat, even with this workaround. We hope this gets you back on track so you can focus on the moments that matter most.
Very important: Make sure to upload the photos where you used QR cards into a separate album within the job after Picture Day to ensure that all galleries are activated smoothly later on.
FAQs
Q: Do I need internet access during the shoot?
A: Only while generating QR cards. You can shoot offline afterward.
Q: Can I reuse old QR cards?
A: No. Delete and regenerate to avoid confusion.
Q: What if I forget to bring extras?
A: [Optional] Print spare blank QR cards as a backup before Picture Day.
