
Table of contents
Overview
EasyUpload is a desktop tool provided by GotPhoto for uploading photos. It is fast, user-friendly, and specifically designed for jobs with large numbers of photos. The tool is available to all GotPhoto customers and provides an encrypted and secure connection for uploading photos. In this article, we explain how to install and use EasyUpload.
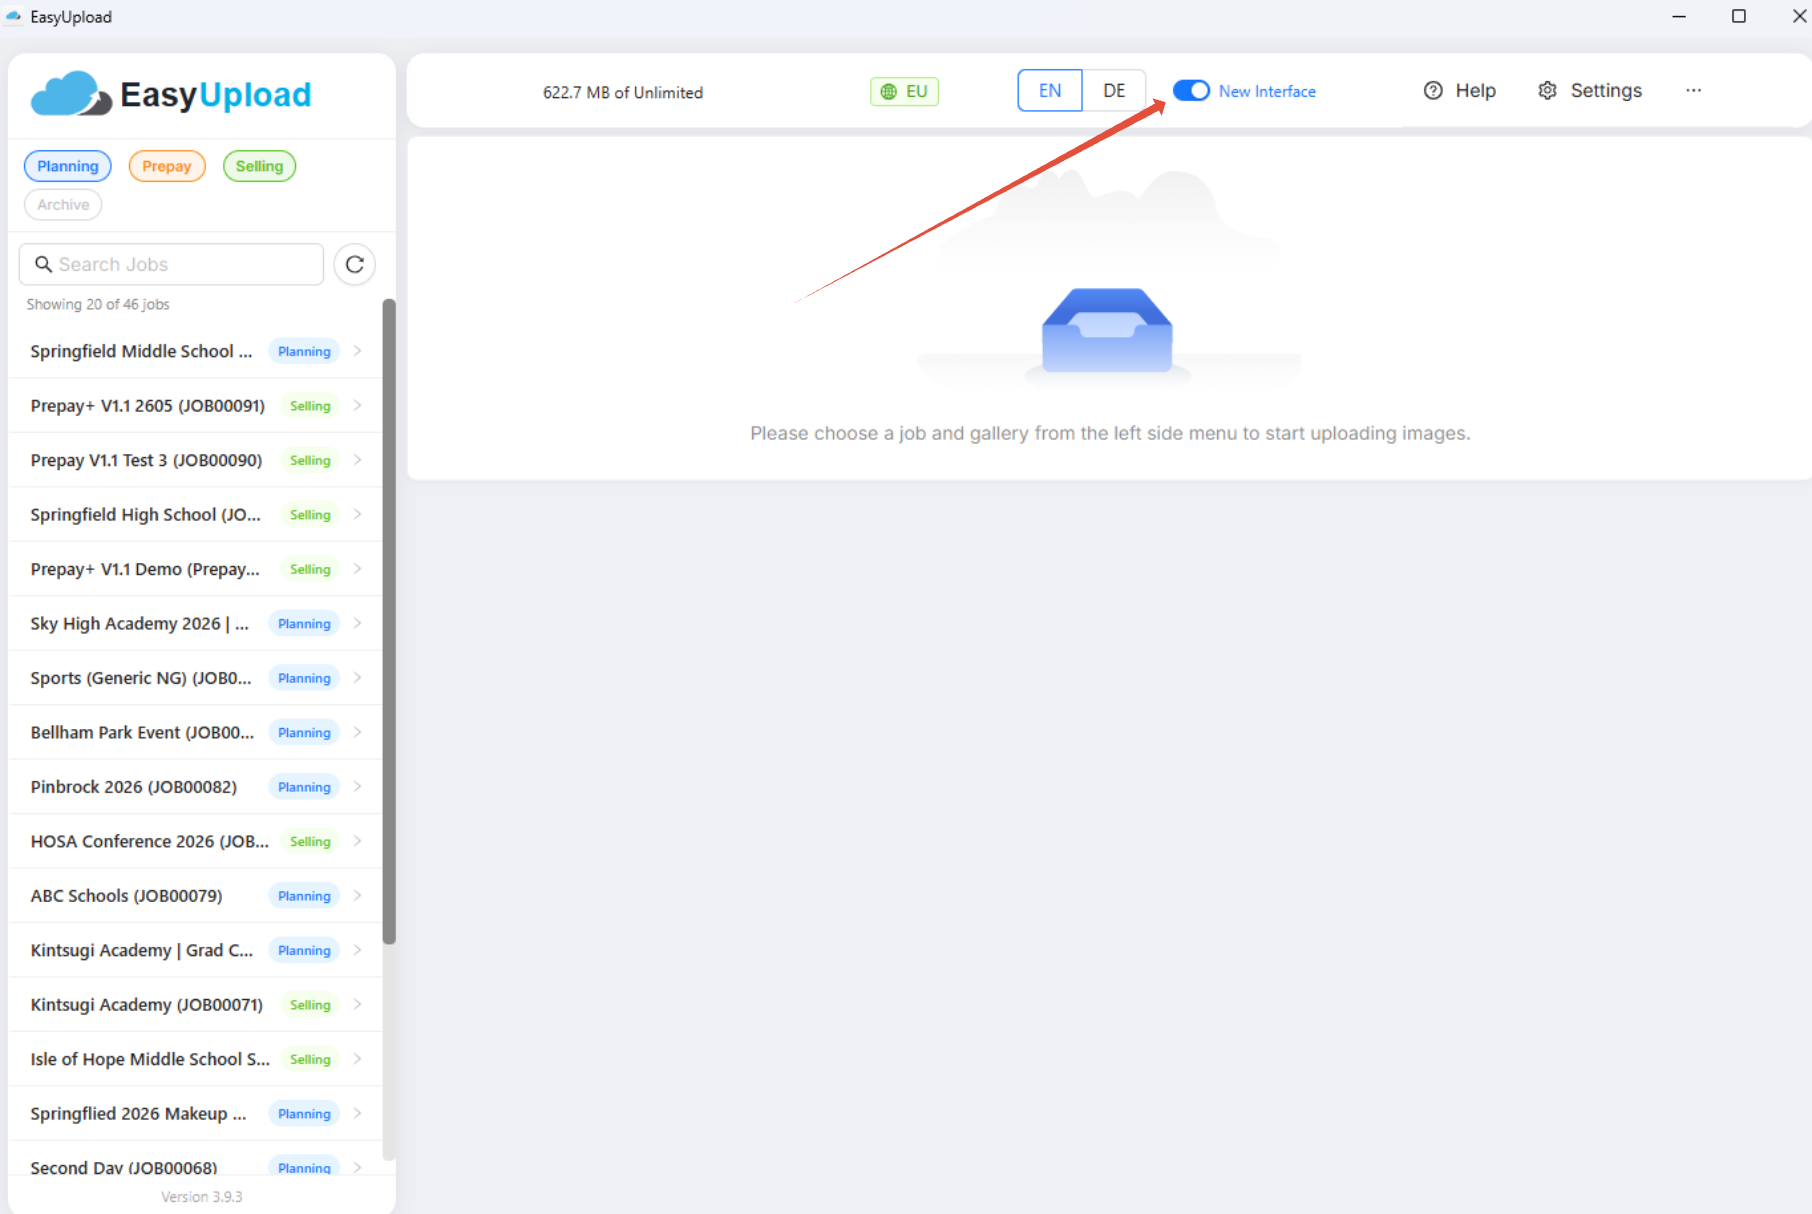
Since version 3.9.3, EasyUpload uses the new user interface by default. You can still switch back to the old interface if needed.
Get started with EasyUpload
Before uploading images to a photo job, the photo job must first be created in your admin area. For detailed instructions on creating a photo job, see Create a photo job.
You can download EasyUpload for Windows or Mac from your admin area. Go to Photo Jobs > Select a Job > Photo Management. There you will find the Photo Upload Methods button.
If you have not used EasyUpload in a while, don't worry about updates. New versions are rolled out automatically. After logging in, a pop-up will notify you when a restart is required, ensuring you always use the latest version.


Mac users: If you see the message shown on the right when first running EasyUpload:
|  |
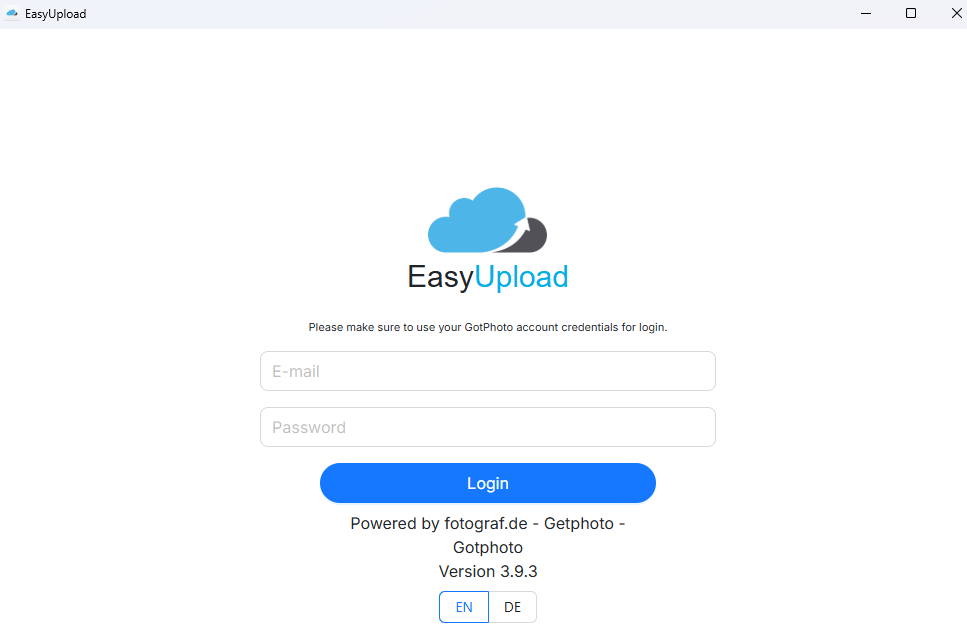
After installation, enter your GotPhoto credentials into EasyUpload.
Note: Accepted file formats are JPG, JPEG, and PNG. We recommend uploading images with a size of approximately 3500 px (long edge) for the best results. More information about photo upload requirements is available HERE.
The new user interface
EasyUpload 3.9.3 introduces a new, more intuitive layout. After updating to the latest version, the new user interface is automatically enabled. During the transition period, you can switch back to the old view using the New User Interface toggle in the header.
Jobs and albums in the new user interface
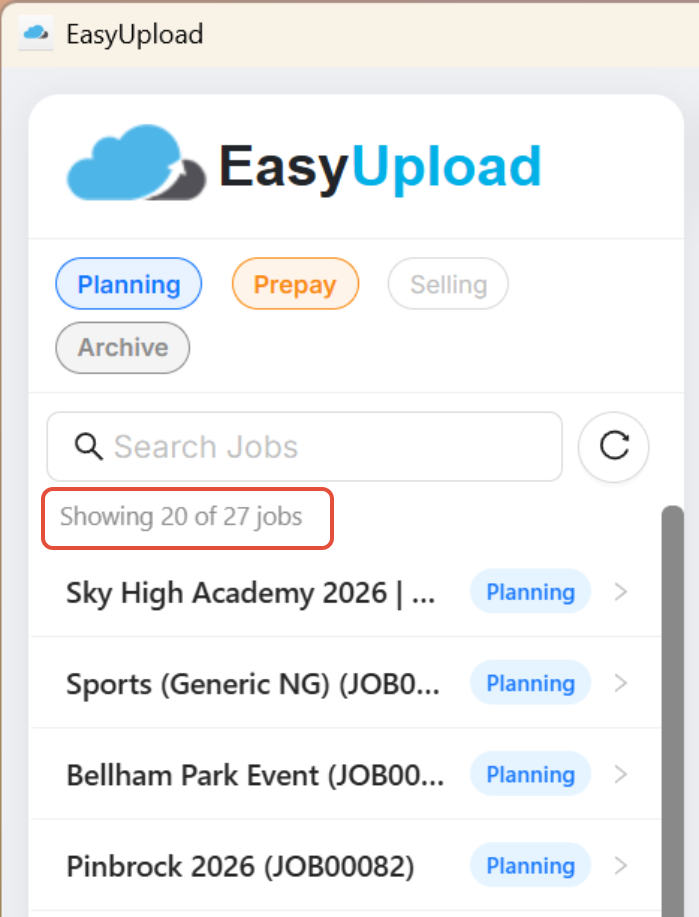
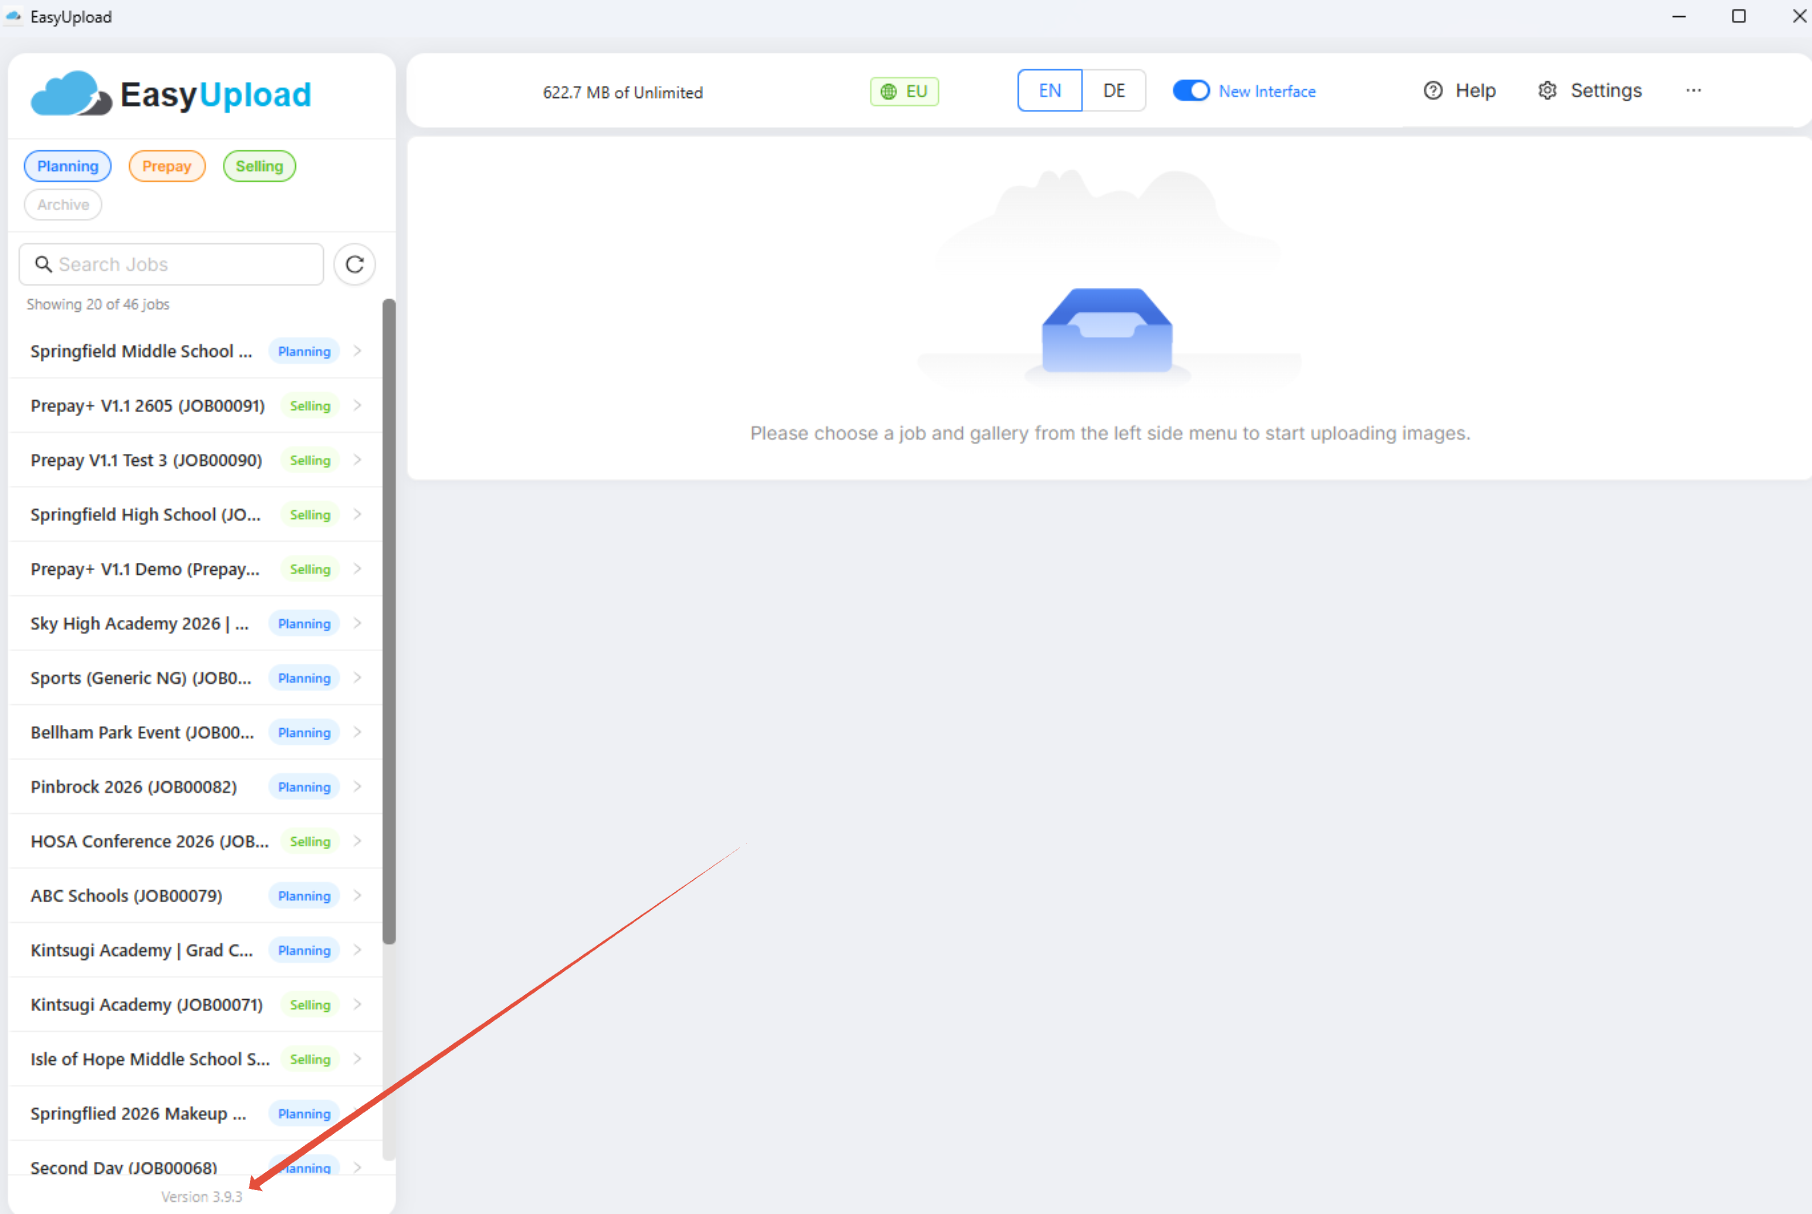
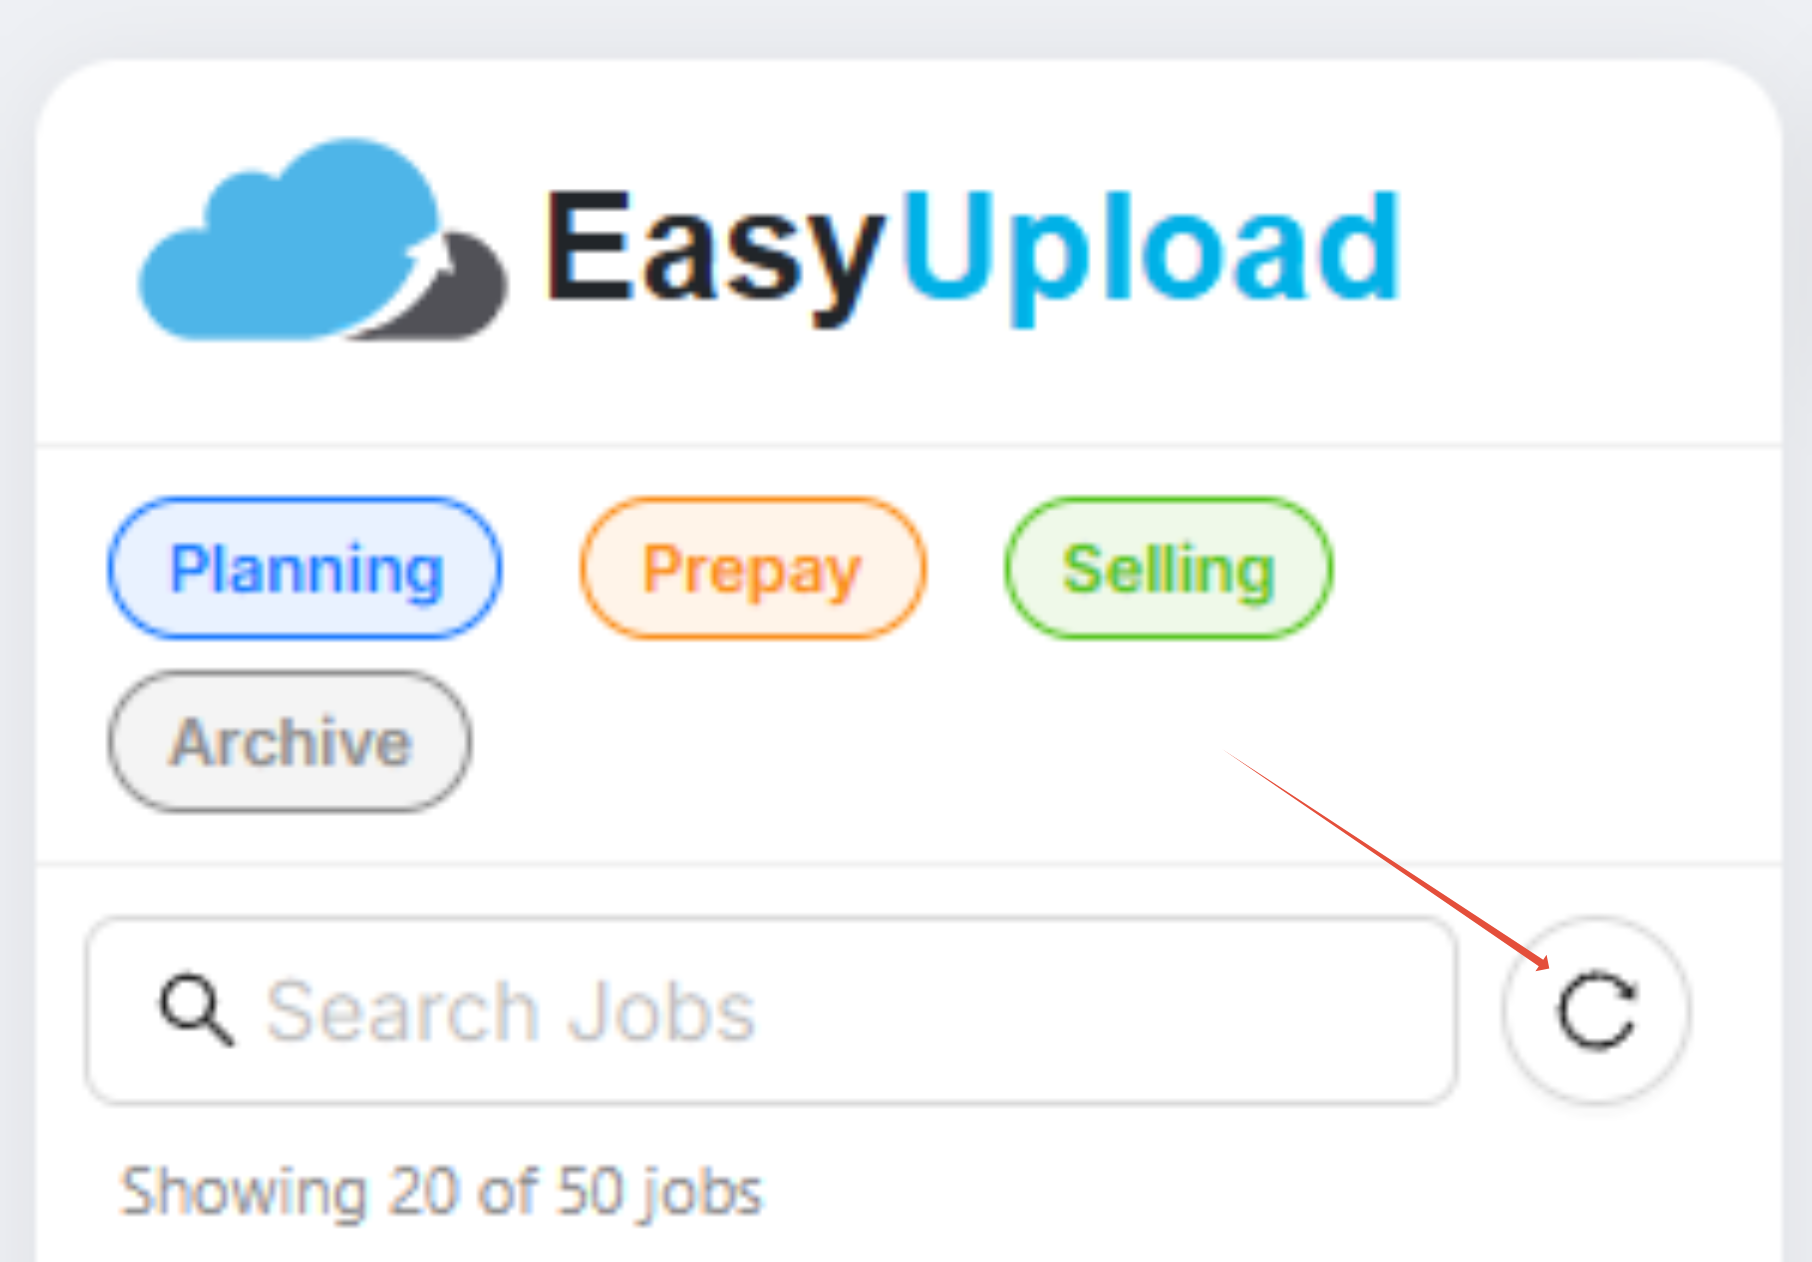
The sidebar displays your jobs as cards with color-coded status indicators: Planning, Prepay (US only), Selling, and Archive.
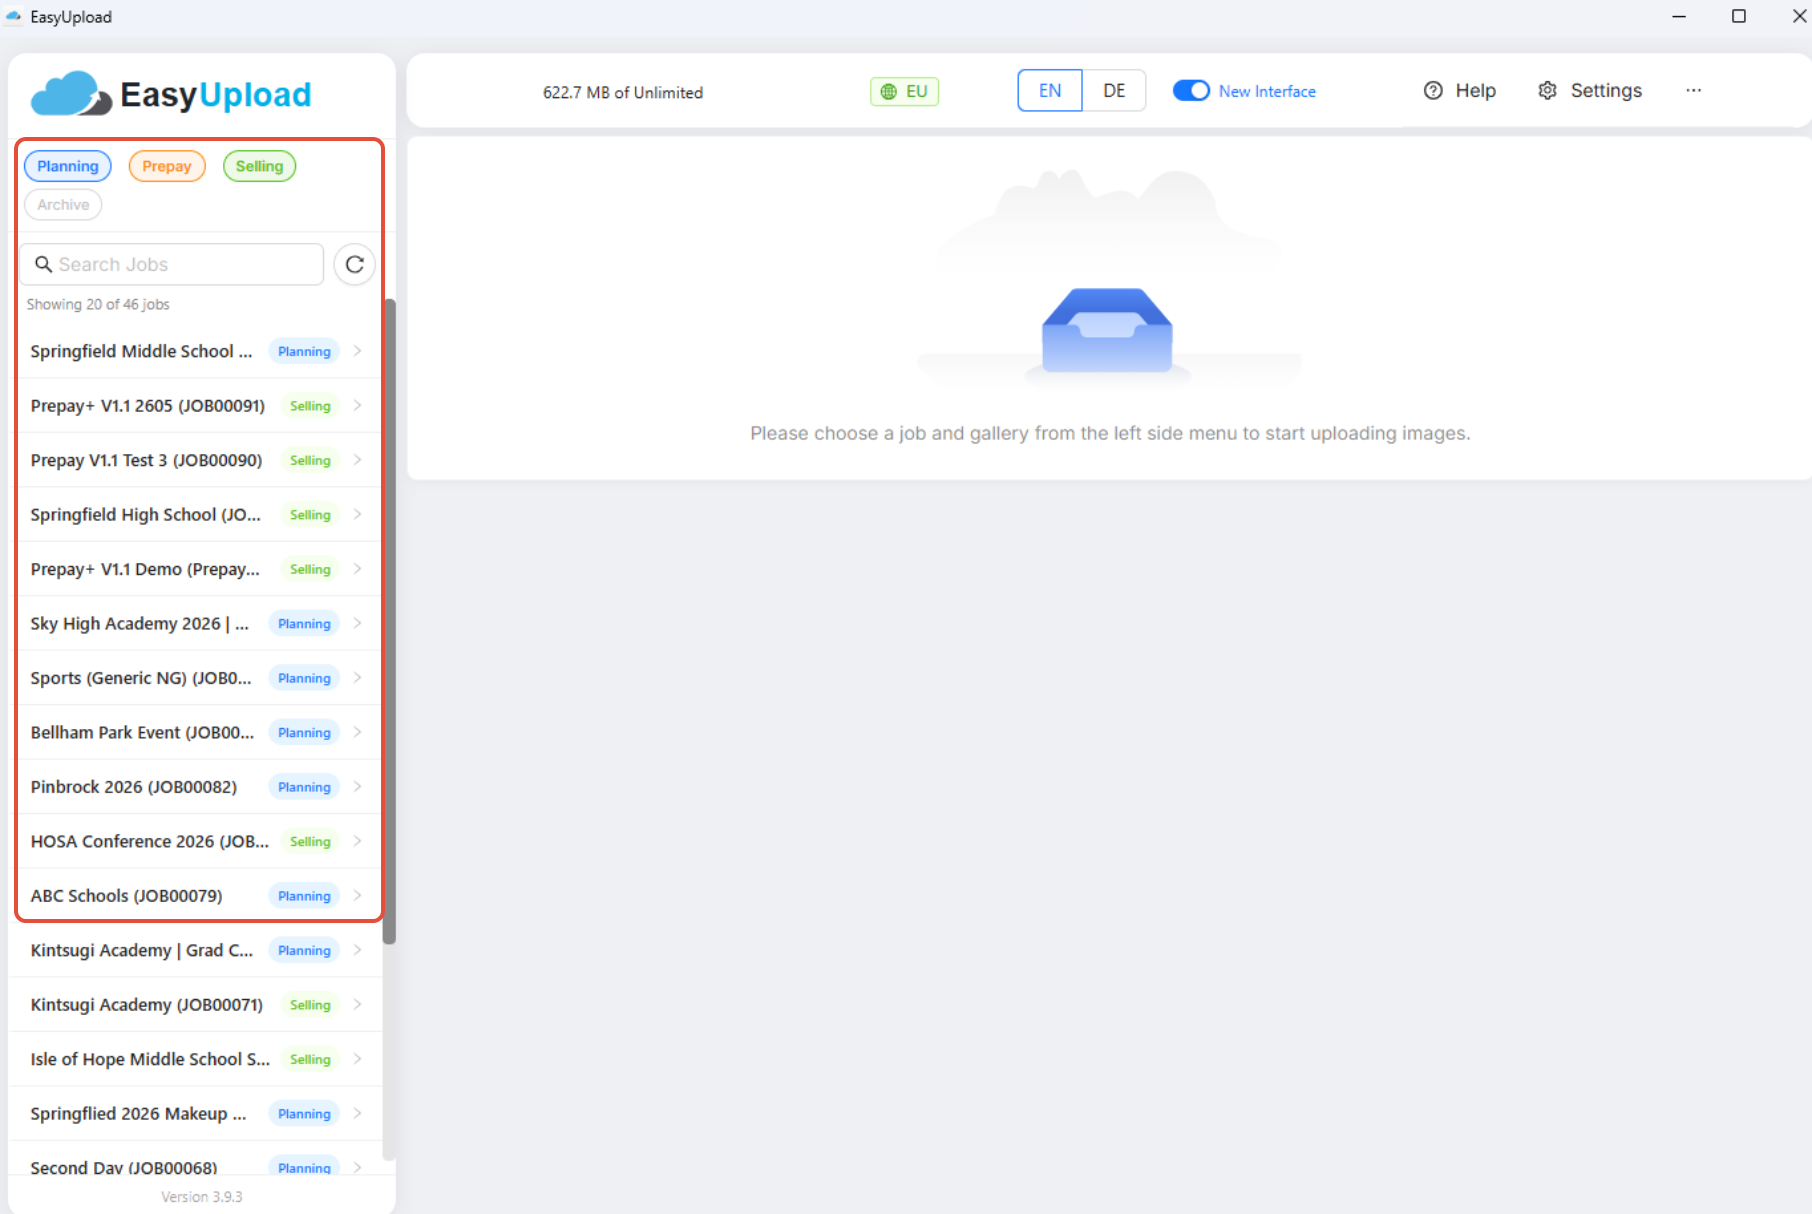
When you click a job, its albums are displayed directly in the same sidebar. Use the back arrow to return to the job list.
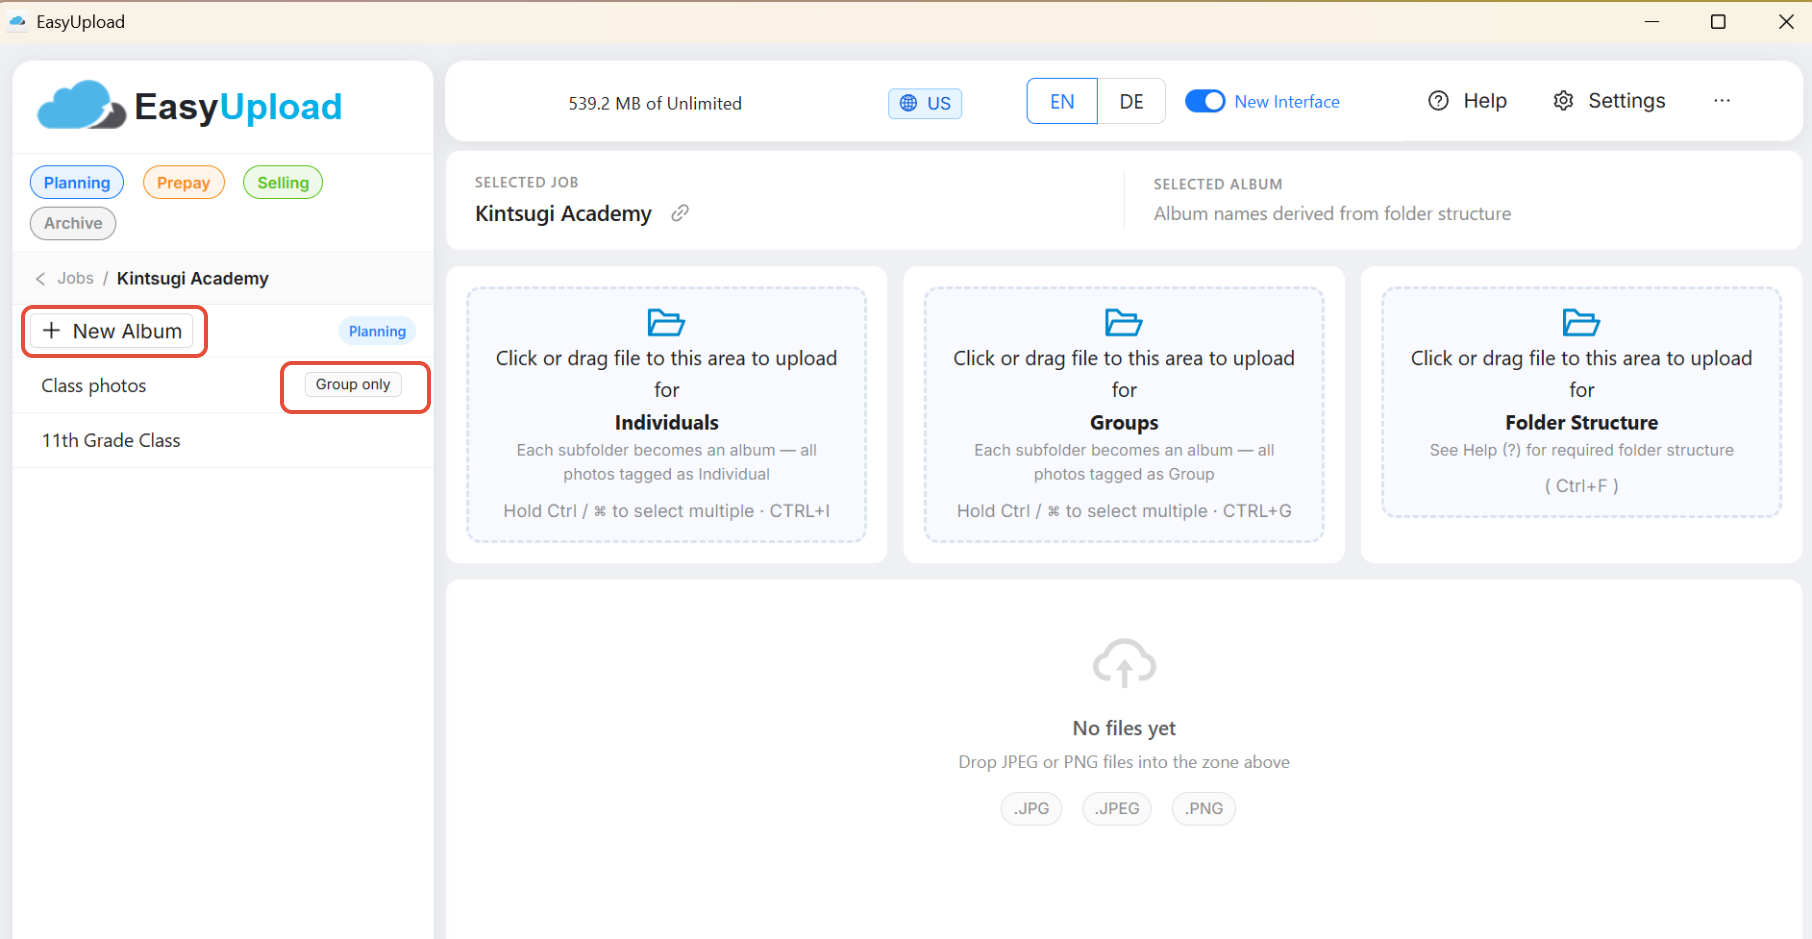
The New Album button is now displayed directly within the album view. Right-clicking is no longer required.
⚠️ Replace with EN article link: https://help.gotphoto.com/de/support/solutions/articles/103000271056
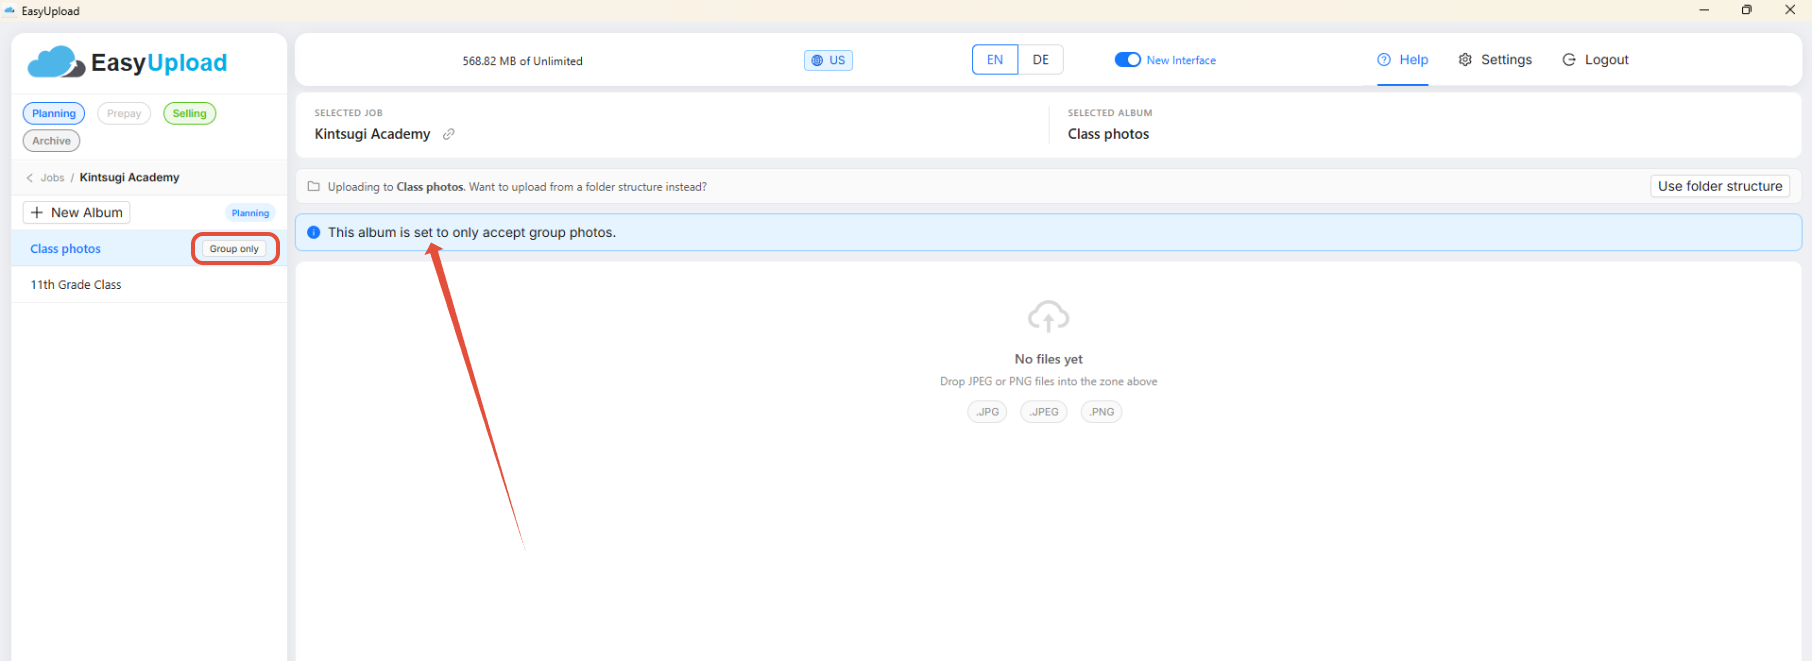
Albums configured for group photos only display a Group Photos Only badge.
Planning, Prepay (North America only), Selling, and Archive filters are now displayed as clickable status tags directly in the sidebar. You no longer need to open Settings to filter jobs.
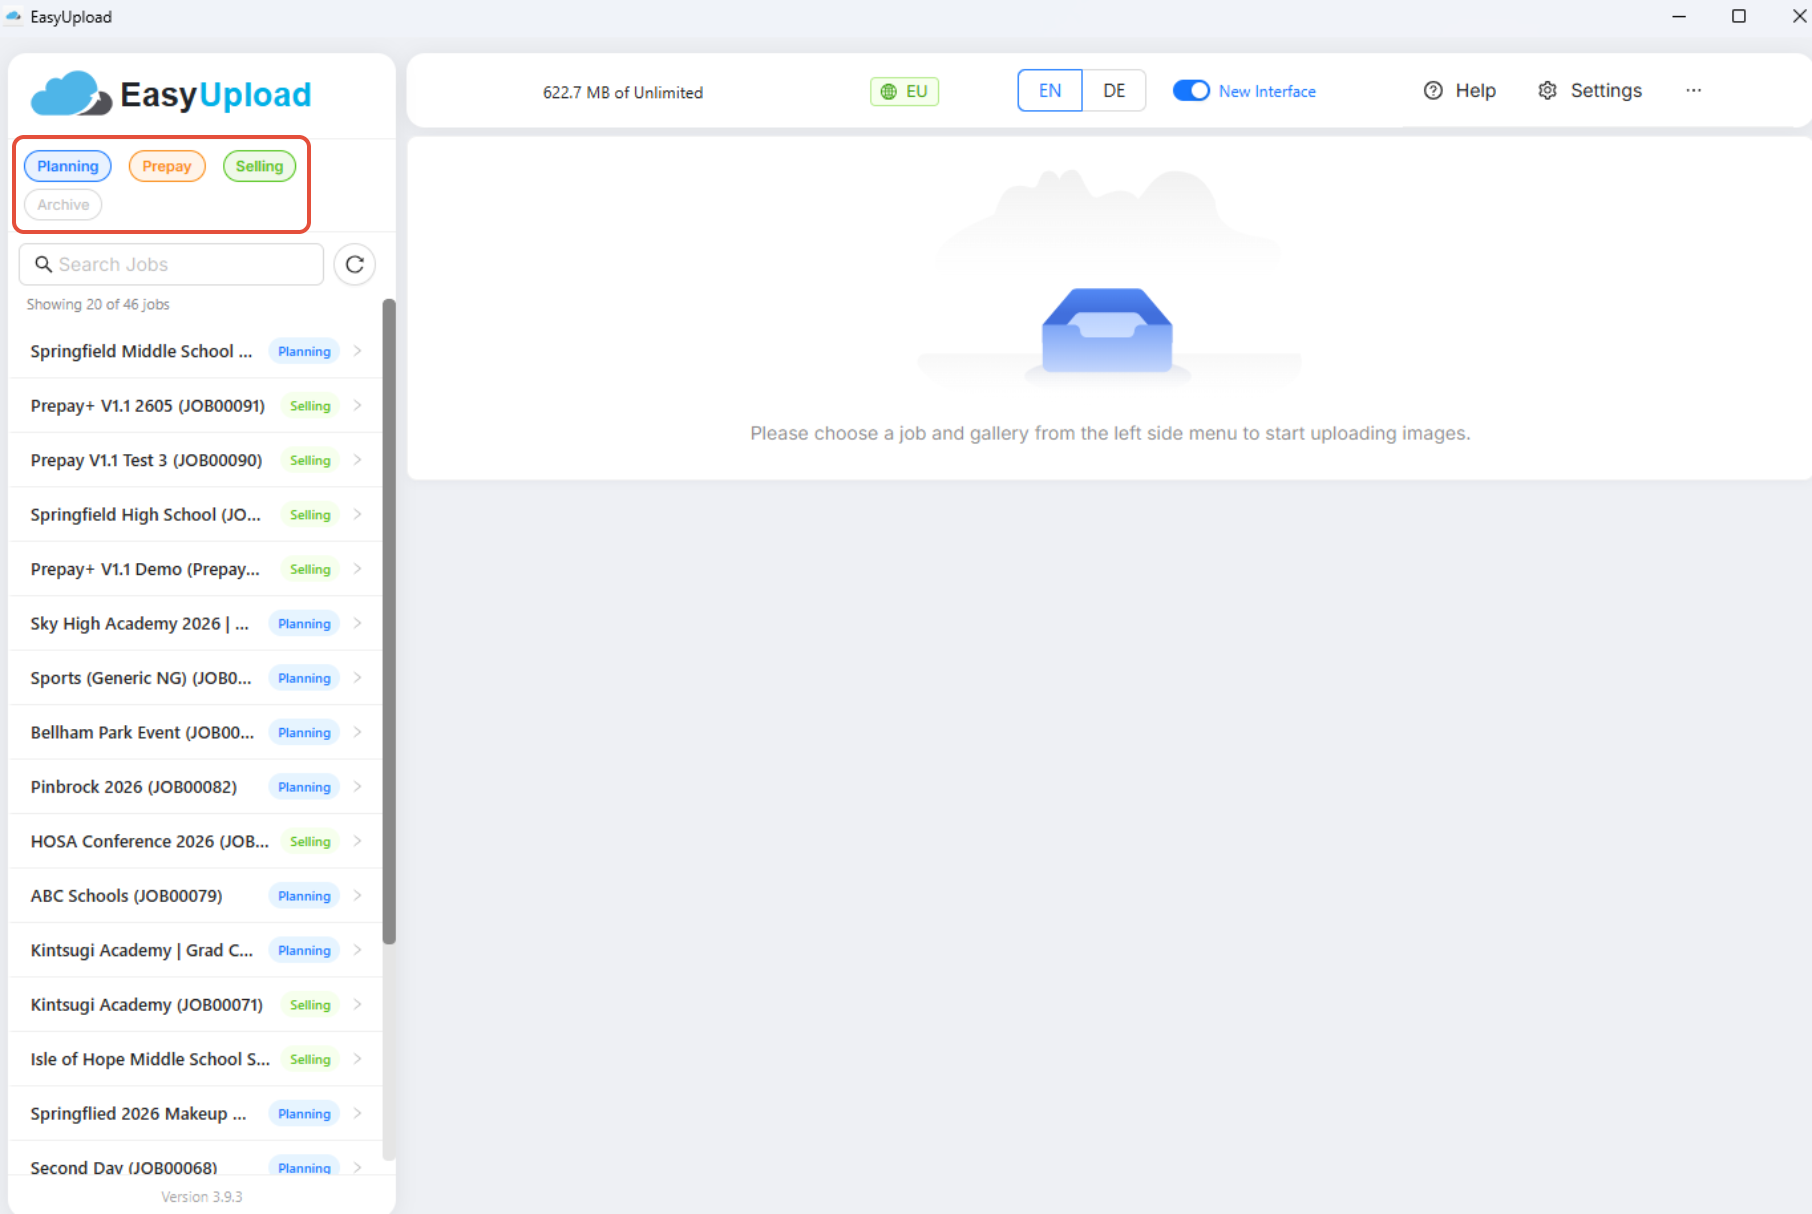
At the top of the sidebar, you'll also see a job counter:
Showing X of Y jobs
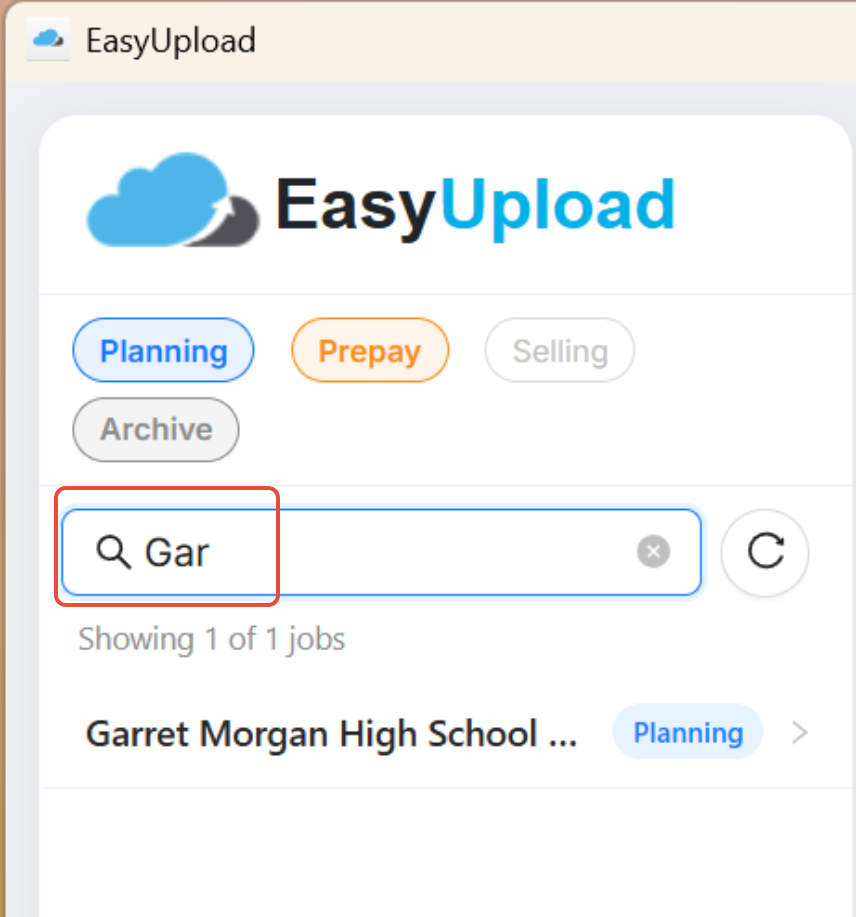
Use the search field to search by job name or internal job name. Enter at least three characters to display matching jobs.
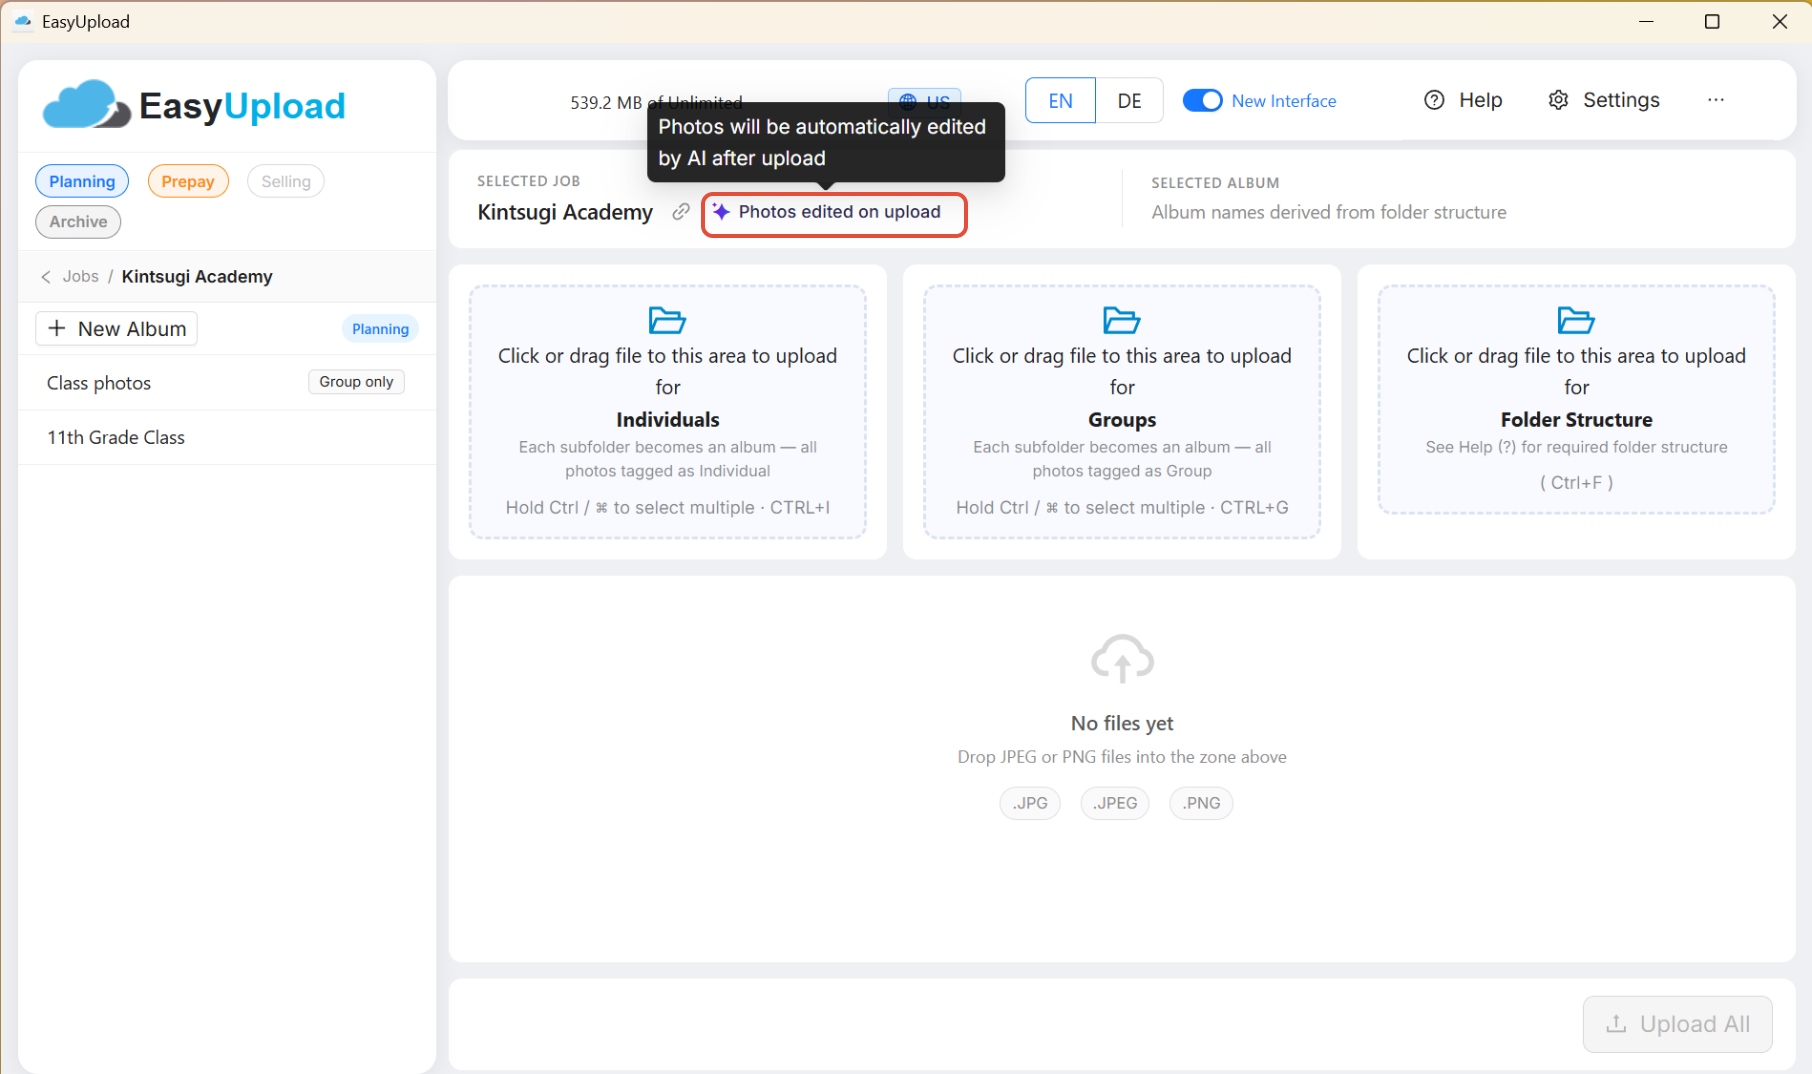
You can also open the selected job directly in the GotPhoto web application.
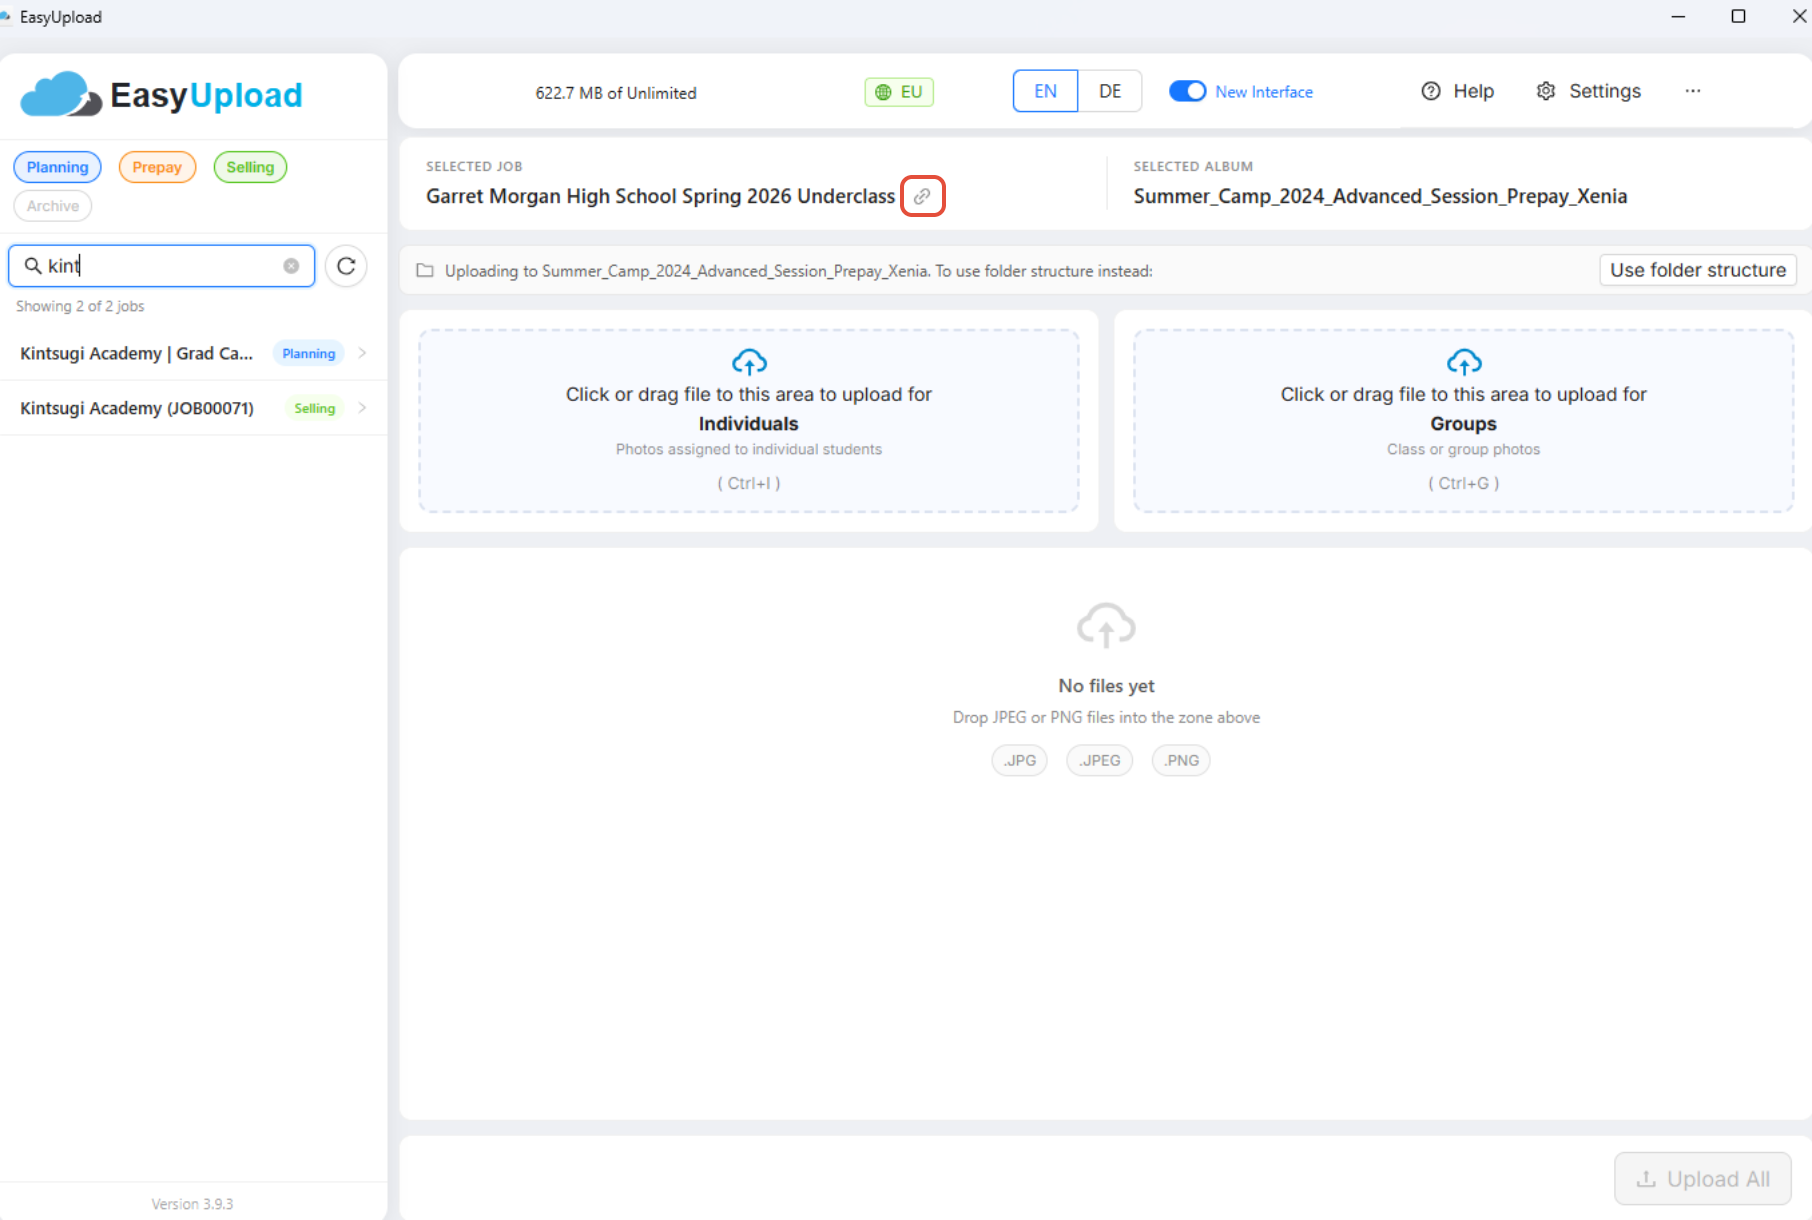
If AI Editing on Upload is enabled for the job, EasyUpload displays a notification.
If you do not want AI editing for that job, disable the setting in the job settings.
The EasyUpload version number is now displayed in the sidebar as well as on the login screen.
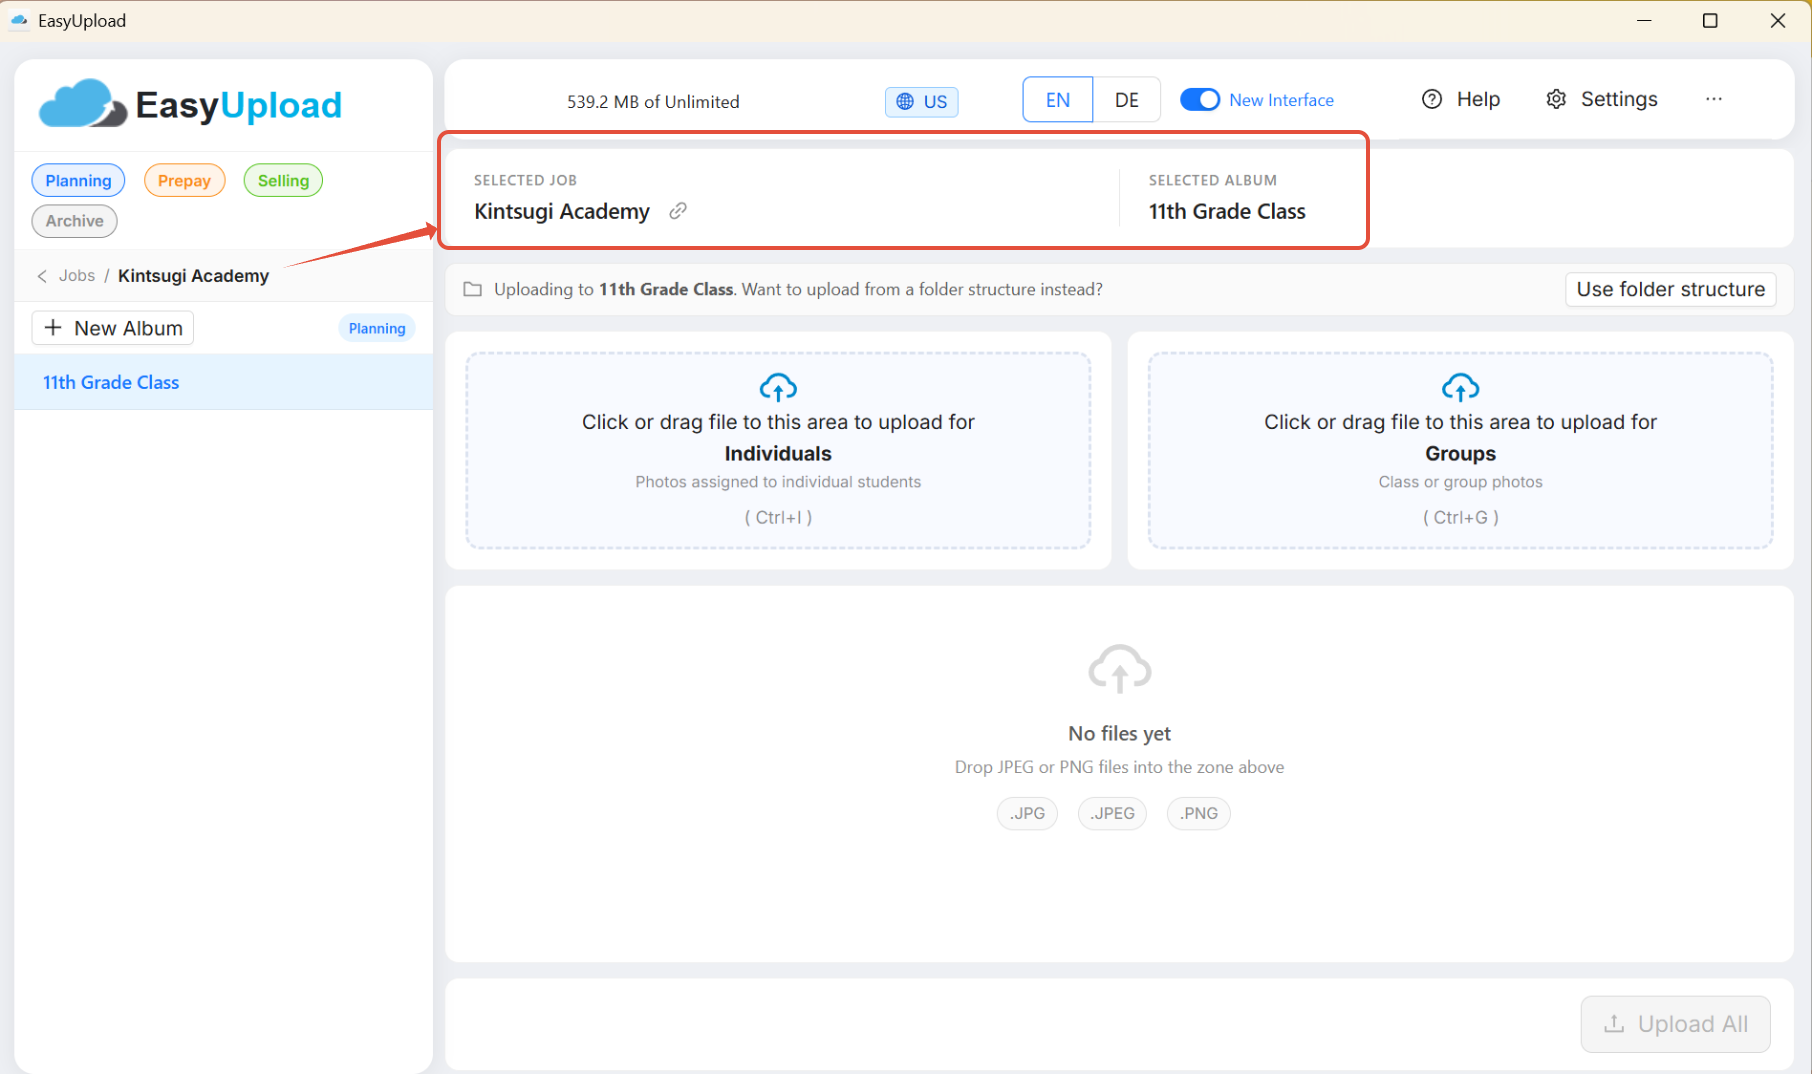
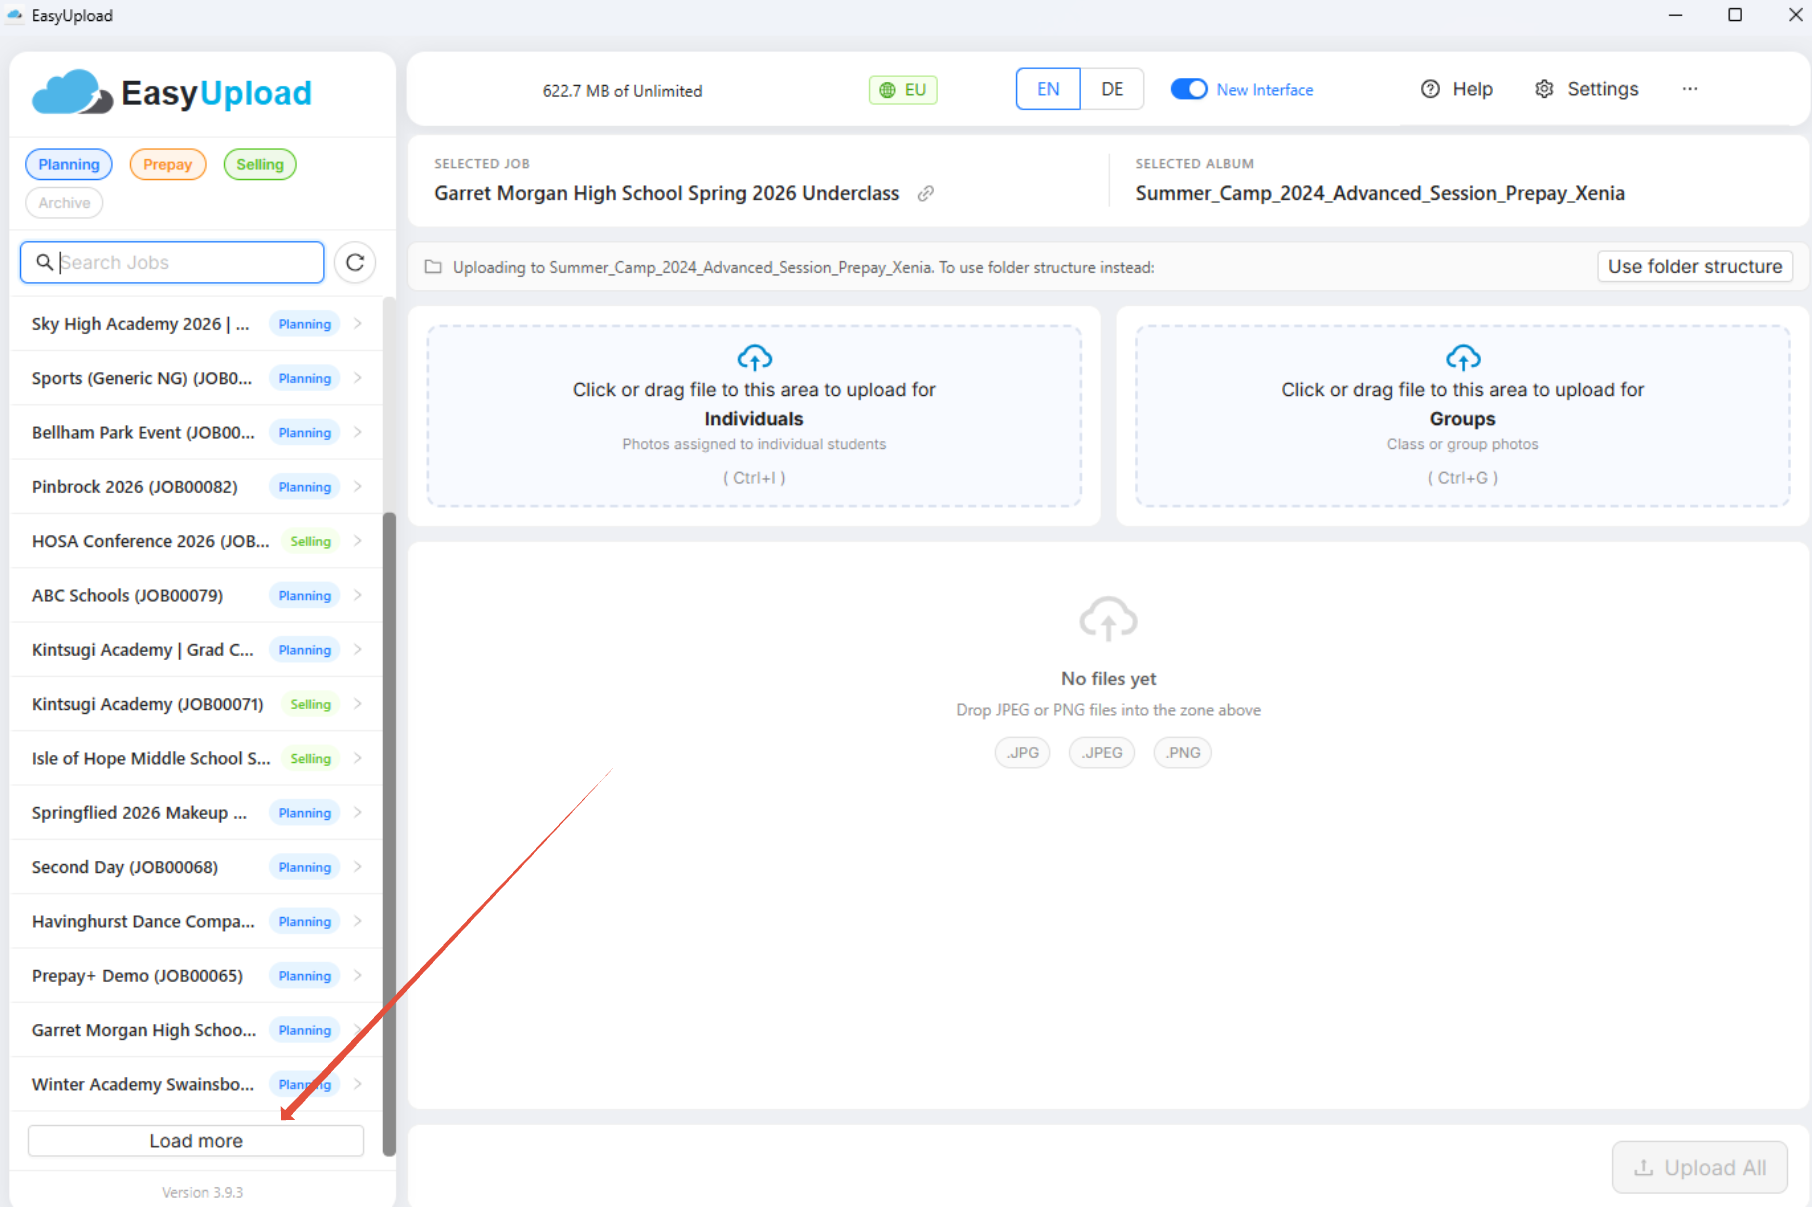
Upload photos in the new user interface
- Select a job or album in the sidebar.
- Drag your photos into the upload area (individual or group photos), or use the folder structure option to select folders from your device.
- Click Upload All.
- After the upload is complete, a confirmation message will be displayed.
Use your operating system's native folder picker to select one or more folders at the same time. EasyUpload remembers the last directory used.
If an album already exists within the photo job, you can upload individual photos by selecting the album in the folder list.
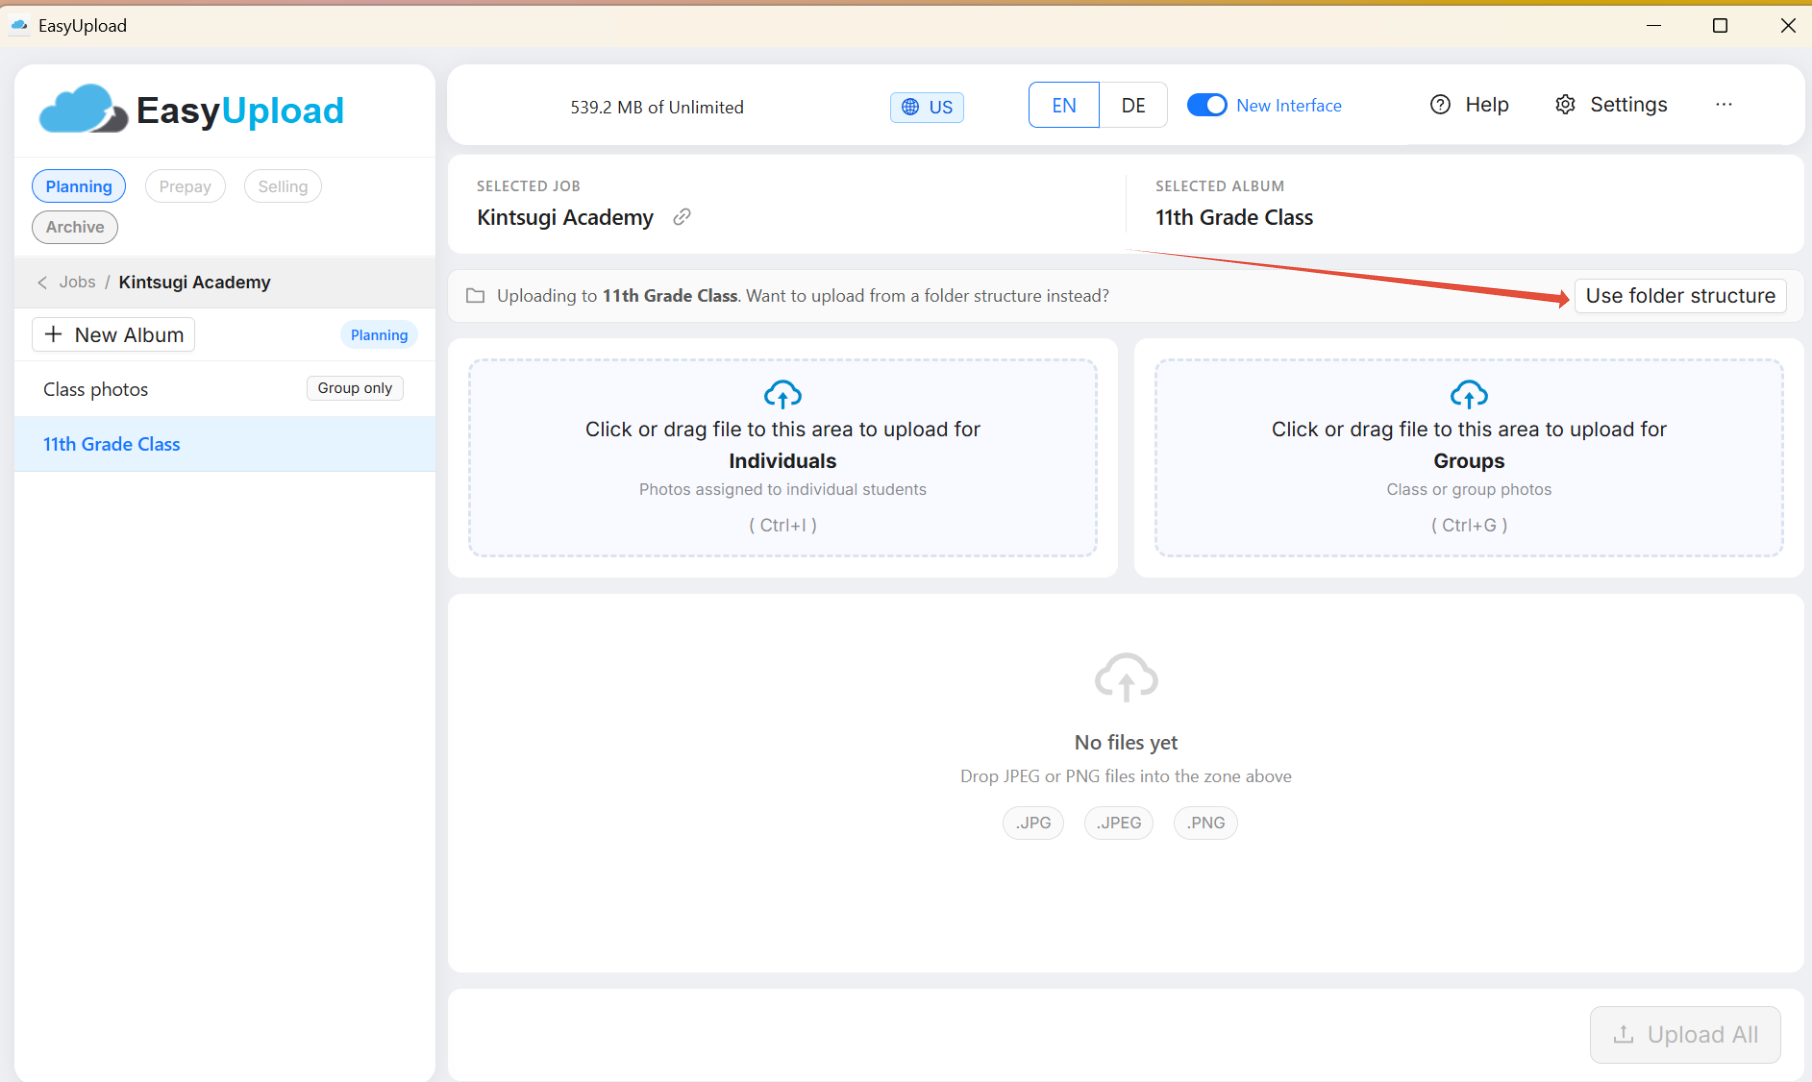
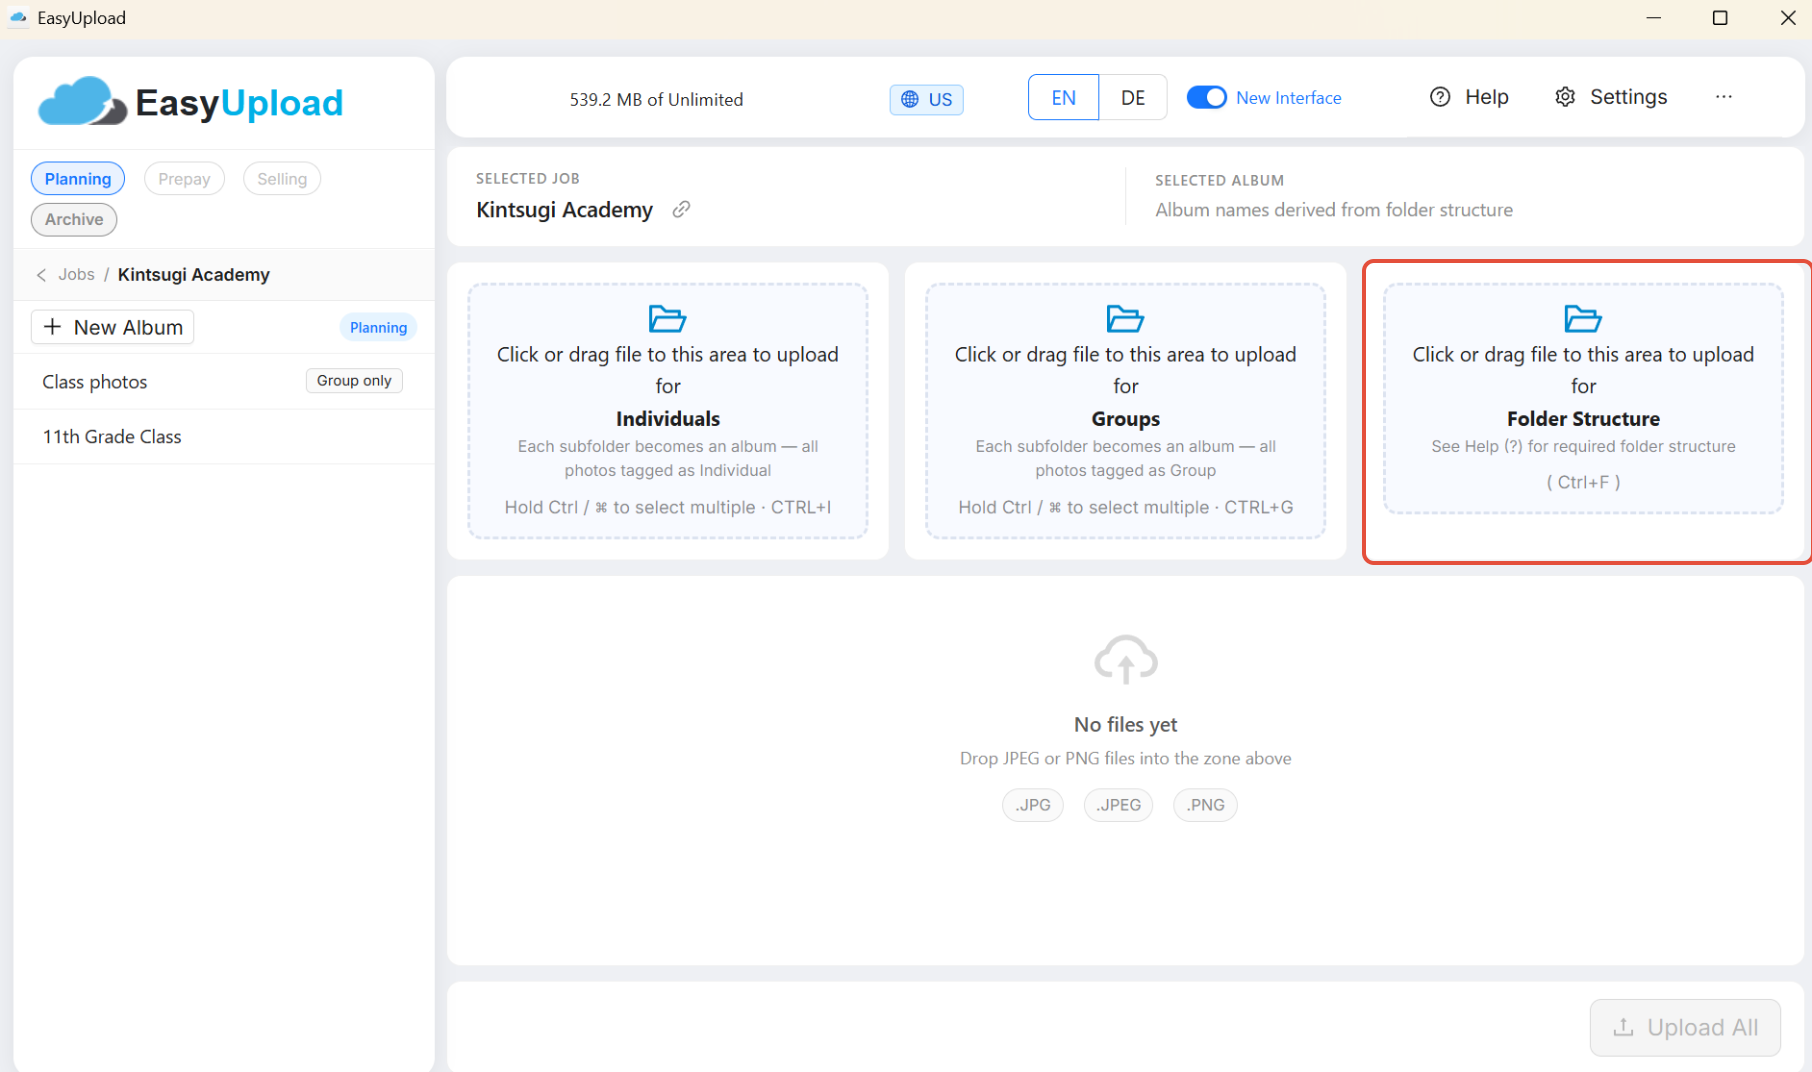
Using folder structures
If you do not have a names list, you can use the folder structure workflow.
A photo job can contain an unlimited number of albums. Each album can contain a maximum of two subfolders:
- Folders named
groups,group,grp, orgrpsare uploaded as group photos. - Folders named
individuals,individual,ind, orindsare uploaded as individual photos. - Files placed at the album root level (outside a supported subfolder) are skipped. A warning message displays the skipped file names.
Folder uploads only proceed when the album structure is valid. If an error exists, a warning message is displayed.
The Help section in EasyUpload contains additional examples of supported folder structures.
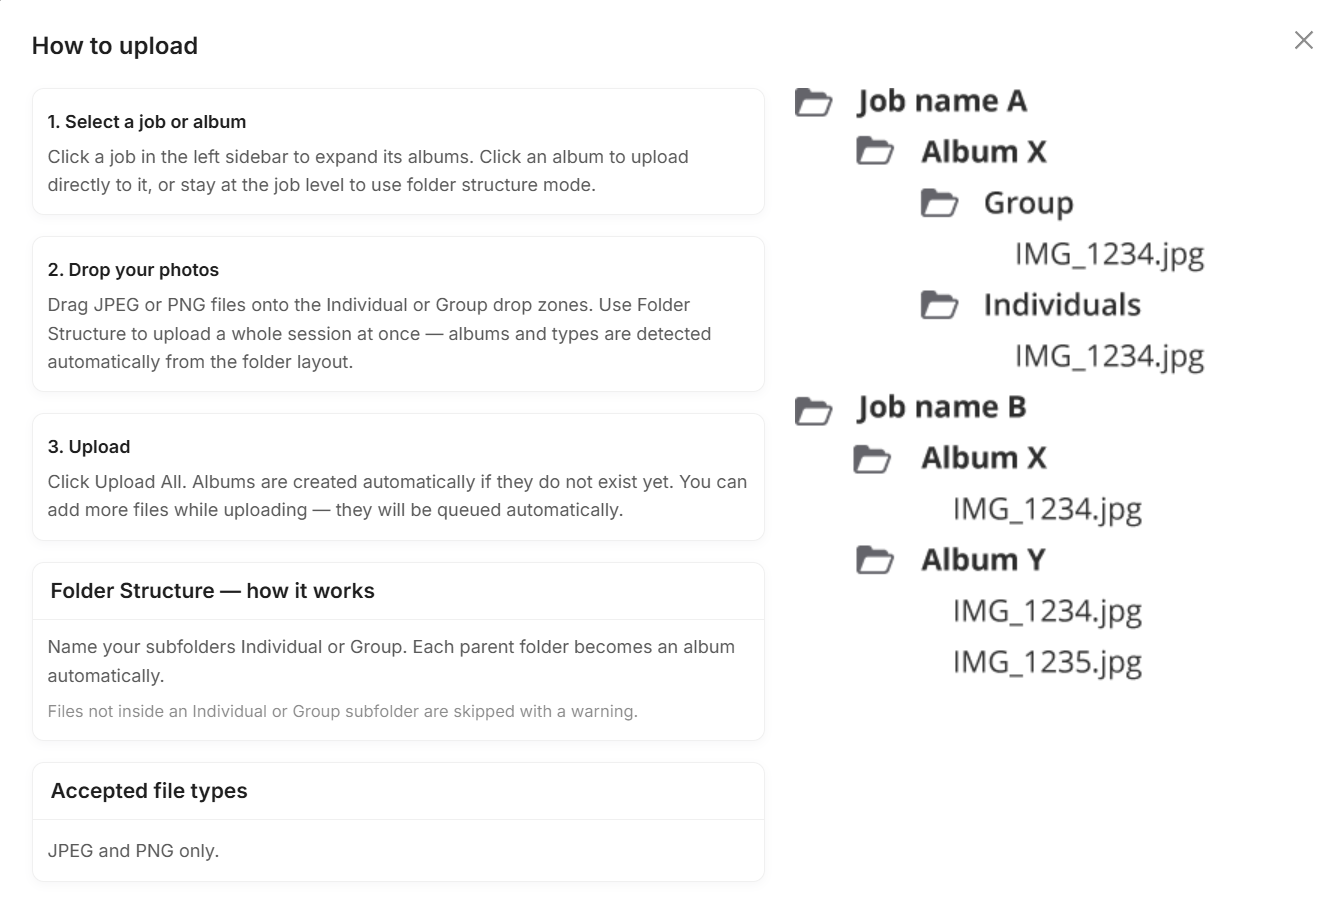
If your job includes a names list and class/group information, you do not need to create albums in advance. Simply upload all photos in a single folder. When the galleries are activated in GotPhoto, the system automatically sorts the photos according to your preferred structure (for example, by class) and moves them into the correct albums.
When a job or album is selected, a confirmation pop-up appears.
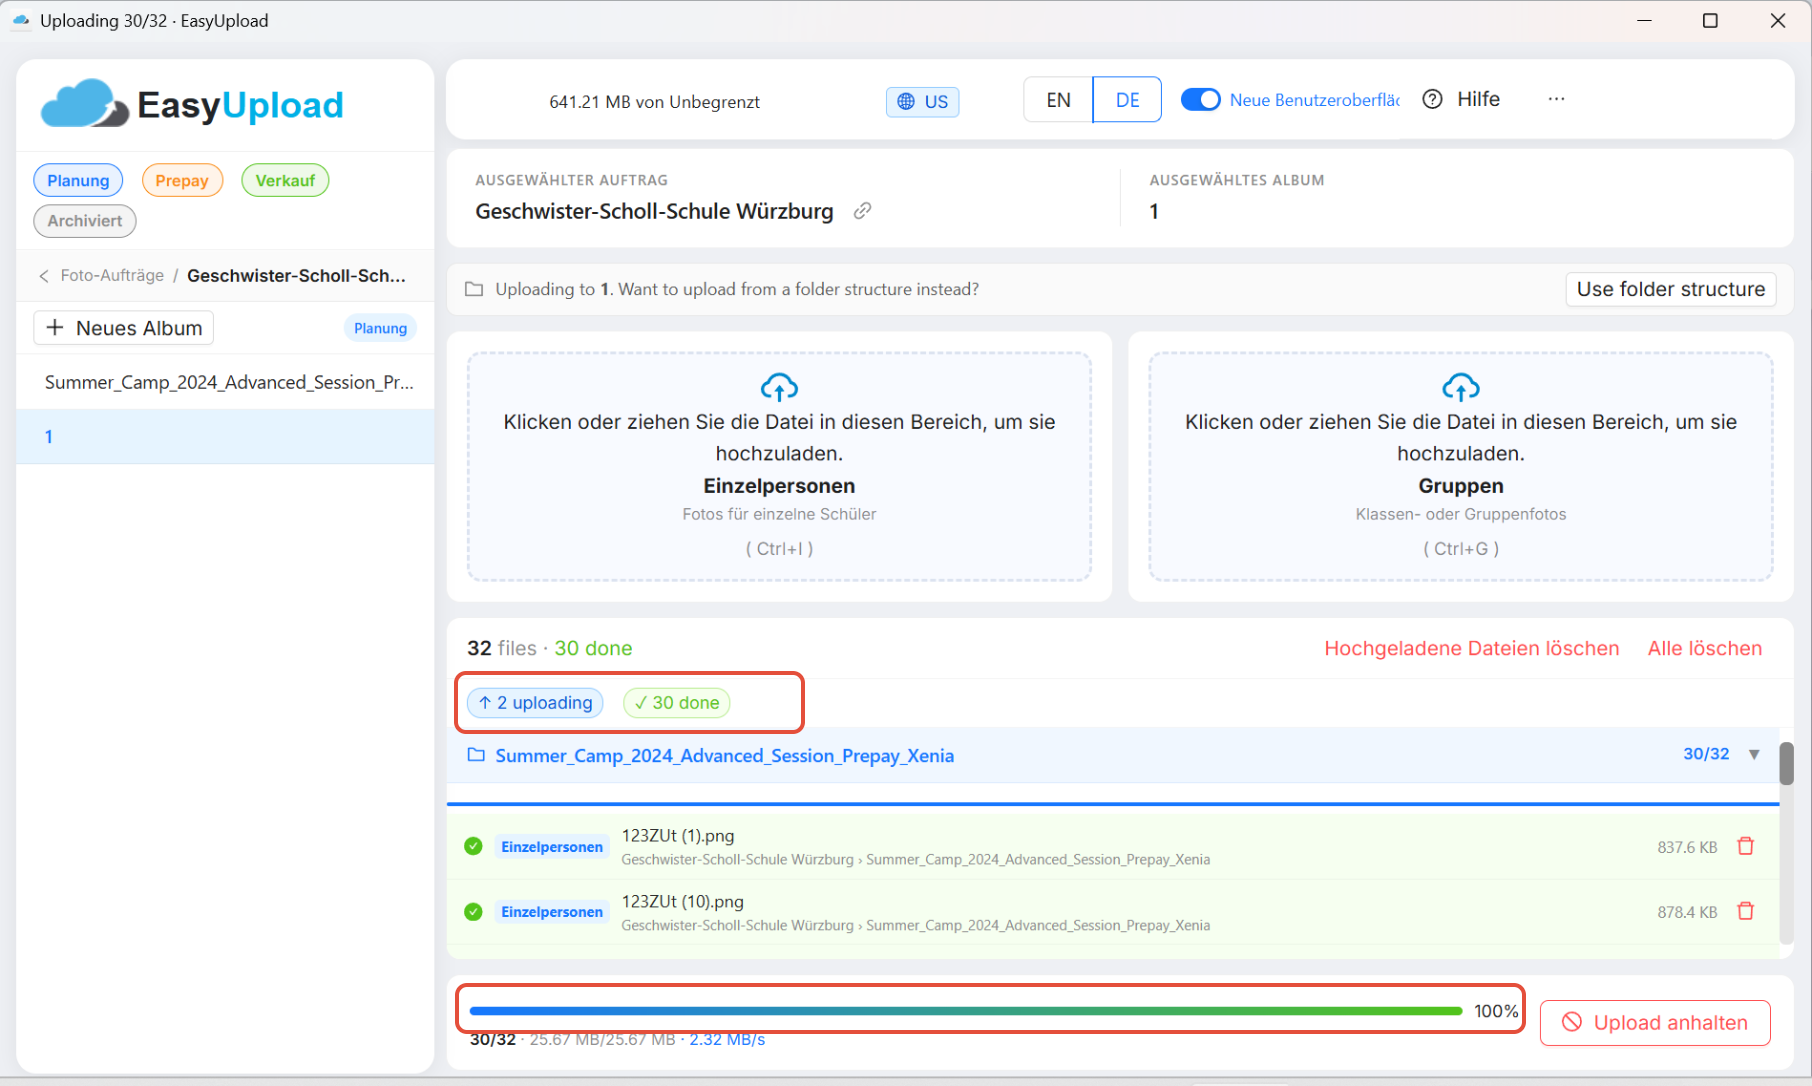
During upload, the upload status is displayed.
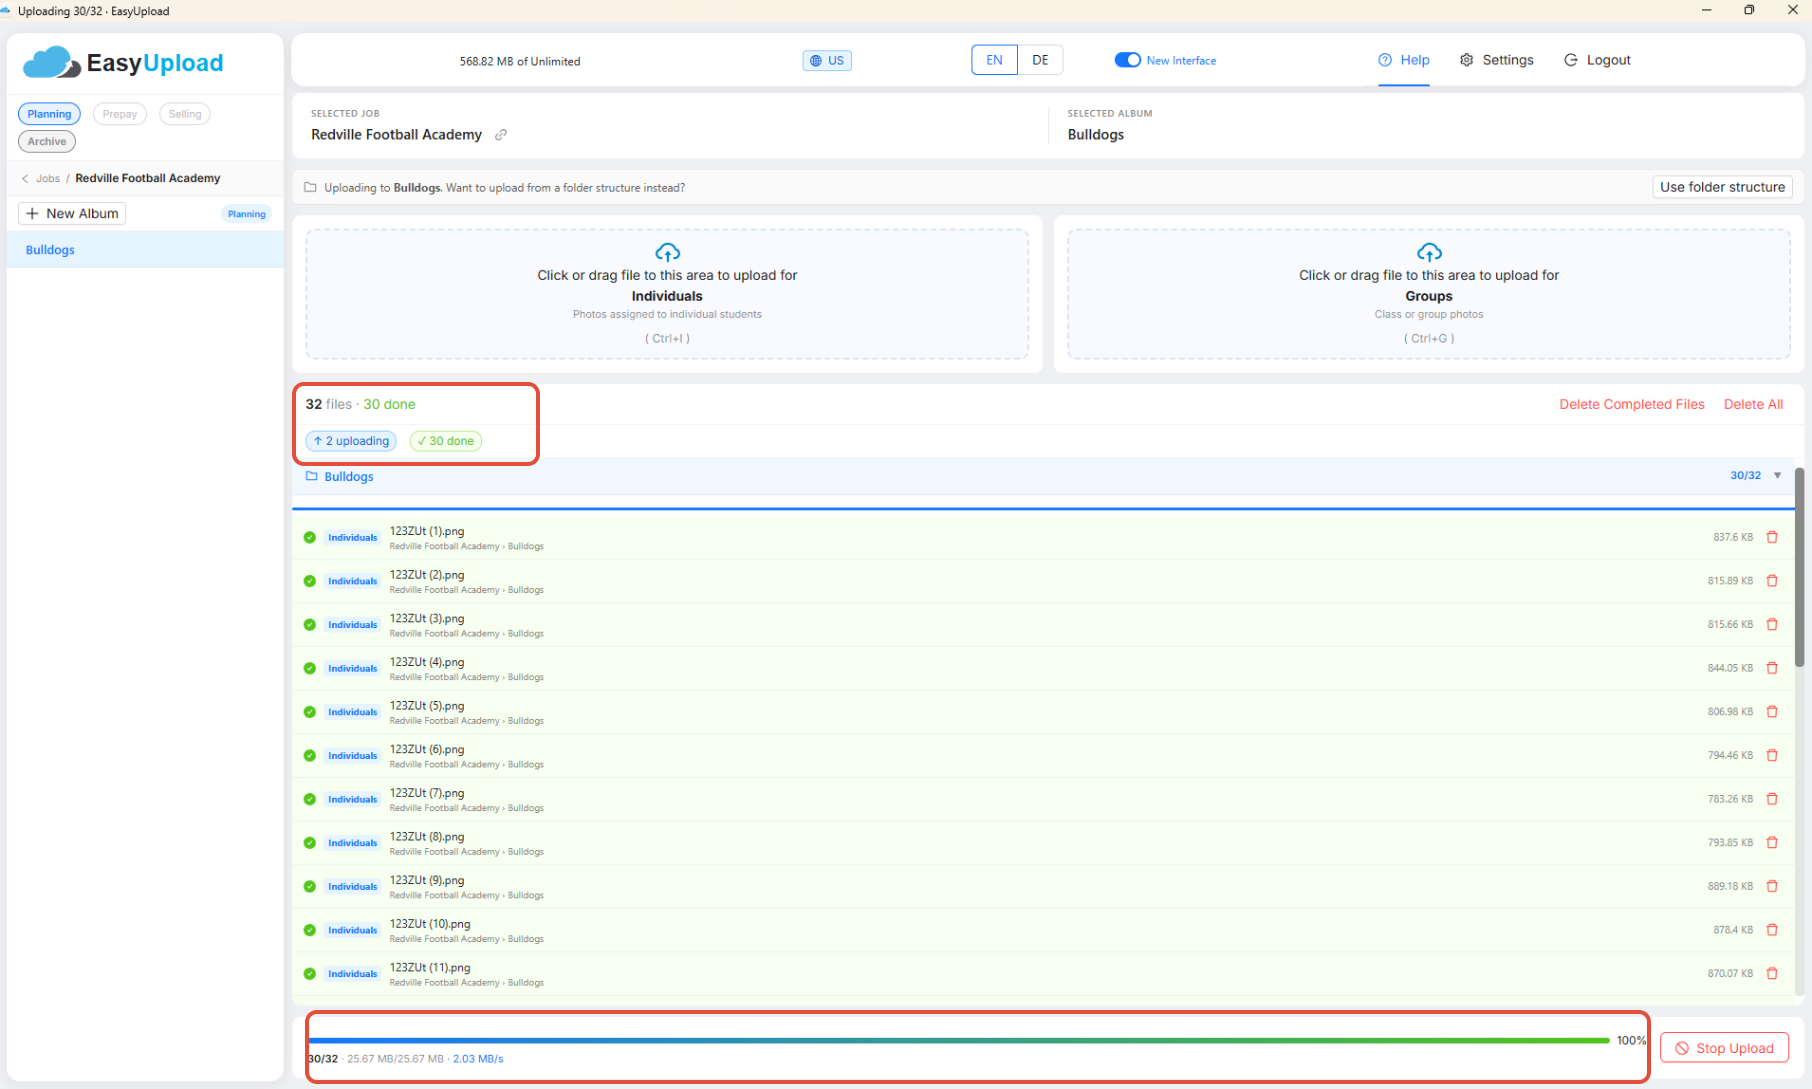
After selecting files, EasyUpload displays:
- Job name
- Album name
- Photo type
You can add additional files at any time.
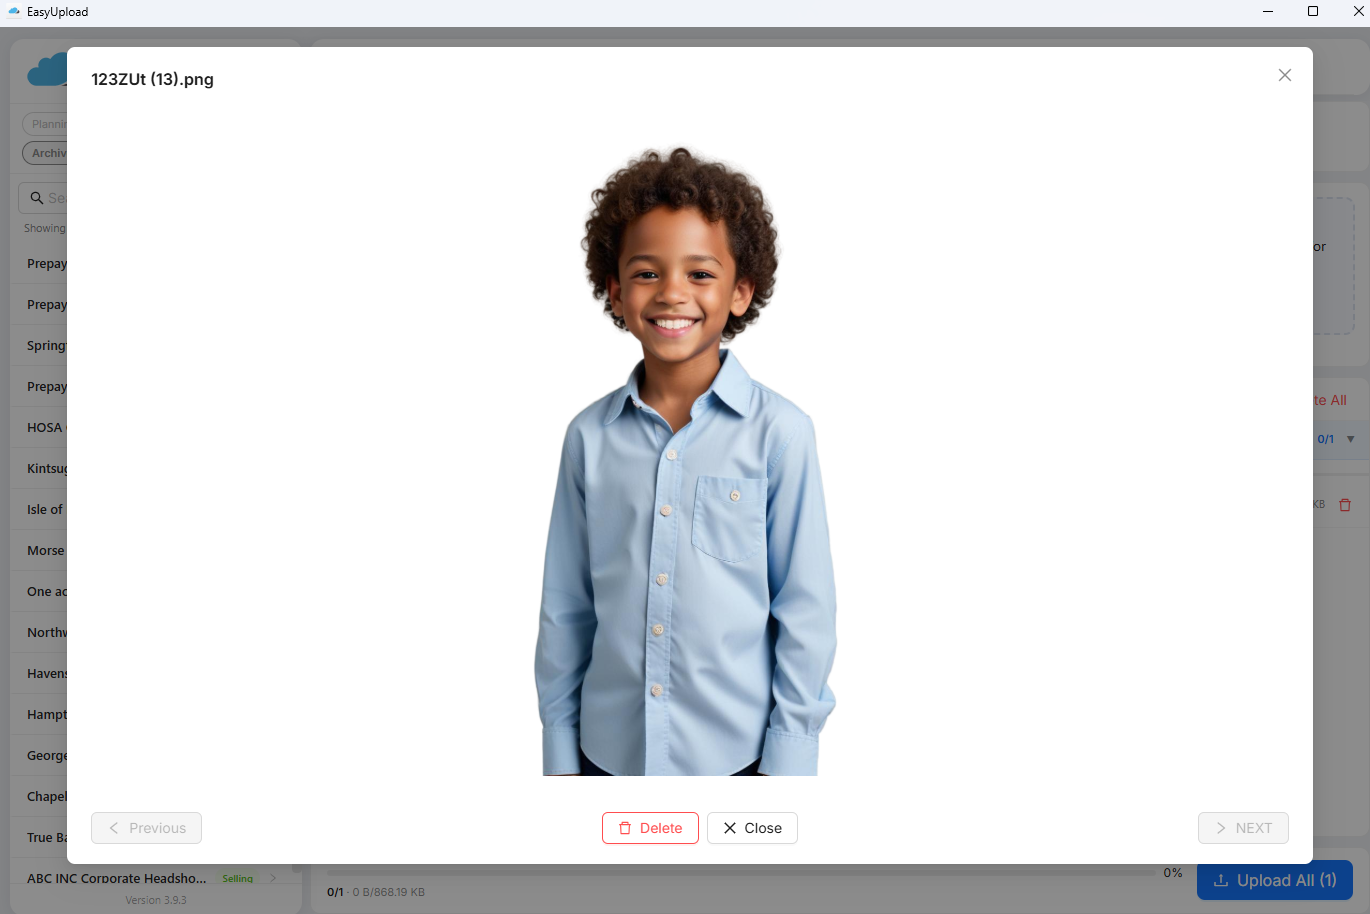
Click any listed image to display a preview.
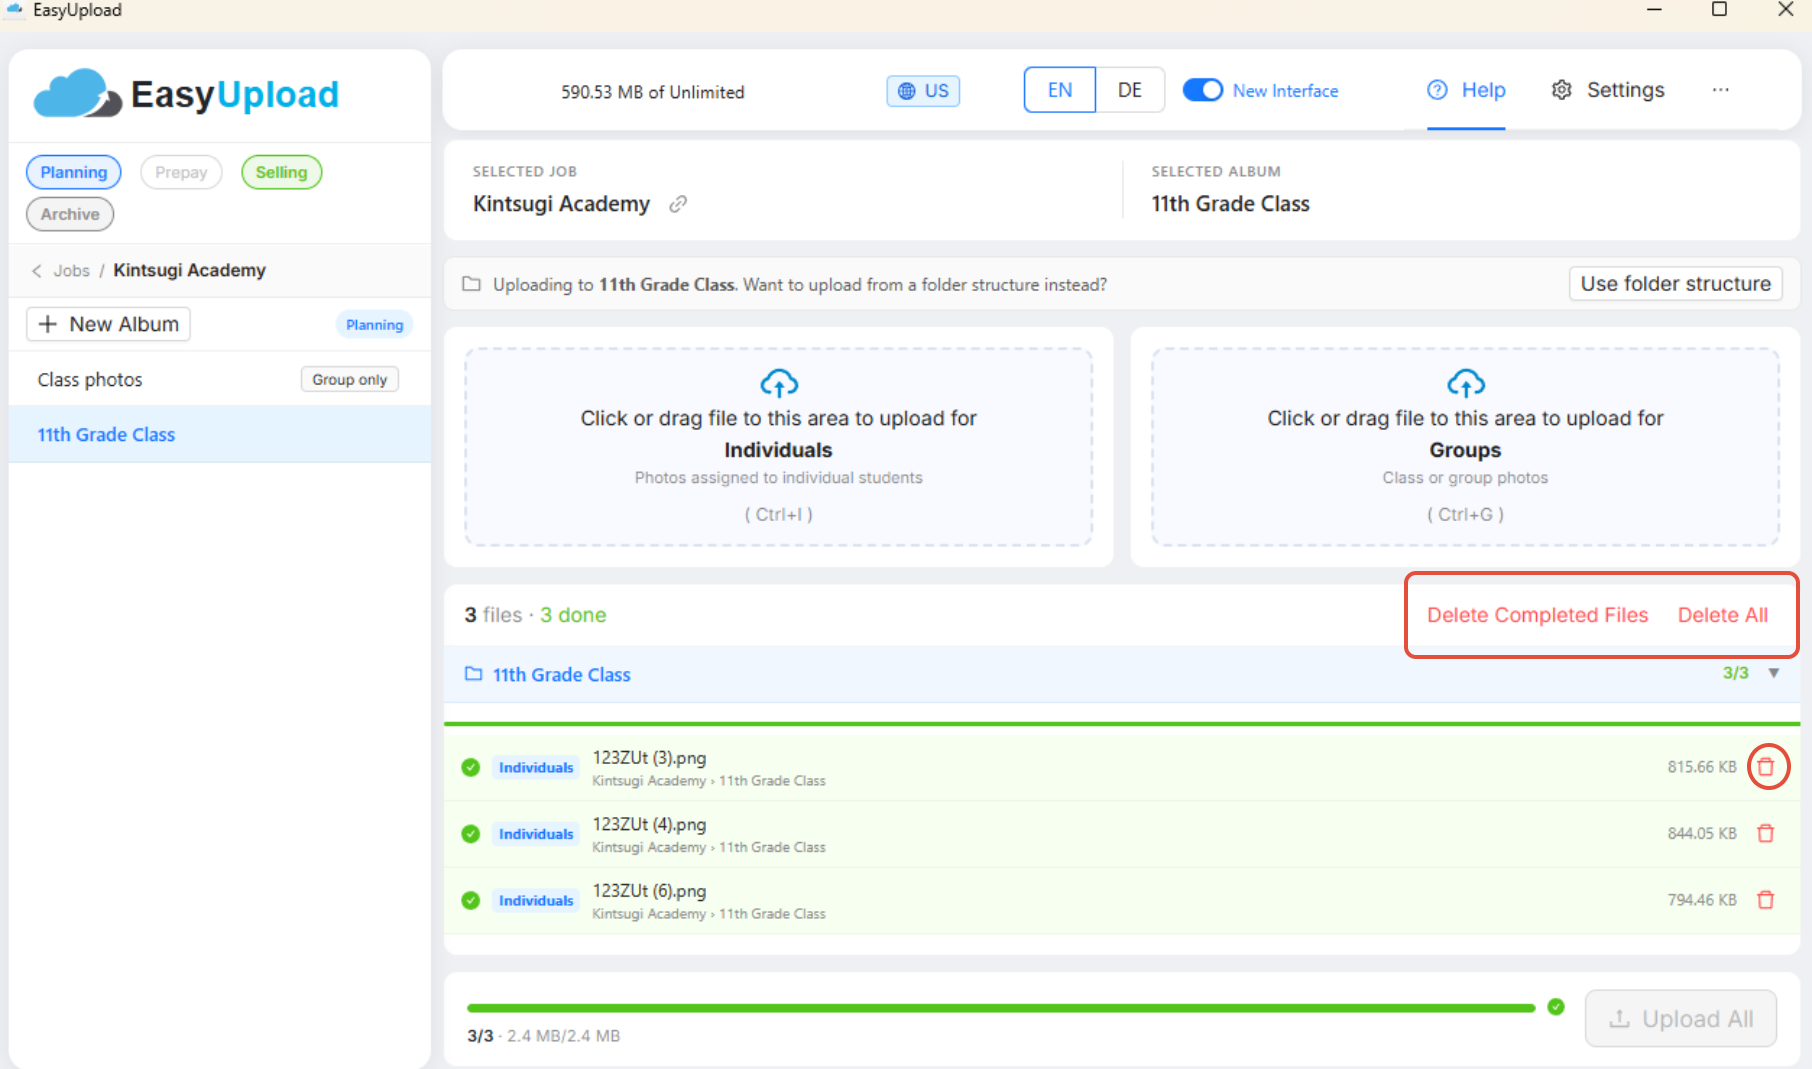
If you uploaded the wrong file, simply remove it by clicking the trash icon next to the image. You can also remove the entire list using Delete All.
Click Upload All to start uploading.
If necessary, click Stop Upload to stop the upload.
To remove already uploaded files, click Delete Completed Files.
The new upload view displays:
- Album bar
- Color-coded file rows
- Upload progress
- Upload speed
Color indicators:
- Green = Uploaded
- Blue = Uploading
- Red = Error
When the upload is complete, a confirmation pop-up appears.
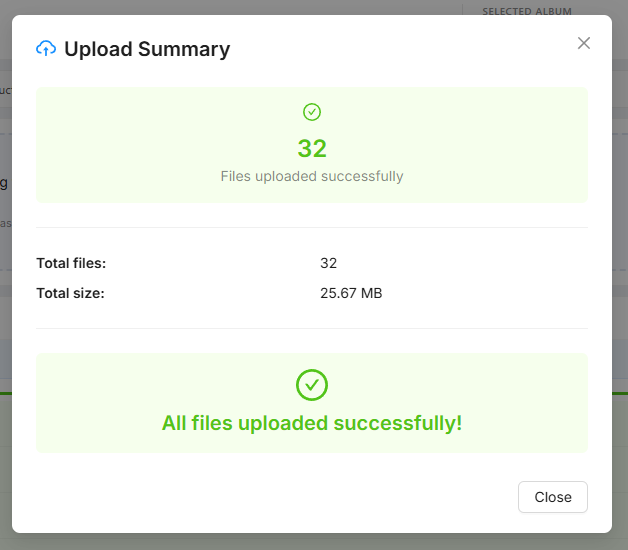
Your uploaded photos are available under the Photo Management tab in GotPhoto.
- If an album contains no subfolders, all images are uploaded as individual photos.
Group photo albums
- Please note that a standard album containing only group photos will not be visible to customers because individual photos must also exist in the same album.
To solve this, create a Group Photos Only album directly in your photo job. This album will be available to all customers who have individual photos in that job.
In the Photo Management tab:- Click Create New Album
- Enter an album name
- Enable Expert Settings
- Select the option for a group-photo-only album
- Refresh EasyUpload afterward to display the new album. You can then upload your group photos.
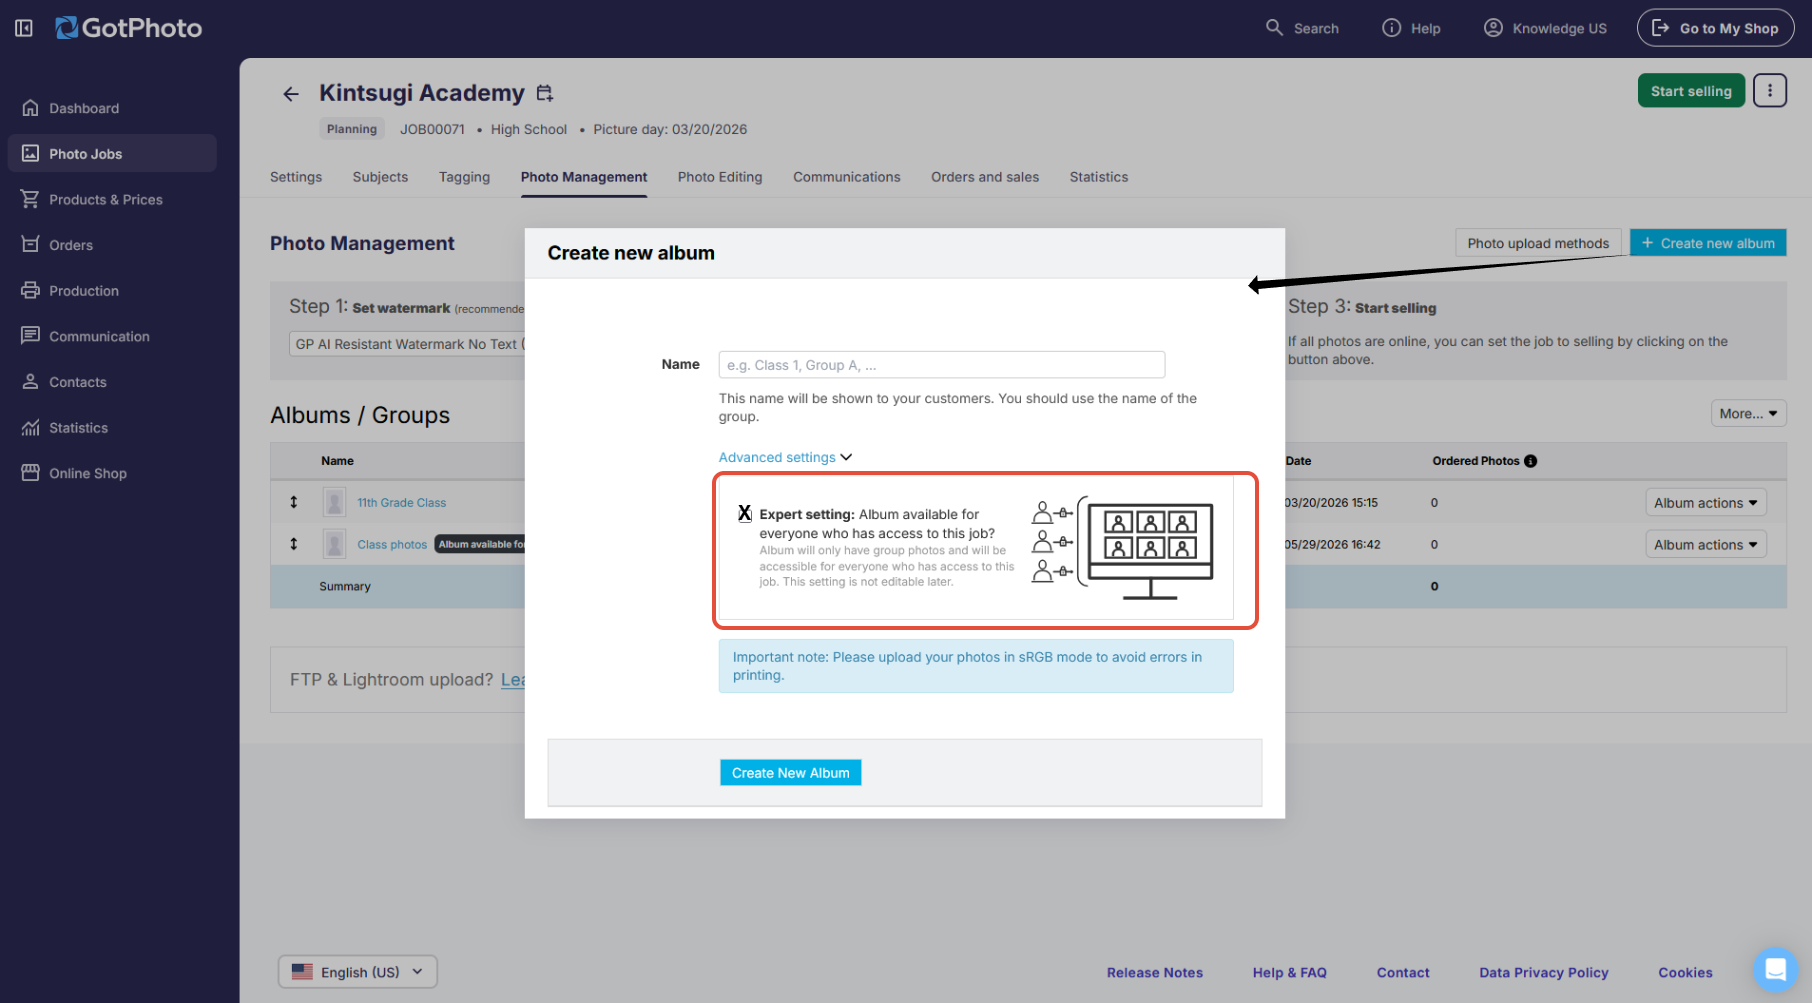
If an album is restricted to group photos only, EasyUpload allows uploads of group photos only.
EasyUpload settings
In EasyUpload Settings, you can choose which jobs should be displayed in EasyUpload. These include jobs in:
- Planning
- Selling
- Prepay (US customers only)
- Archive
When changes are made, EasyUpload now displays a Save and Close button.
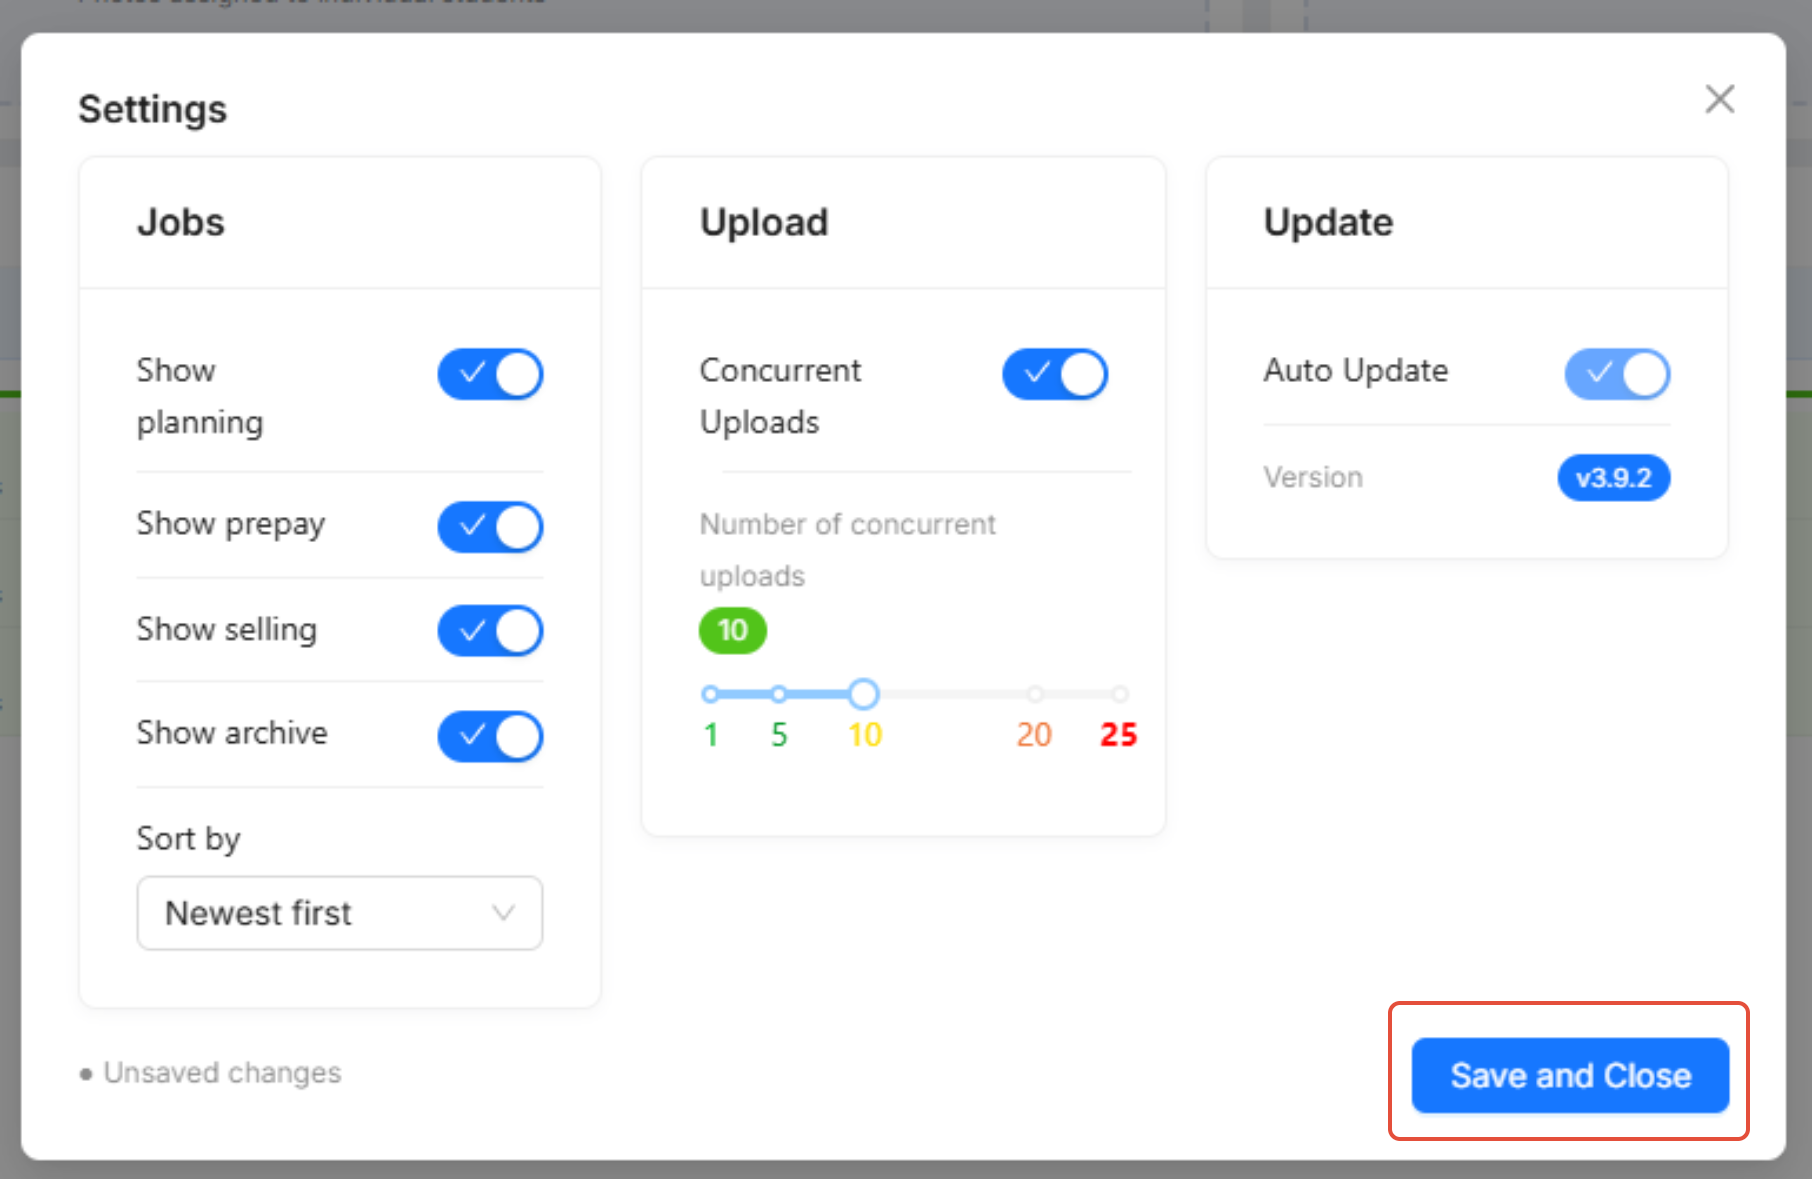
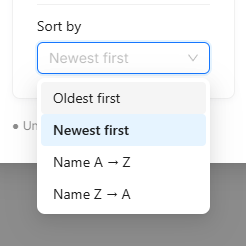
- You can sort jobs by:
- Name A–Z
- Name Z–A
- Creation date
- You can choose the number of simultaneous uploads. The current maximum is 25 files, although we recommend 10. Your internet connection speed may affect performance.
- To keep the job list manageable, jobs are loaded in groups of 20. Click Load More at the bottom of the list to display additional jobs.
- A maximum of 500 albums per job can be displayed.
- The upload speed indicator is displayed at the top of EasyUpload. Click the server indicator (EU/US label with globe icon) to see additional details.
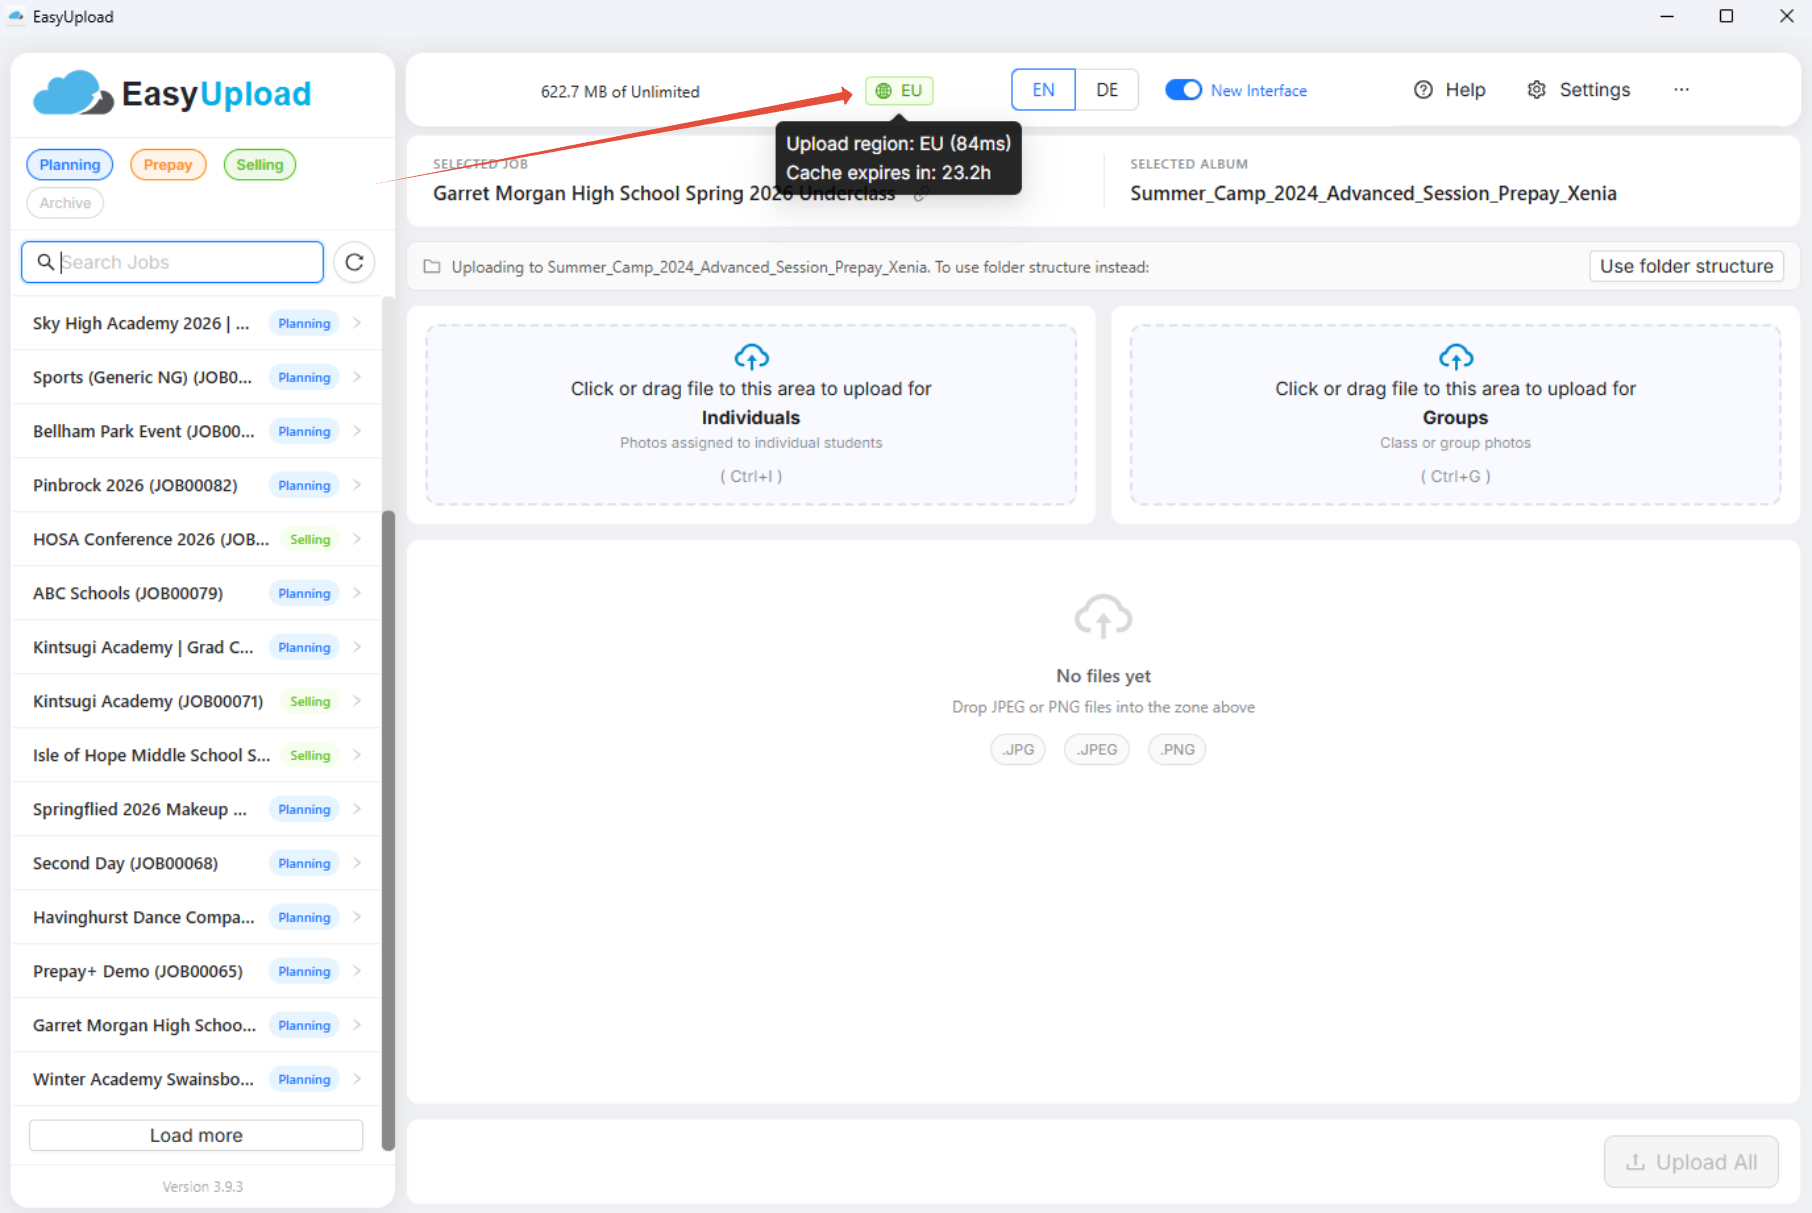
EasyUpload automatically checks available servers at regular intervals and selects the fastest option.
Example:
- 1678 ms = latency between your device and the server.
- Cache expires in: 23.4 hours = the selected server remains cached until another speed test is performed.
- You can refresh EasyUpload at any time, for example after creating a new job or album, by clicking the refresh button next to the search field.
Create and delete albums
EasyUpload allows you to create and delete albums directly from the application and in your GotPhoto account.
- Hover over a job name, right-click, and select the option to create an album.
- Hover over an album name, right-click, and select the option to delete the album.
Troubleshooting
1. I can't see my photo job in the list.
If a photo job does not appear in EasyUpload, check its status in your GotPhoto admin area. Also ensure that the corresponding status filter is enabled in EasyUpload.
In the new user interface, status filters can be activated directly from the sidebar. In the old user interface, these filters are available in EasyUpload Settings.
2. I don't see the new user interface.
Restart EasyUpload and make sure you are using the latest version. The new user interface is enabled automatically after updating.
If you switched back to the old interface, you can reactivate the new view using the New User Interface toggle in the header.
3. I followed the folder structure but still receive a folder structure error.
Check that your subfolder names are correct and that your albums are named correctly.
Group or class photos must be uploaded into a subfolder named:
- groups
- group
- grp
- grps
Individual photos must be uploaded into a subfolder named:
- individuals
- individual
- ind
- inds
Any variation outside these naming conventions will trigger a folder structure error.
4. I uploaded photos to the wrong job. Can I move them between jobs?
Unfortunately, this is not possible. Remove the photos and upload them again to the correct job.
FAQs
Can I replace images in an existing job by uploading them again with EasyUpload?
Yes. Images can be replaced even after access codes have been activated. However, the replacement images must have the same filename and file format (JPEG or PNG) as the originals.
Important: Always upload replacement images into the same album where the original images are stored.
If you upload them to the job instead of the album, EasyUpload creates a new album. Moving those images into the original album afterward will create duplicates rather than replacing the existing files.
The same issue occurs when photos are uploaded using QR cards, the codes are activated, and the sorting function is used afterward. This also creates duplicates instead of replacement images.
To correctly replace images, upload the updated files directly into the original album.
The system automatically overwrites the originals. This applies both to albums with activated codes and to albums that use QR tagging but whose codes have not yet been activated.
Summary
EasyUpload is a fast and simple solution for uploading large numbers of photos. Since version 3.9.3, the new user interface has become the default experience and makes it easier to manage jobs, albums, status filters, and uploads.
If no names list is available, using the correct folder structure and folder names is essential to ensure a smooth upload process.