
Overview
Customizing your Online Shop is incredibly important for brand recognition and creates a professional ordering experience for your customers. GotPhoto offers a variety of different ways for you to customize your shop and bring your brand to life online!
Your online shops
Regular proofing shop
The Online Shop section of your Settings page links to pages where you can update the design of your Proofing Shop.
The Logo & Design page
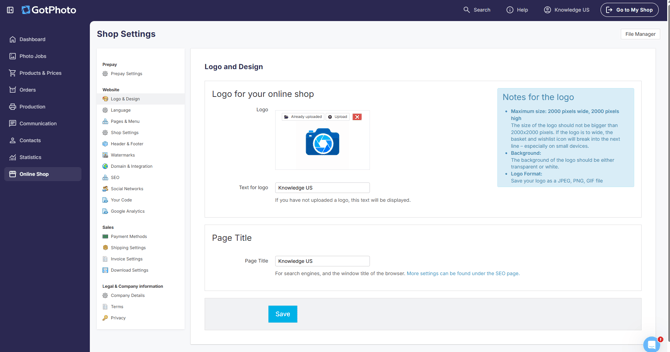
The Logo & Design page lets you change your shop logo and page title.
Logo checklist:
- File type: PNG (best for transparent backgrounds), JPEG, or GIF.
- Background: Transparent or solid white only.
- Max size: Up to 2000 pixels on its longest edge.
- Cropping: Crop right up to the edges of your logo. Do not leave extra empty space around it.
Note: 2000 pixels is a maximum limit, not a recommended standard. Oversized logos can disrupt the header layout and push wishlist or cart icons out of alignment on mobile devices.
Page title:
A page title, often referred to as the “tab name”, is the specific text displayed on the tab at the top of your web browser.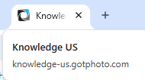
The Language page
The Language page allows you to set your shop’s standard language and add additional languages. Learn more here: How to manage shop languages and translations.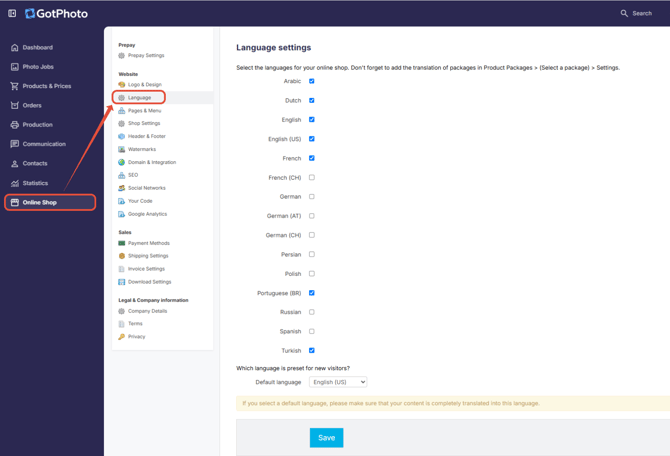
The Pages & Menu area
Manage and customize your shop’s primary navigation menu here.
Shop view before login
The mobile site opens directly on the Login page. Customers can access additional pages, such as FAQ and the Contact form, by opening the main menu.
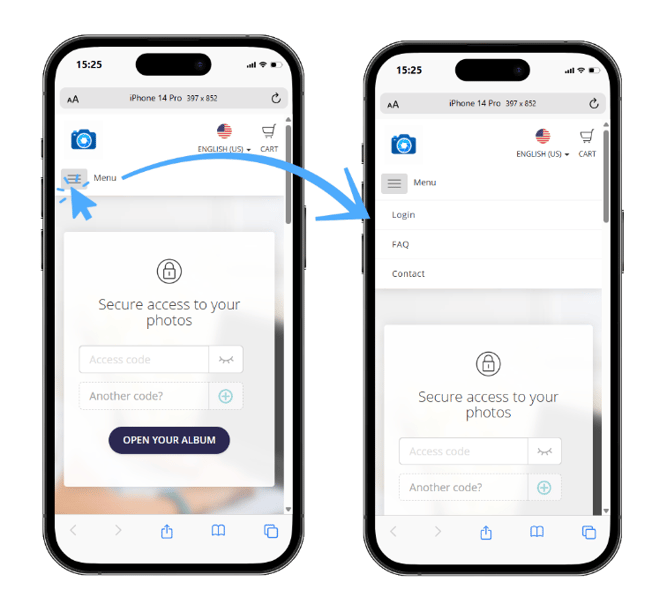
Default pages included:
- Login page (homepage)
The Login page is the page where your customers enter their access code. - FAQ
The FAQ page comes pre-populated with standard questions and answers. We recommend customizing them to better fit your business needs. - Contact
The Contact page allows your customers to contact you. It includes a reCAPTCHA checkbox (“I’m not a robot”) to verify human users and protect the form against automated spam bots.
You can also add custom pages (such as a link to your main studio website). Customizing these default pages helps align the shopping experience with your brand and caters directly to your clients’ needs.
More information can be found here: The Pages & Menu Page.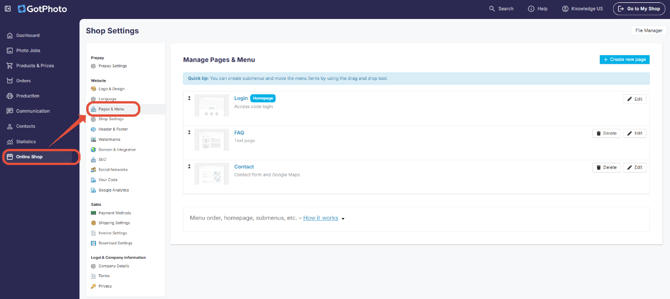
How customers find the FAQ and Contact pages after login
Once a customer logs into the new shop, additional pages like FAQ, Contact, and any custom-created pages won't display in the top header menu. Your customers can currently reach them through the Contact link in the footer of any shop page. We’re improving the shop navigation as we continue to develop the new shop.
Here’s the path your customers follow after logging in:
-
Your customer logs in to your shop with their access code.
- They scroll to the bottom of any shop page.
- In the footer, they click Contact.
- The Contact page opens with your contact form and contact details. At the top of the page, a menu shows Login, FAQ, Contact, and all other additional pages you’ve set up.
- From this menu, they can open the FAQ or any other additional page.
- To return to their photos, they click Login and then To my photos.
Video: How to find the FAQ and additional pages after the shop login
The Shop Settings page
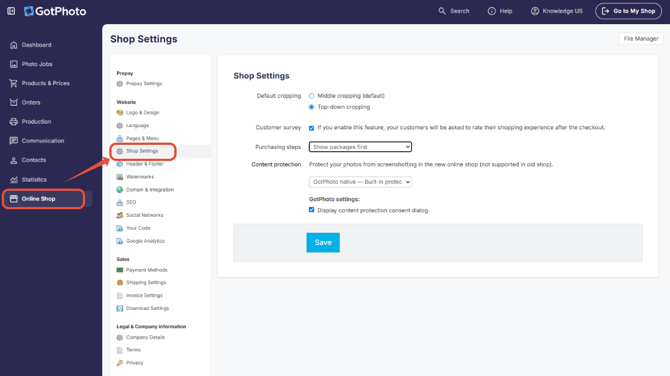
In Shop Settings, you have these customization options:
- Default photo cropping: Choose middle cropping or top-down cropping for photo displays.
- Customer survey: Enable a post-checkout survey to collect buyer feedback.
- Purchasing steps: Select whether to show photos or packages first when a customer enters your shop.
- Content protection: Set screenshot protection settings to prevent unauthorized screen captures.
Learn more about these settings here: The Shop Settings and Your Code Pages.
The Header & Footer page
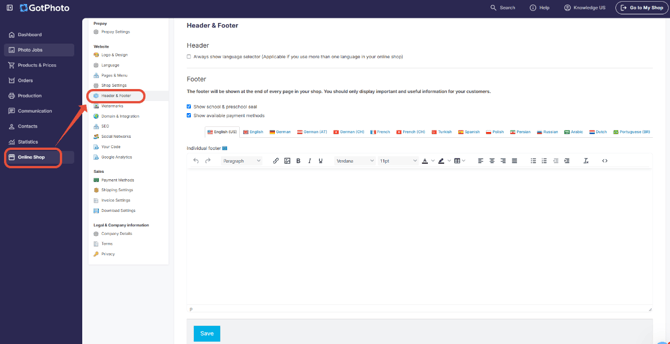
On the Header & Footer settings page, you can customize the layout, display elements, and content shown in your Online Shop’s header and footer.
- Language selector: Toggle permanent visibility in the header.
- Seals & badges: Show the school seal and the payment icons that apply to your shop.
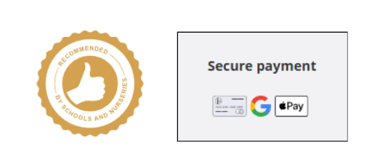
- Multilingual text: Manage footer text across 15+ languages.
- Custom footer editor: Add custom text, links, or images.
The Watermarks page
On the Watermarks page, you can review the pre-loaded watermarks and add your own watermark. More guidance can be found here: Add a watermark.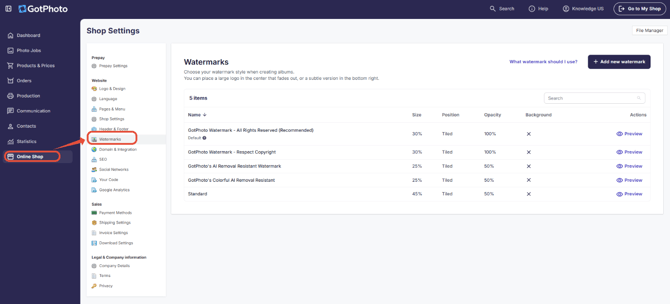
The Domain & Integration page
The Domain & Integration page is where you can edit your shop subdomain and make changes to your DNS settings. For more info, check out this article: Use your own domain with DNS Forwarding.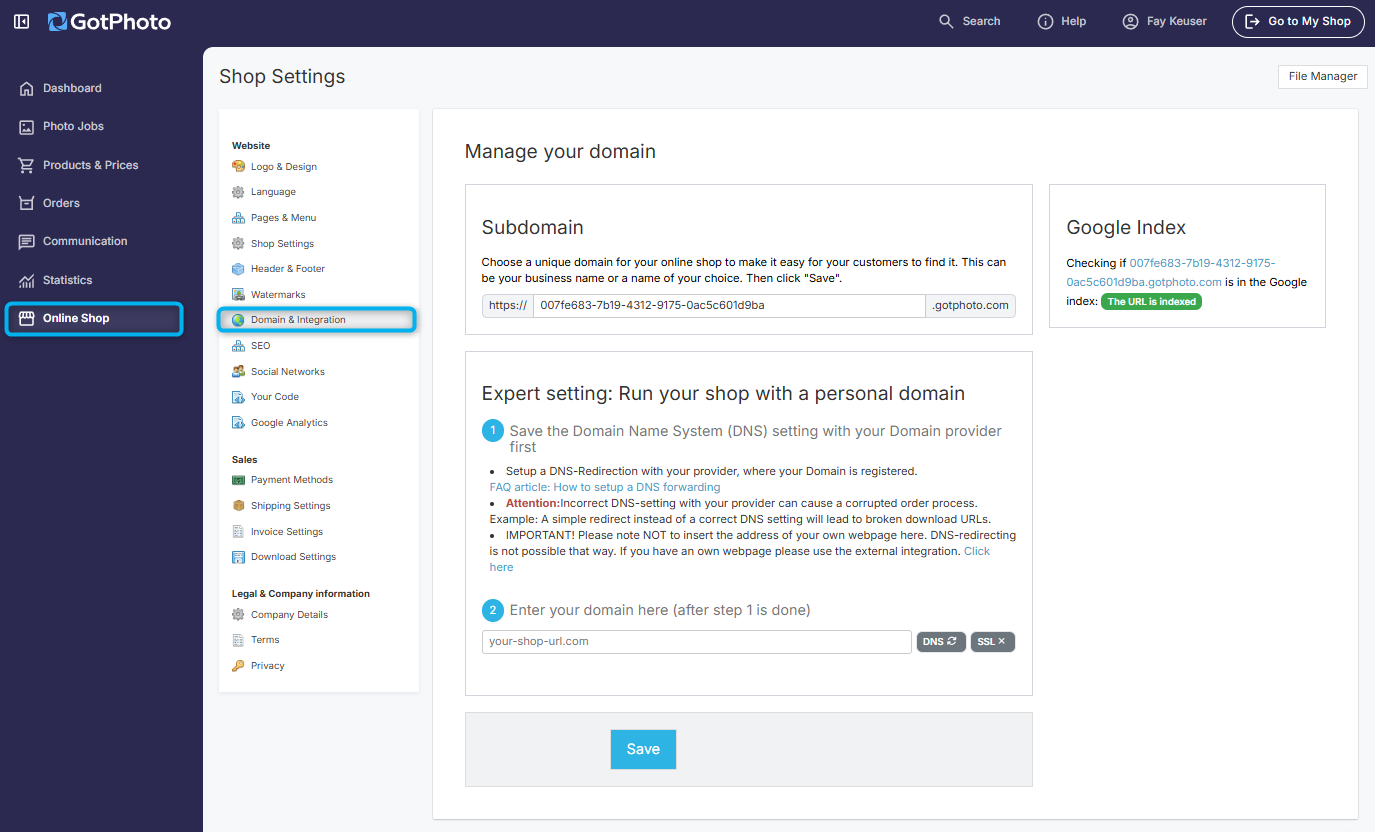
The SEO, social networks, your code & Google Analytics pages
These legacy settings do not apply to the new shop. Some settings enabled before the transition to the new shop will continue to work on public pages, but they are no longer supported inside the logged-in shop.
Prepay shop (US and Canada only)
⚠ Please note: Prepay is not activated by default. The feature is reserved for higher-tier plans with specific business needs. If this applies to you, please contact your account manager.
Once Prepay is added to your account, open your Prepay settings via Online Shop > Prepay Settings.

You can adjust the following:
- Protected access: Requires an access code per job. Recommended to prevent customers from accidentally logging into the wrong job when schools or organizations have similar names.
- Title: The name of your Prepay page. Visible in the browser tab and search engine results.
- Primary color: Changes the top banner color in your shop. Avoid white to keep menus visible.
- Test mode: Deprecated. Instead, use a custom voucher to test orders.
Additional customization
If you want to edit the photo effects (photo filters) shown to your customers in the shop, you can find all the information in this article: Change or disable photo effects.
The takeaway
Elevate your brand and enhance the customer ordering experience by customizing your online shops with GotPhoto. You can personalize your shop pages and additional settings, ensuring a professional and unique online presence for your business.
Related articles: