

Table of contents
Overview
Even if you are using one access code for a job, you can still use email marketing if you upload a names list that includes parent information.
This guide explains how to configure your job settings and choose between sending a one-time message or setting up an automated campaign.
Set up job and names list
Follow these steps to prepare your job for email marketing using a names list:
Set the job to QR Tagging with a list of names. Upload and import the names list.
- Create a new job and select the access type One Access Code
- Enter and the shared access code for the job
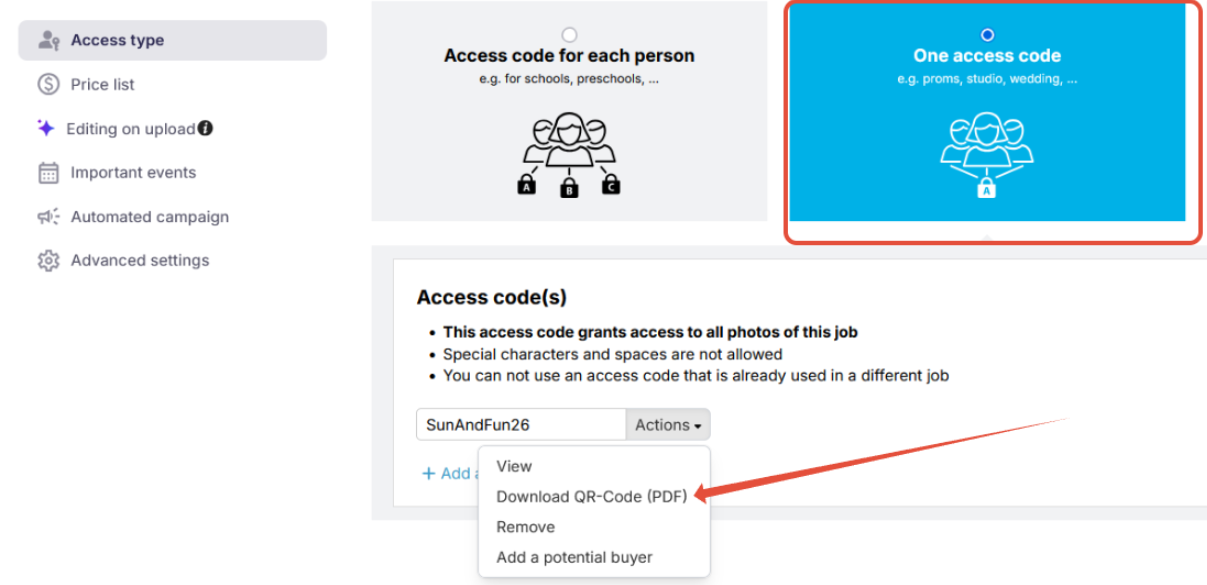 and save the settings.
Choose the communication method
You have two options for sending email notifications:
- Option 1: Automated campaign — More effort upfront, but ideal for multiple reminders.
- Option 2: One-time message — Faster to send, but requires manual follow-up if needed.
Option 1: Creating an automated campaign
- Create a new campaign and name it based on the job.
- Add a notification and choose the group: customers with no photos available yet.
- Add your shop URL (create a hyperlink) and the job's access code instead of the personal login button.
Important: Duplicate the campaign and edit the access code when using it for a different single-access-code job.
Example email sent to customers:
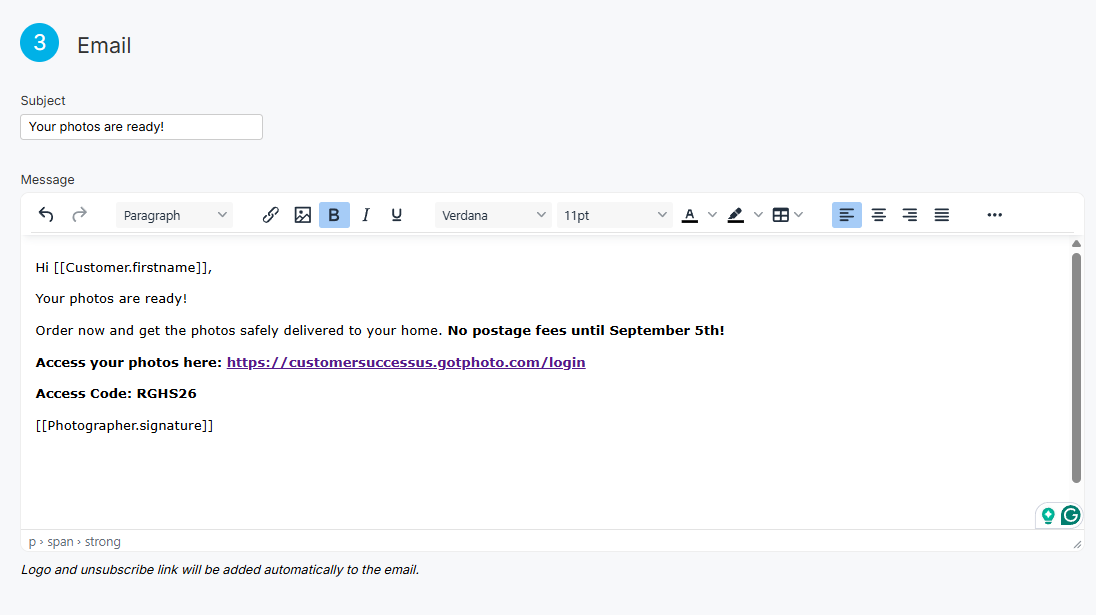
Option 2: Send a one-time message
- Create a one-time message.
- Select the customer group: no photos available yet.
- Include the shop URL and your job’s access code in the email or SMS body.
The takeaway
Even when using a single access code, uploading a names list unlocks email marketing capabilities. Choose between a one-time message or an automated campaign depending on how many follow-ups you plan to send.