
Table of contents
- Overview
- Before you start
- Makeup / retake workflows
- Option 1: Create a new makeup / retake album in the original job
- Option 2: Upload pictures in a new job
- Take away
Overview
This article outlines a legacy workflow that has been replaced by the new Makeup Day Workflow (introduced in April 2025). While this legacy method is retained for reference, we recommend switching to the updated version for better efficiency and support. Note: the new workflow is only available in the US and Canada.
Before you start
Use the same tagging method for makeup day as the original job (QR Codes, Entagged, or SpotMyPhotos). Mixing methods may cause photo mismatches and delays. Staying consistent ensures a smooth experience for you and your customers.
Makeup / retake workflows
You can handle makeup days in two ways, each with different benefits:
- For Entagged jobs, use either option.
- For SpotMyPhotos jobs, use option 1.
Option 1: Create a new makeup / retake album in the original job
- Use the same QR cards as the original job. Open the QR cards PDF on a tablet for easy access. Use the student data export to find absentees.
- Upload the photos to a new album within the same job.
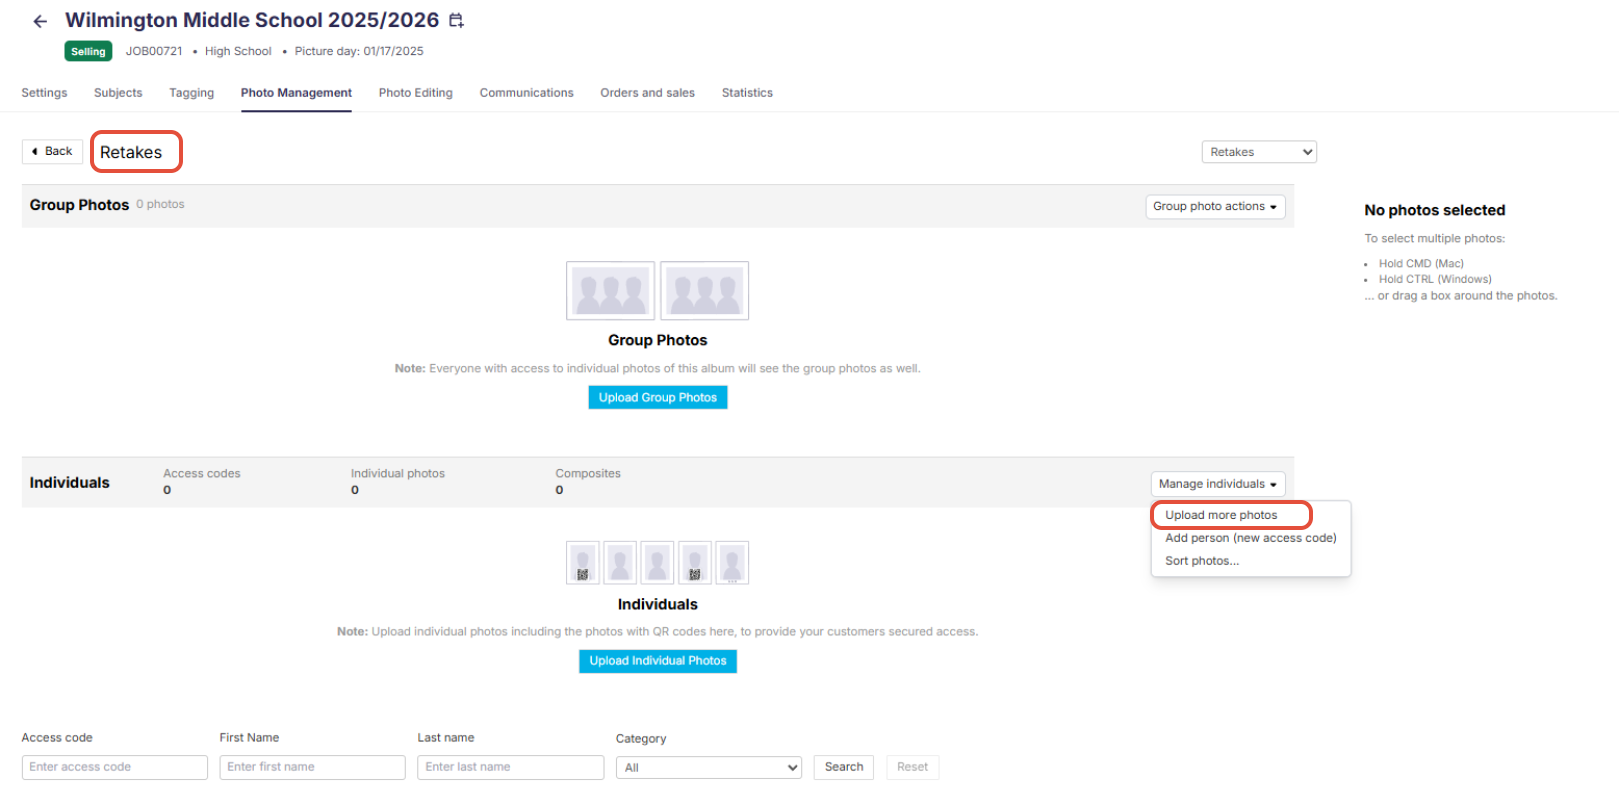
- Activate the access codes as usual.
- Send a one-time message to notify customers: go to Communication tab → One-Time Message → Write newsletter.
- Under recipients, click Add/edit and filter by Retake album.


- Create your email message. You can use the "Your Photos are ready" template. Click save & preview, then send.

With this option, makeup customers can choose their preferred yearbook photo (unless disabled in job settings).
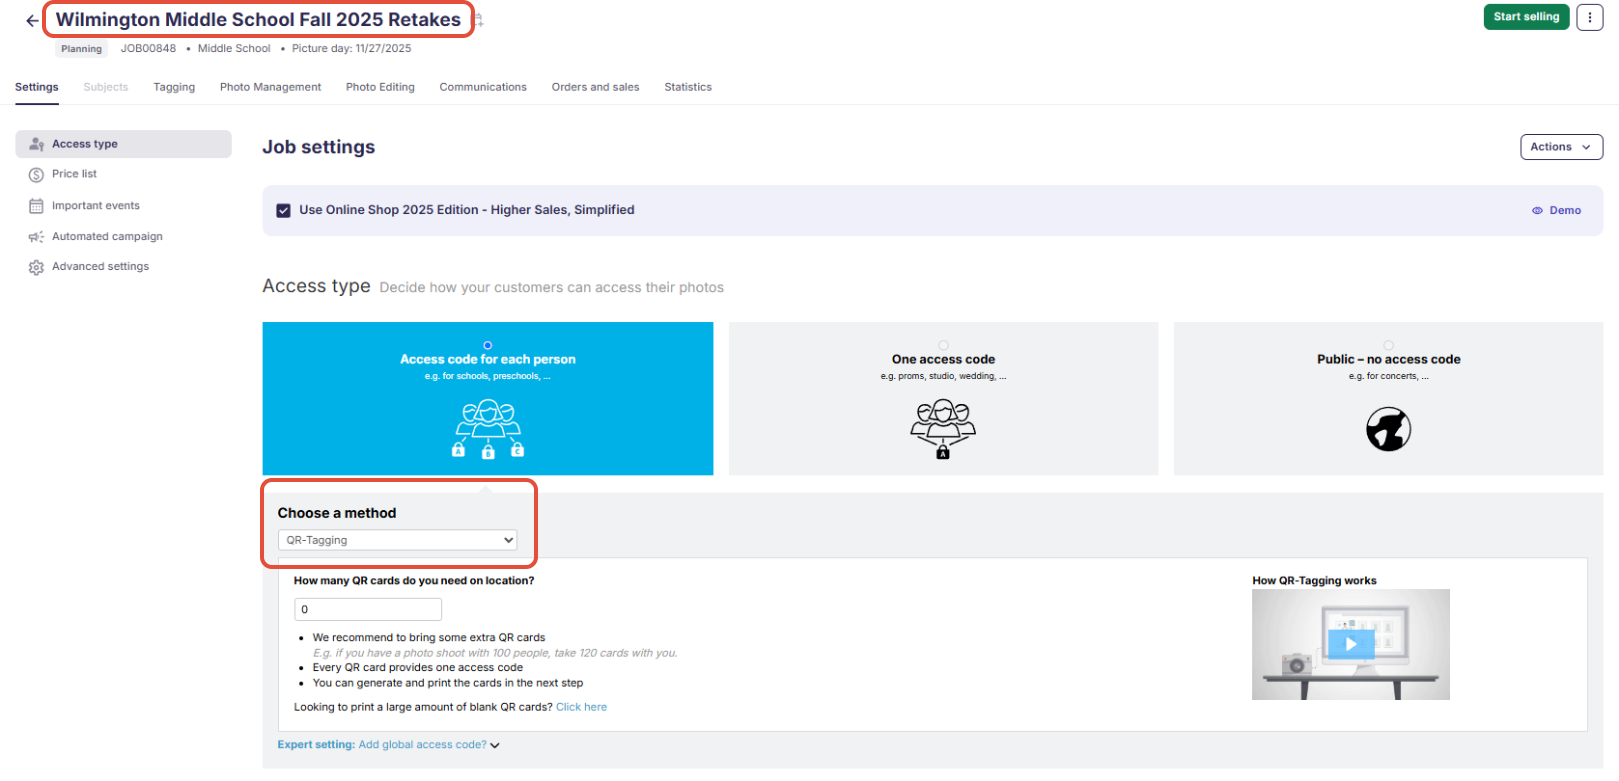
Option 2: Upload pictures in a new job
This method is better if retakes happen over a long period.
- Create a new job using the same organization. Set QR Tagging and make sure not to load data or generate QR cards.
- Add the same communication profile and price profile (price list) from the original job. Optionally add a coupon.
- Use the original QR cards. A tablet with the PDF will help. Search and photograph the QR code on-screen (avoid glare or shadows).
- Upload the photos and activate the access codes. [Limit] Sorting images by names list is not available in a new job.
- Ensure the photos are indexed (star icon).
- If you don’t want customers to see original photos, hide or delete them in the first job.

- If yearbook selection is still active in the first job, customers can select retake photos from the new job.
- Switch the job to "Selling" so customers are notified.
Take away
Retakes and makeup days are easy to manage using either of these two workflows. Choose the option that best fits your schedule and tagging setup to ensure a smooth experience for you and your customers.