
Table of contents
- Overview
- Creating a message
- Adding images to a message
- Finalizing and sending your message
- FAQs
- The takeaway
Overview
One-time messages are a great way to communicate upcoming sales or convey special messages to your customer audience. Similar to automated campaigns, they allow you to target specific types of customers and automatically pull in personal data using placeholders. The primary difference is that a message is a one-off notification that you manually send, while automated campaigns are a series of notifications that are automatically sent based on the job triggers. In this article, we'll review how to create an email one-time message. For SMS, see SMS one-time message guide. If messages aren’t reaching all intended recipients, see guide on why messages may not reach all recipients.
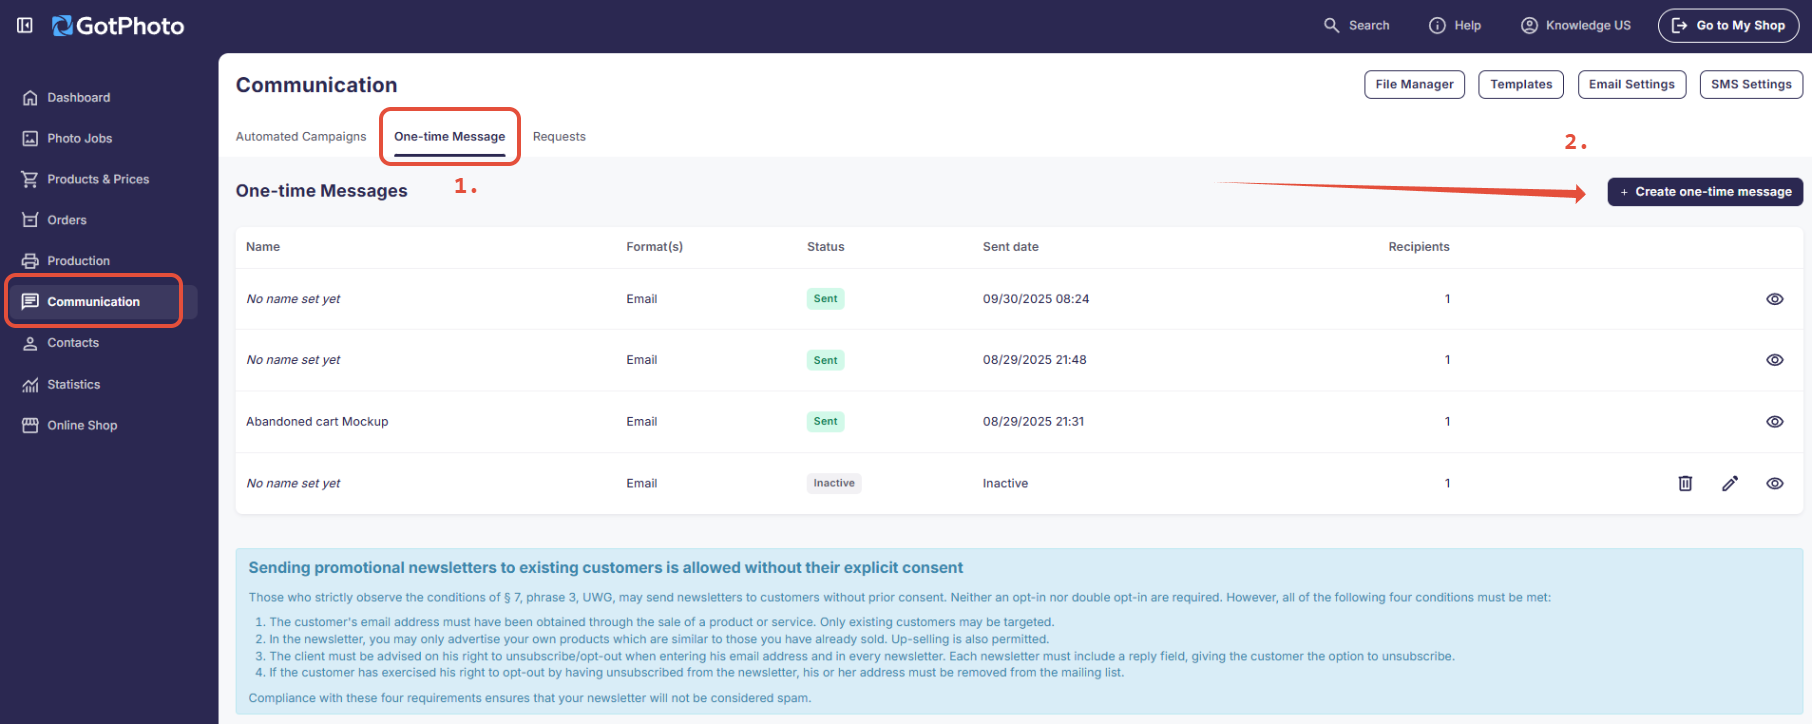
Creating a message
There are two ways to send one-time messages:
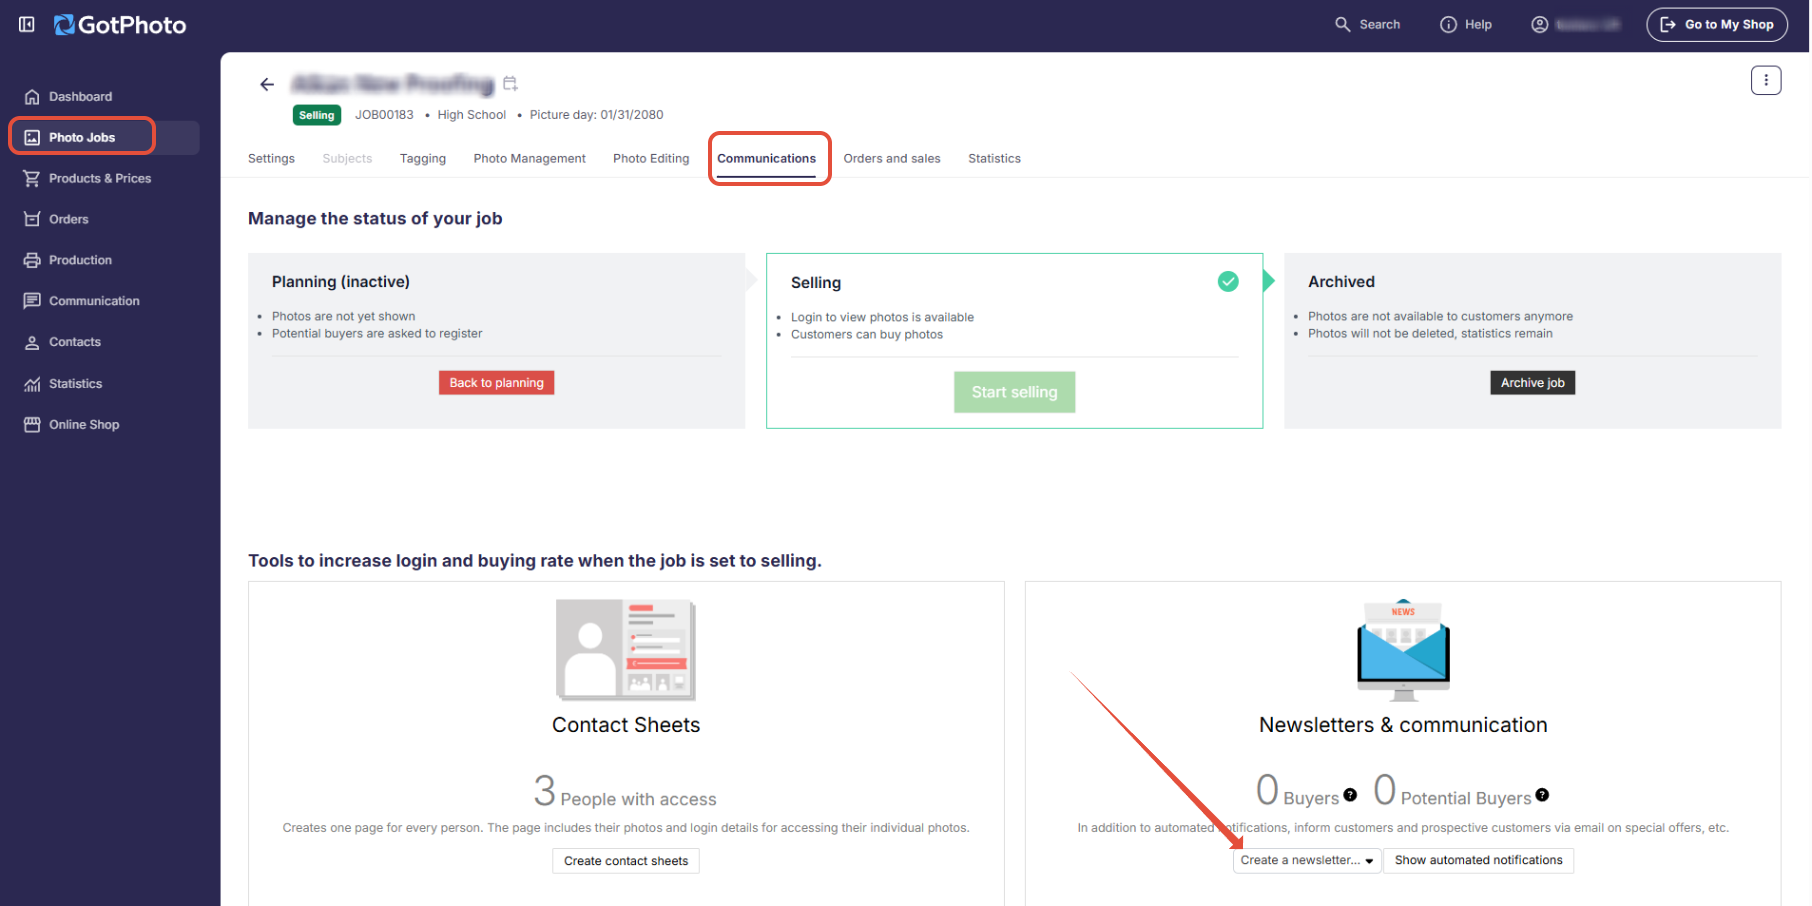 |  |
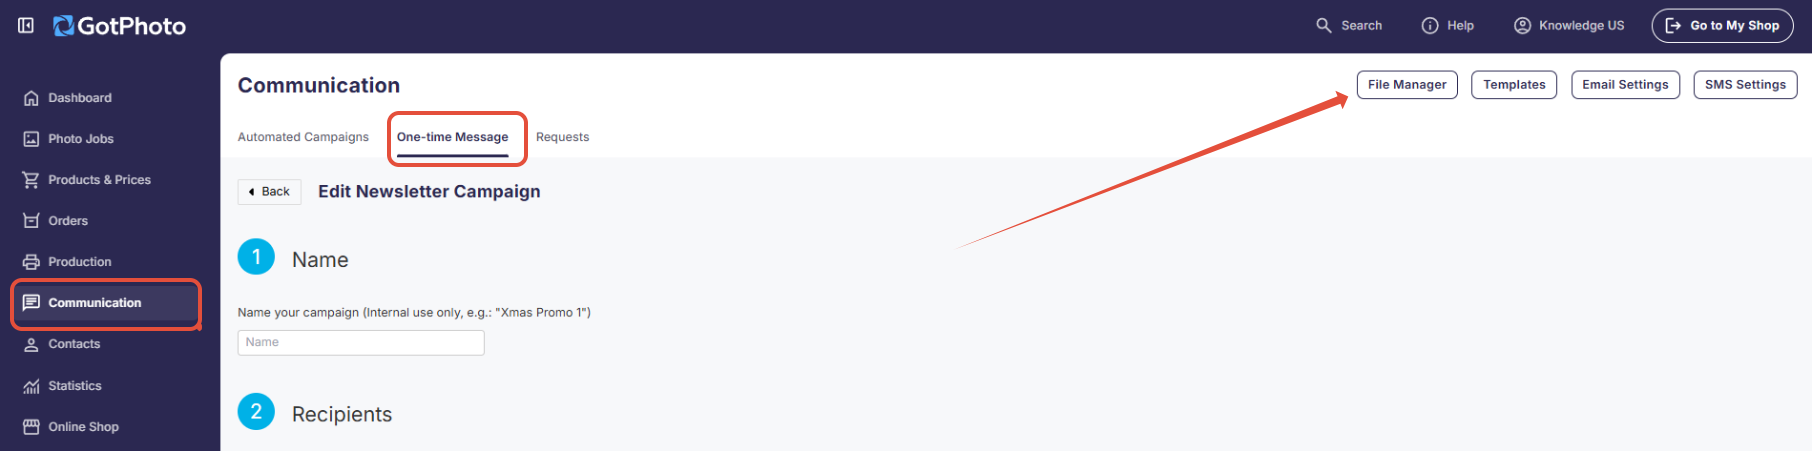
- A. From the Communication tab within a Photo Job: Sends to customers from that specific job.
- B. From the One-Time Message tab on the Communication page: Sends to all applicable customers across jobs.
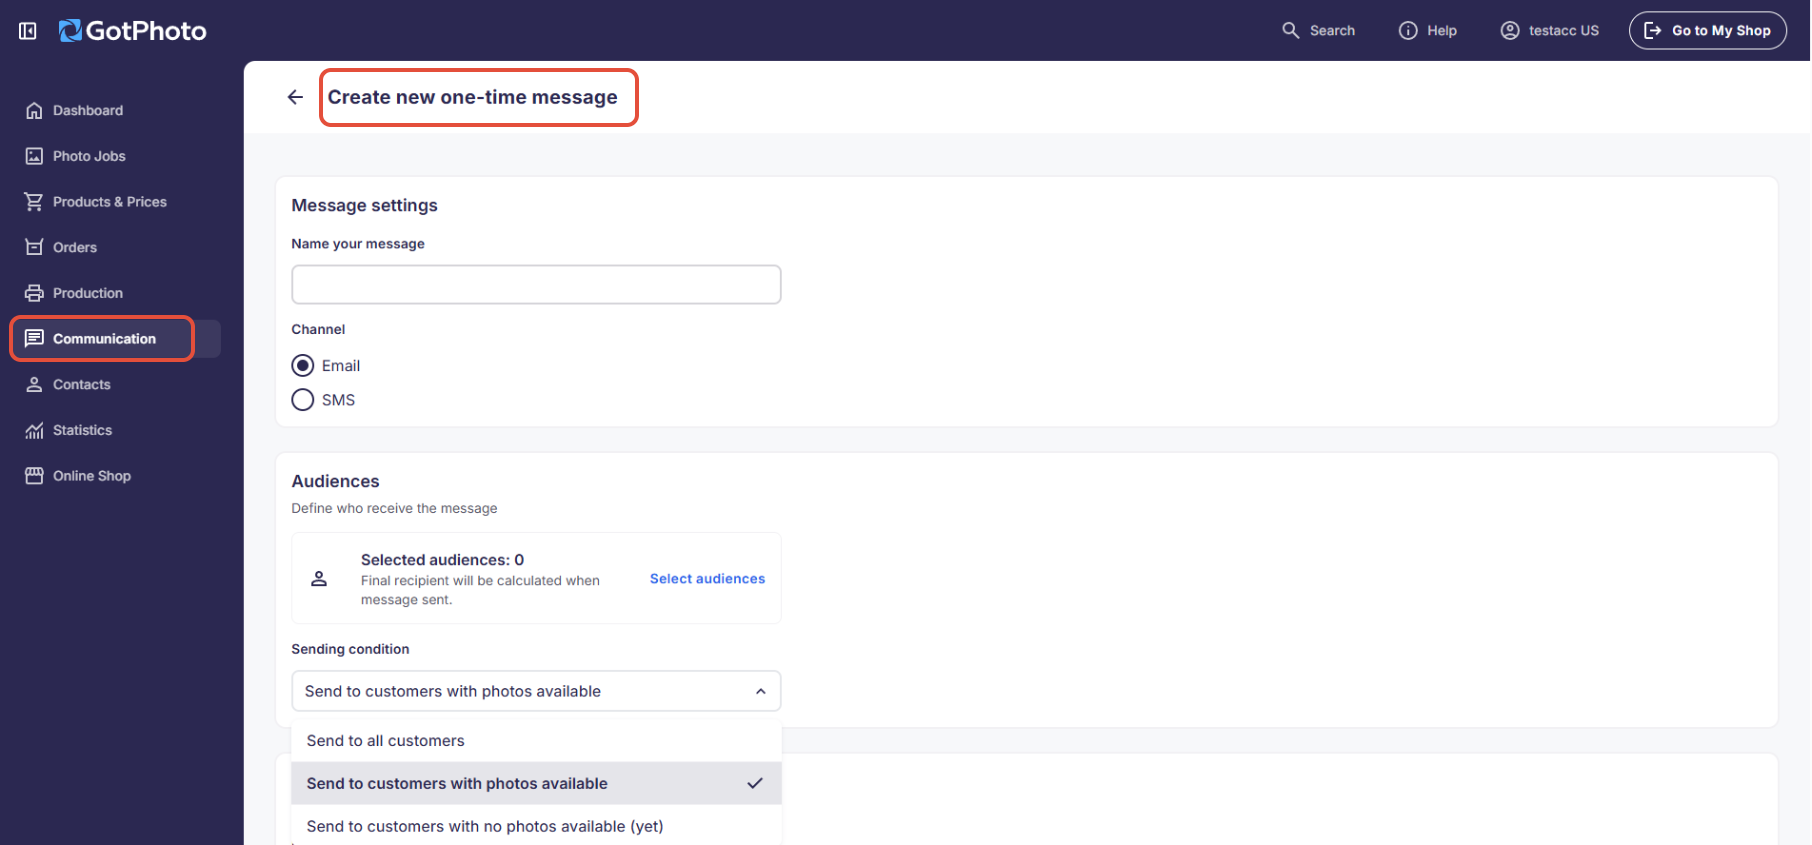
- Name: Provide a meaningful internal name for tracking purposes.
- Channel: For an email newsletter, select the Email format.
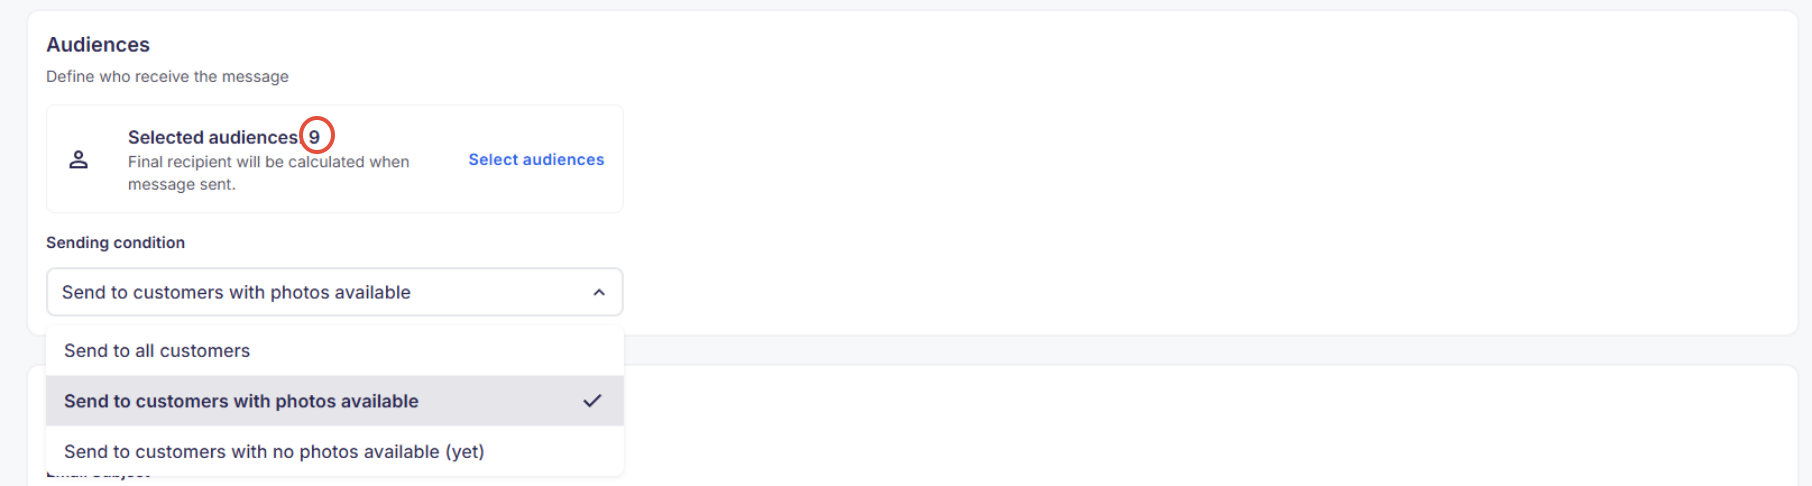
- Audiences: Use filters to select recipients by job, album/group, customer status, year (job created or customer created), or photo job type.

After you select the audience, press the button Apply selection.
4. Sending condition: Select the sending condition (all customers, with photos available, customers with no photos available).
5. Message content & Design: Use HTML or pre-loaded templates to customize your message.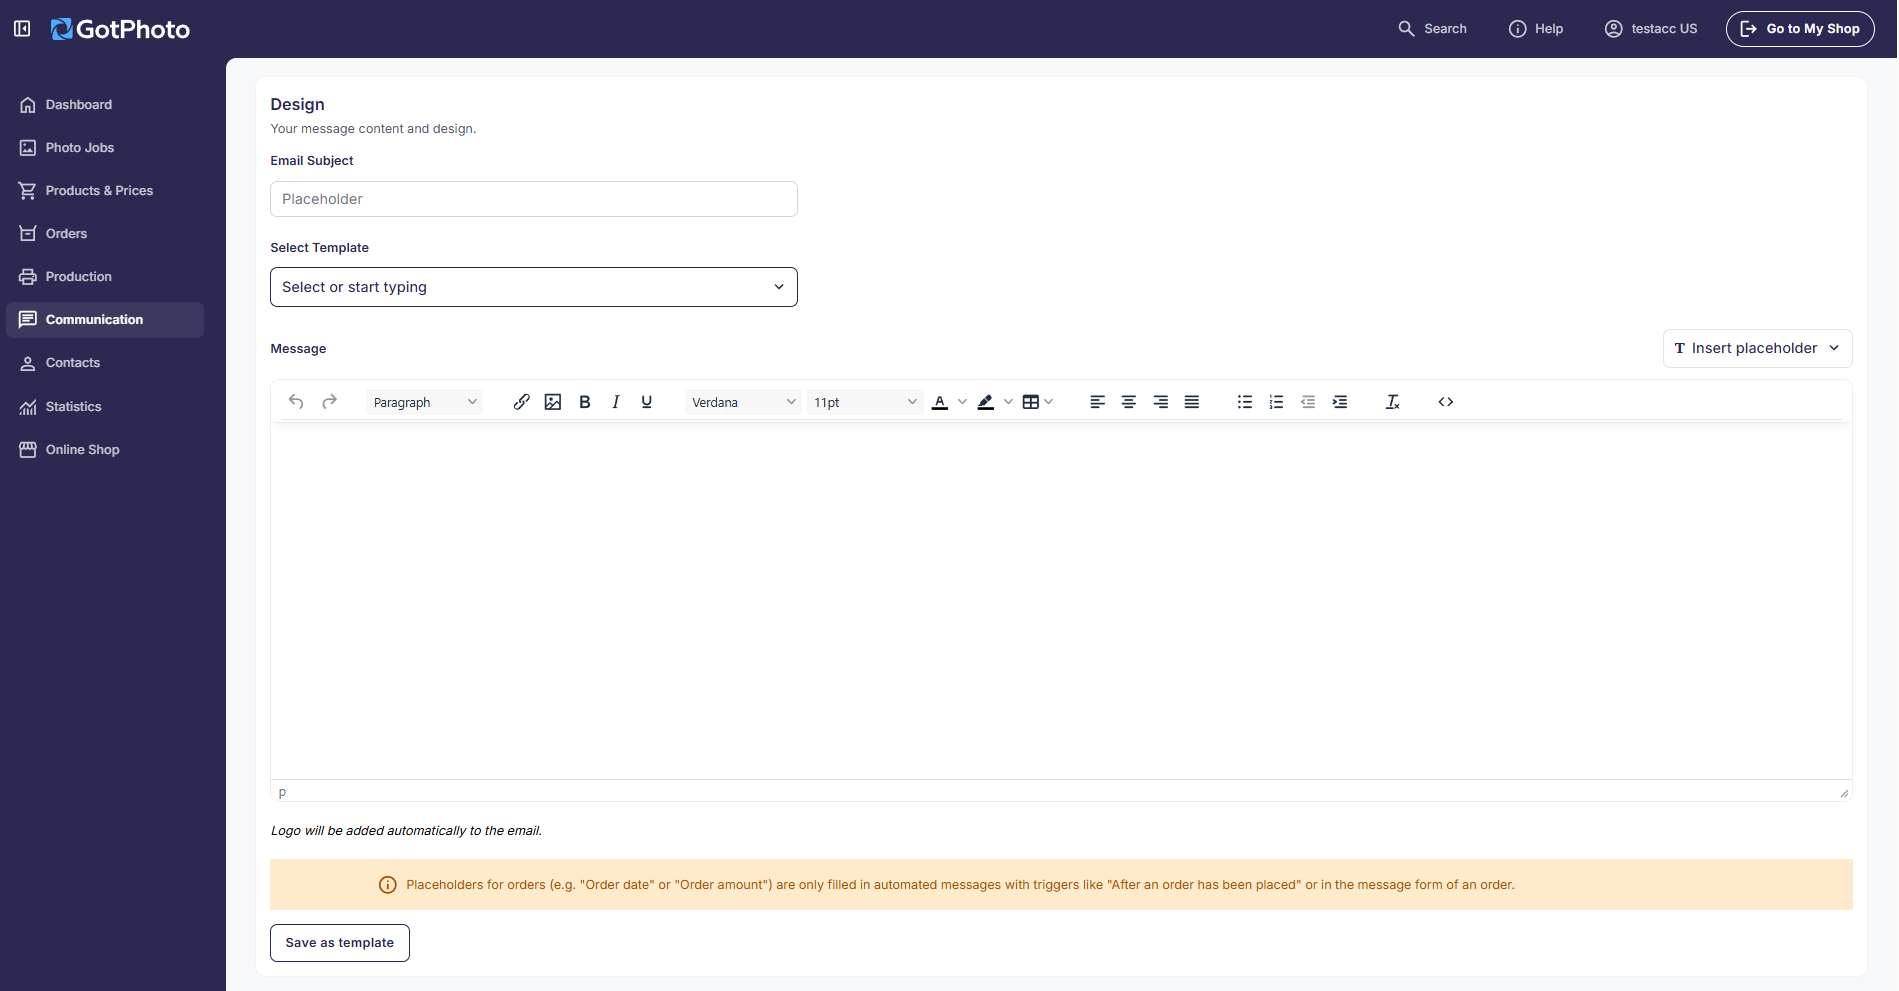
6. Email Subject: Enter a meaningful email subject. Be clear, short, and specific. Avoid vague, misleading, ALL CAPS, spammy words, or overly long subjects.
7. Templates: Alternatively, select a pre-loaded template from the drop-down menu.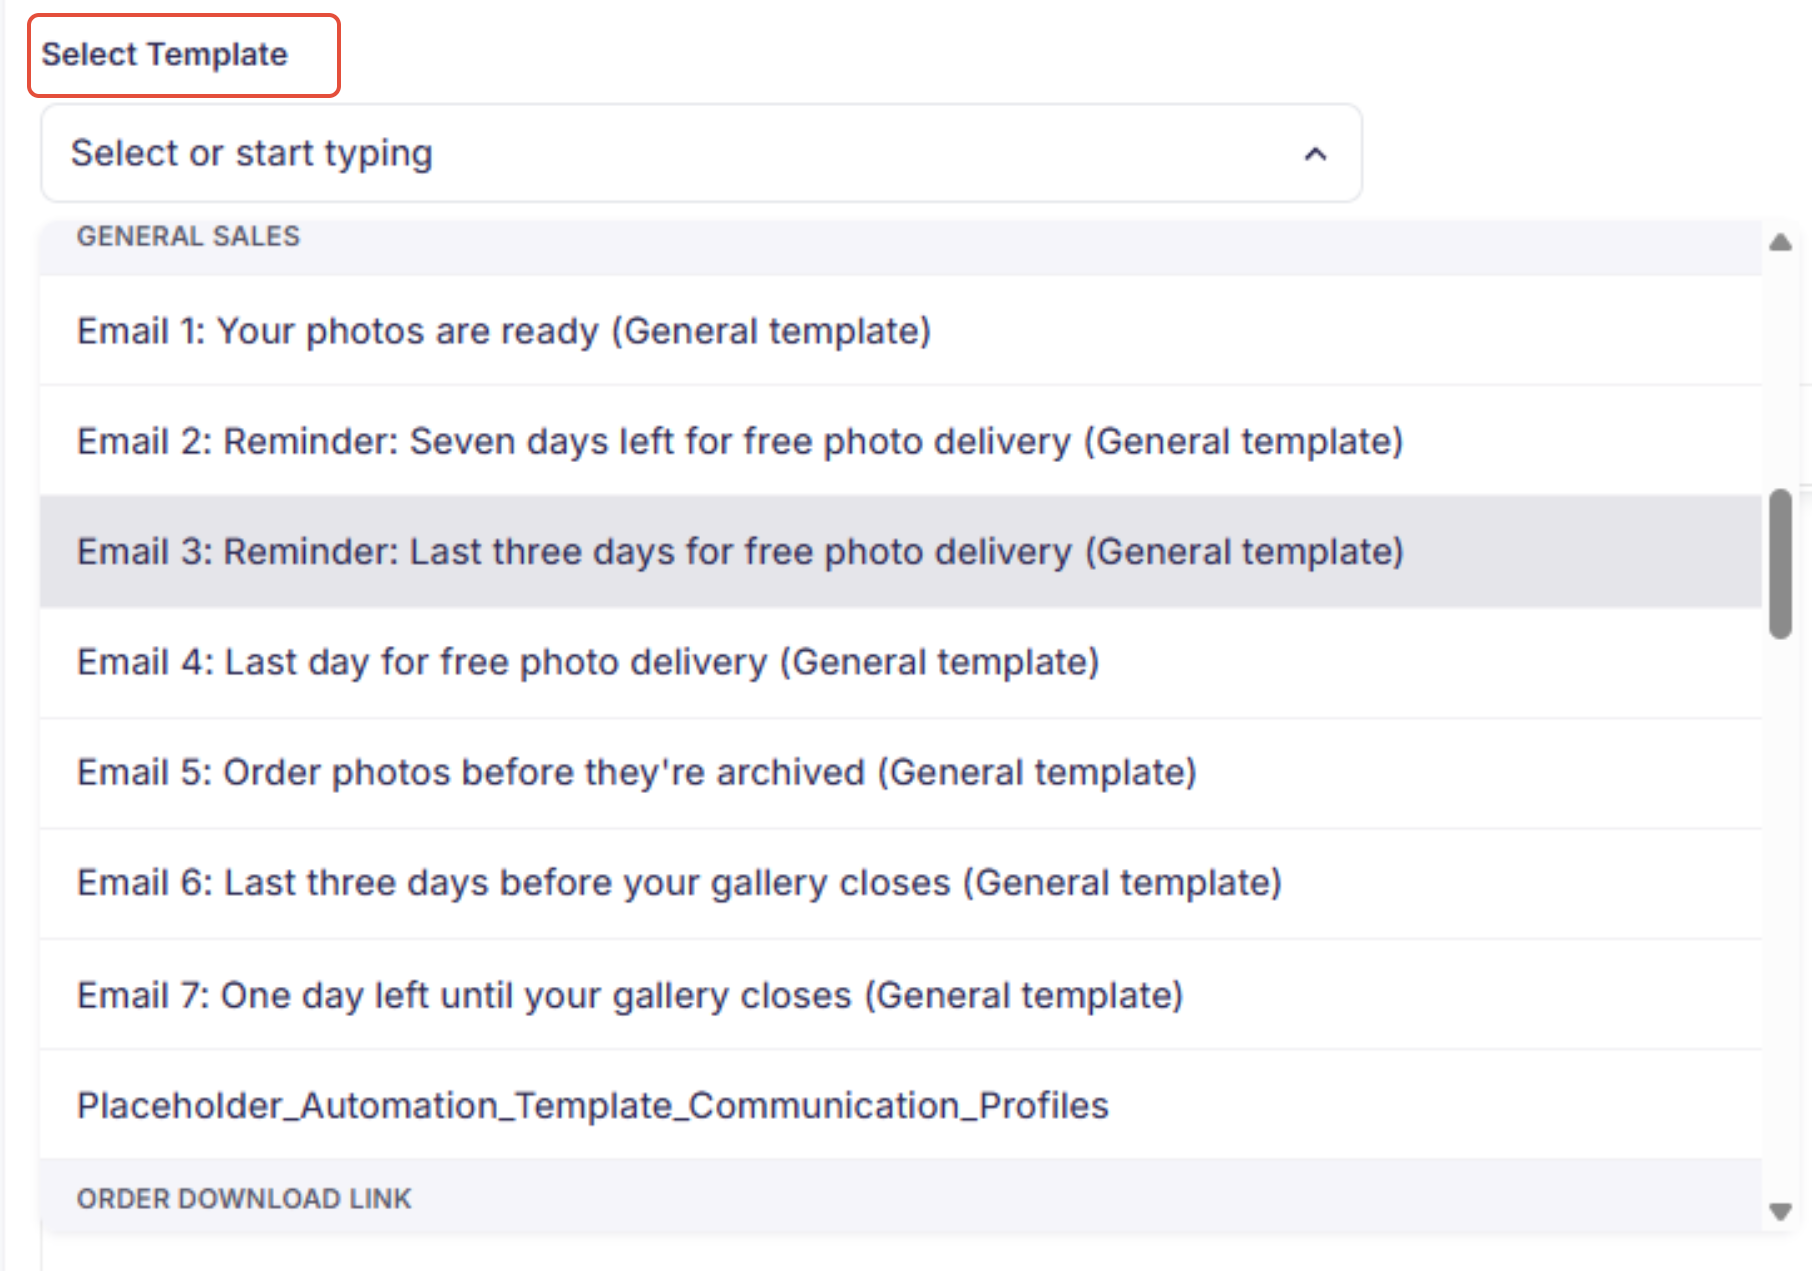
8. Automated scheduling: Choose to send immediately or check the box to schedule the email for later. Large batches may stagger delivery to avoid spam classification. ⚠ Important: After scheduling, click Send Newsletter to activate.

Adding images to a message
You can add images using the File Manager:
- Go to the File Manager on the Communication or Settings page. Upload your image and copy its URL.
- In your message, click the Image icon in the editor toolbar.

- Paste the image URL and add an alt description.

Finalizing and sending your message
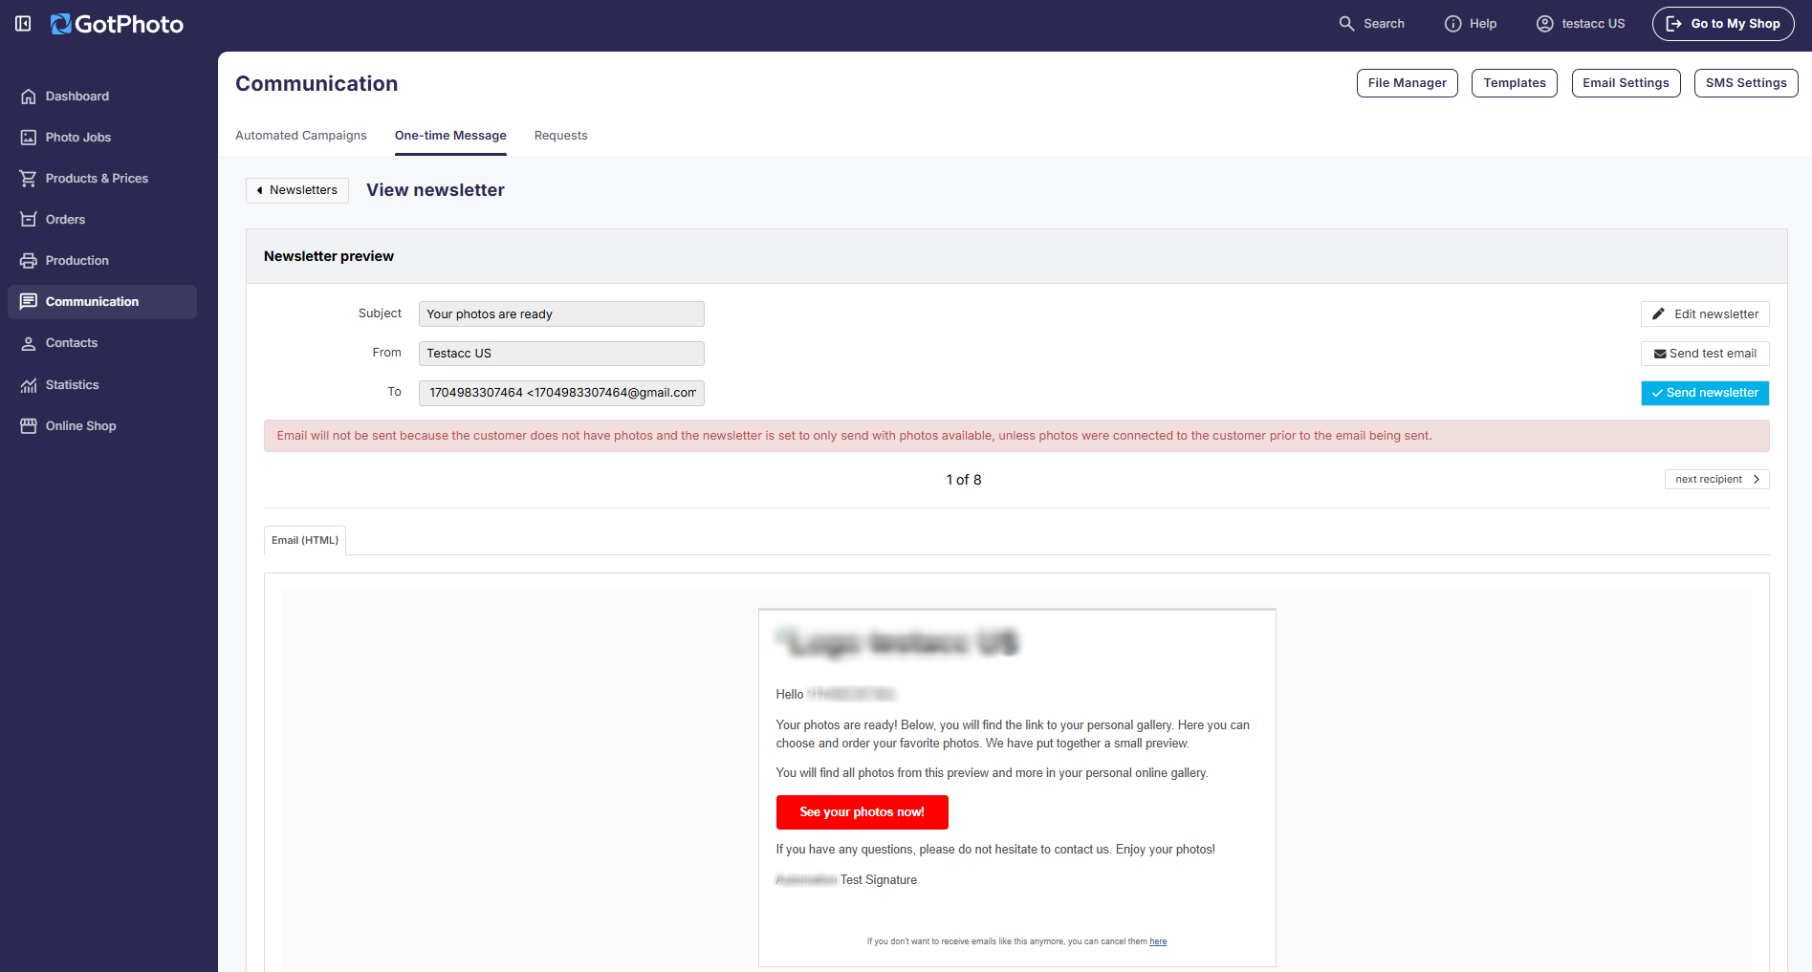
After completing your message, click Preview and Send. Preview it with all data populated and make final edits before sending.
From this review page, you can either:
- Edit the newsletter
- Send a test email to your account email
- Send the newsletter (if you selected to schedule it, it is now scheduled to go out on the selected day / at the selected time).
FAQs
How can I create a newsletter that includes access codes within it?
Because of data protection and compliance requirements, GotPhoto does not offer an automated placeholder to include individual access codes in newsletters. Automatically inserting personalized access codes into mass emails could expose sensitive login information and does not meet our security standards. However, there are alternative methods available to share login access efficiently with your clients.
US/CA Customers: We recommend using the placeholder "Customer's Login Information". This is your customer's personal link to automatically log in with the following placeholder text: " [[Customer.login]] ". This is the "quick login" link as seen on the access code preview page. Clicking the hyperlink will automatically log the end customer into the shop without having to input their access code manually.
UK Customers: Please use the GDPR-compliant placeholder "Customer's email address" [[Customer.email]].
If I schedule a one-time newsletter for next week and select the group "potential buyers"+"with photos available" and some of them place an order in the meantime, will they still receive the newsletter?
Yes, unlike automated campaigns, the system does not re-evaluate the status of recipients once a newsletter has been scheduled, which means it is best to manually send the message at the time it should actually be sent if you want to target a specific group instead of all customers. If you have already scheduled the newsletter, you can still update the recipient group by editing the scheduled newsletter right before it is sent, removing the current recipients, adding the group of potential buyers with photos again, and saving the changes. This way, the recipient group will be refreshed and up to date before the emails are sent.
Are one-time email newsletters only sent between 9 am and 9 pm, similar to notifications in automated campaigns?
Unlike automated campaigns, email newsletters can be sent immediately or scheduled for any time during the day. Once started, they are sent as quickly as possible within legal limits until all messages are delivered; no specific timeframe can be defined. Our system uses a staggering method to send messages in batches. Depending on the number of recipients, delivery may take some time. To avoid late-night deliveries, schedule one-time emails earlier in the day to ensure the final batches are delivered before quiet hours begin.
Can I create a one-time email and SMS at the same time?
You need to create the one-time email and SMS separately, one after the other.
The takeaway
Whether you're targeting a single job or your entire customer base, one-time messages give you a flexible way to engage your audience with important updates, promotions, and personalized content.