
Table of contents
- Overview
- Create and add a message
- Compose an email notification
- Compose a text message (SMS)
- Best practices for live jobs
- The takeaway
Overview
Personalized emails and text messages help you engage customers and drive conversions. This article explains how to add a new email or SMS notification to an automated campaign.
Create and add a message
Add a notification to a campaign by choosing the trigger, timing, and audience.
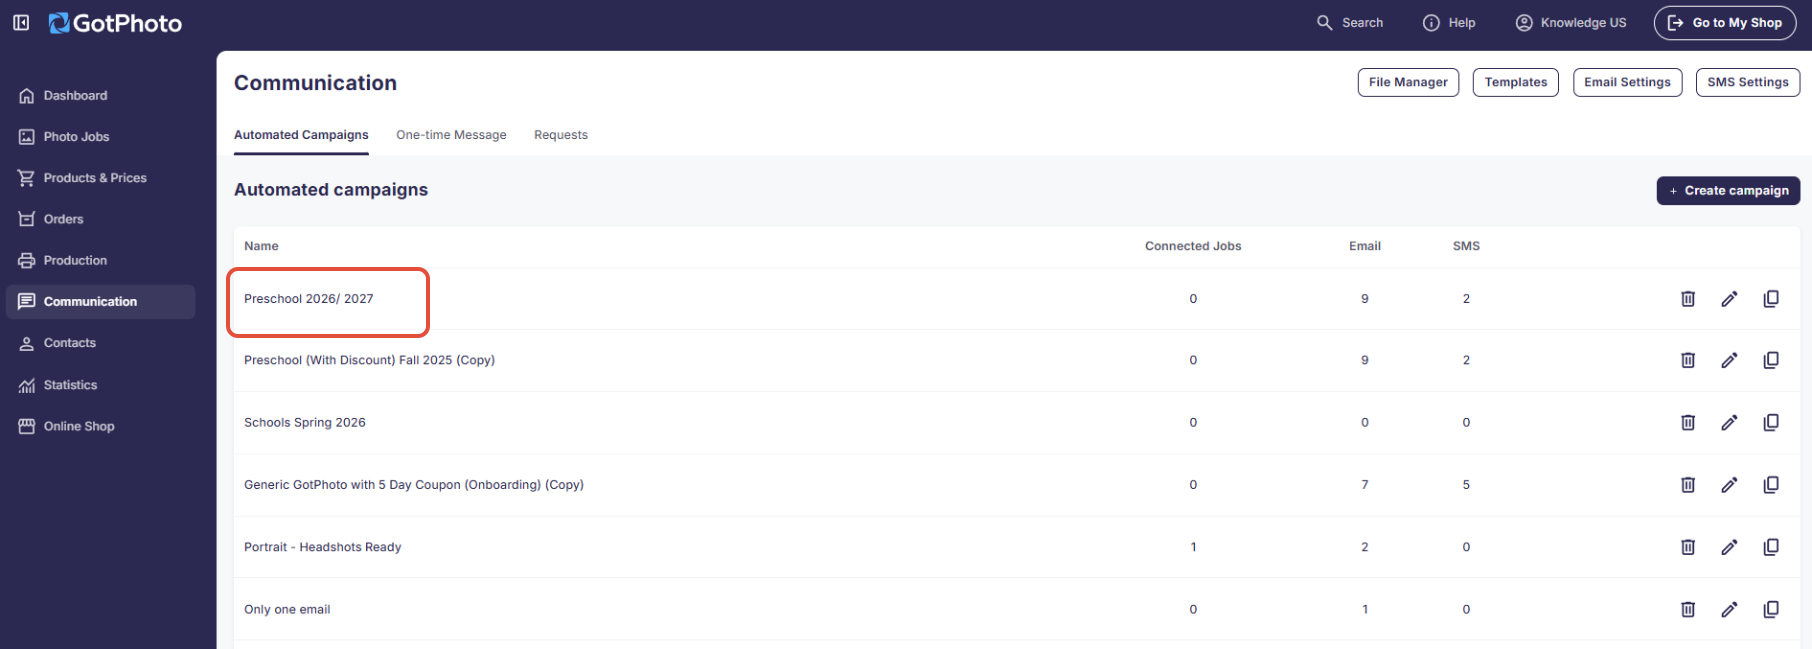
- Go to the Communication page and open the Automated campaigns tab.
- Open your campaign by selecting its name (blue link) or use Actions → Edit.
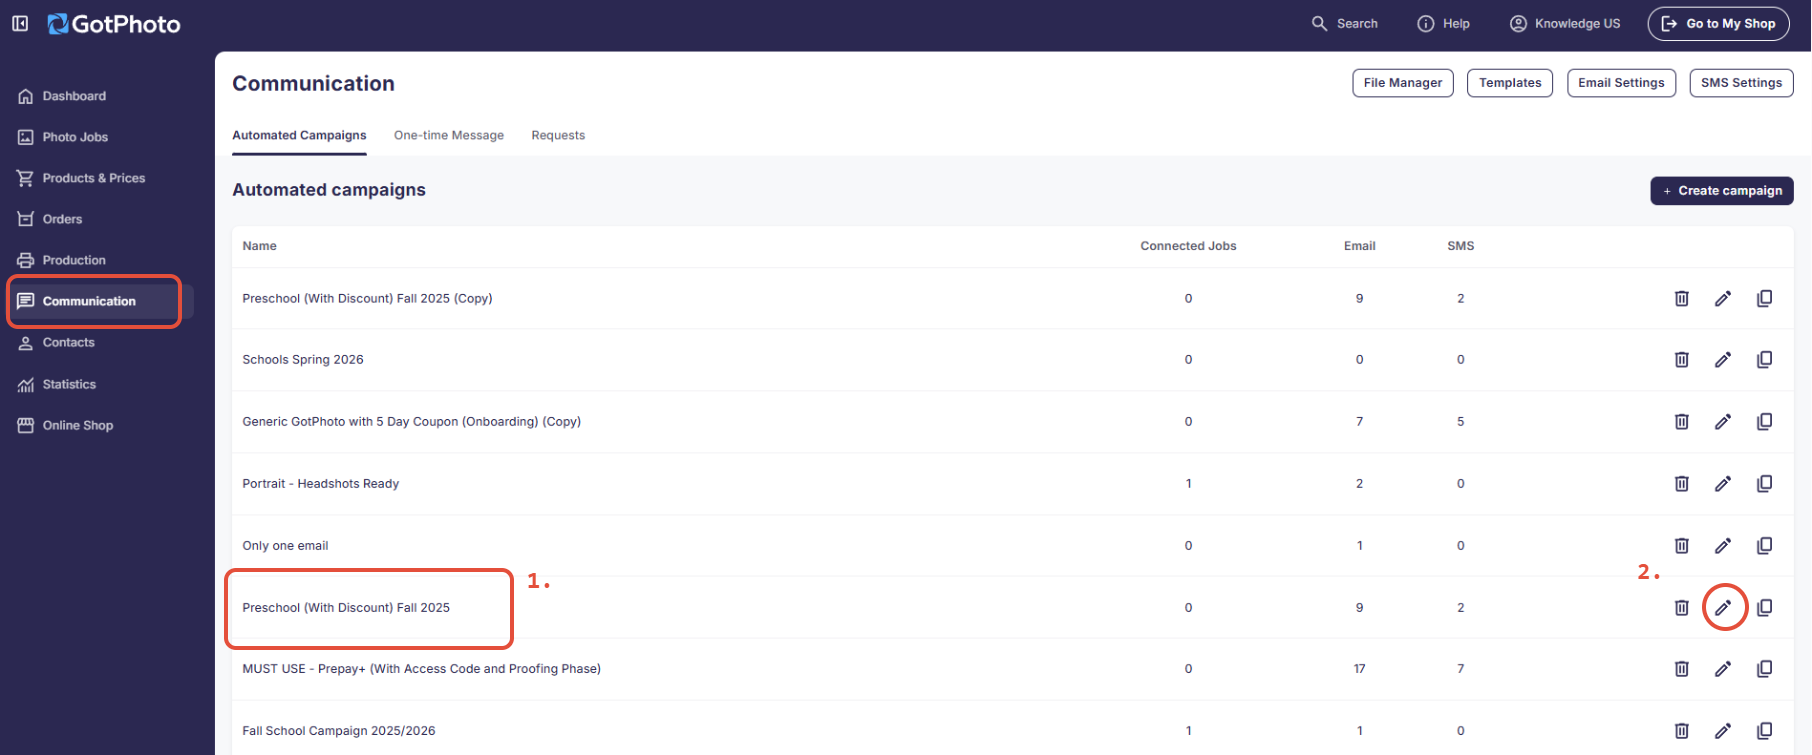
- Click the blue + Add notification button. If you want to add a notification to a standard GotPhoto campaign, duplicate the campaign first and edit the duplicate.
- Select your trigger. Choose the event (e.g., before picture day, photos live online) that sends the message.
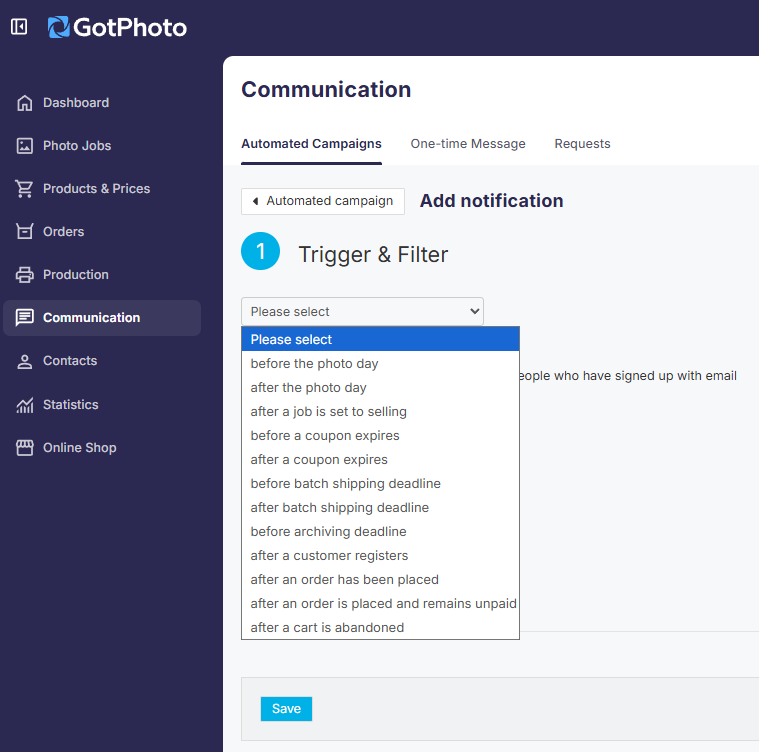
- Select the number of days. For example, “1 day before” sends the message one day before picture day.
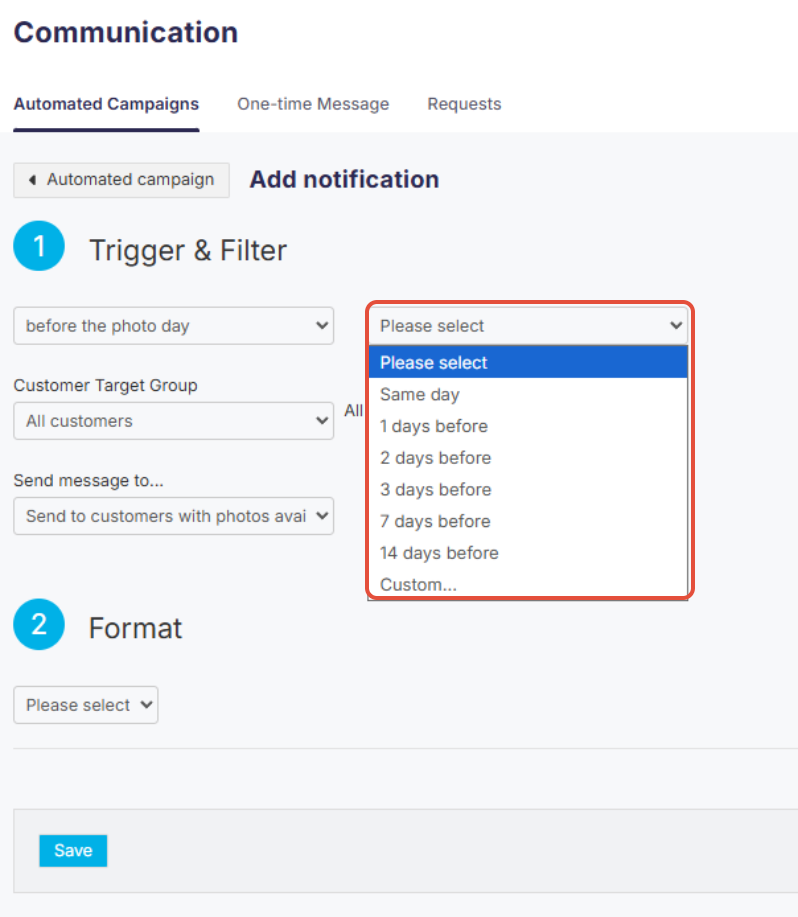
- Select the time. Choose a morning or evening time range. If you selected “immediately,” the time is set automatically.
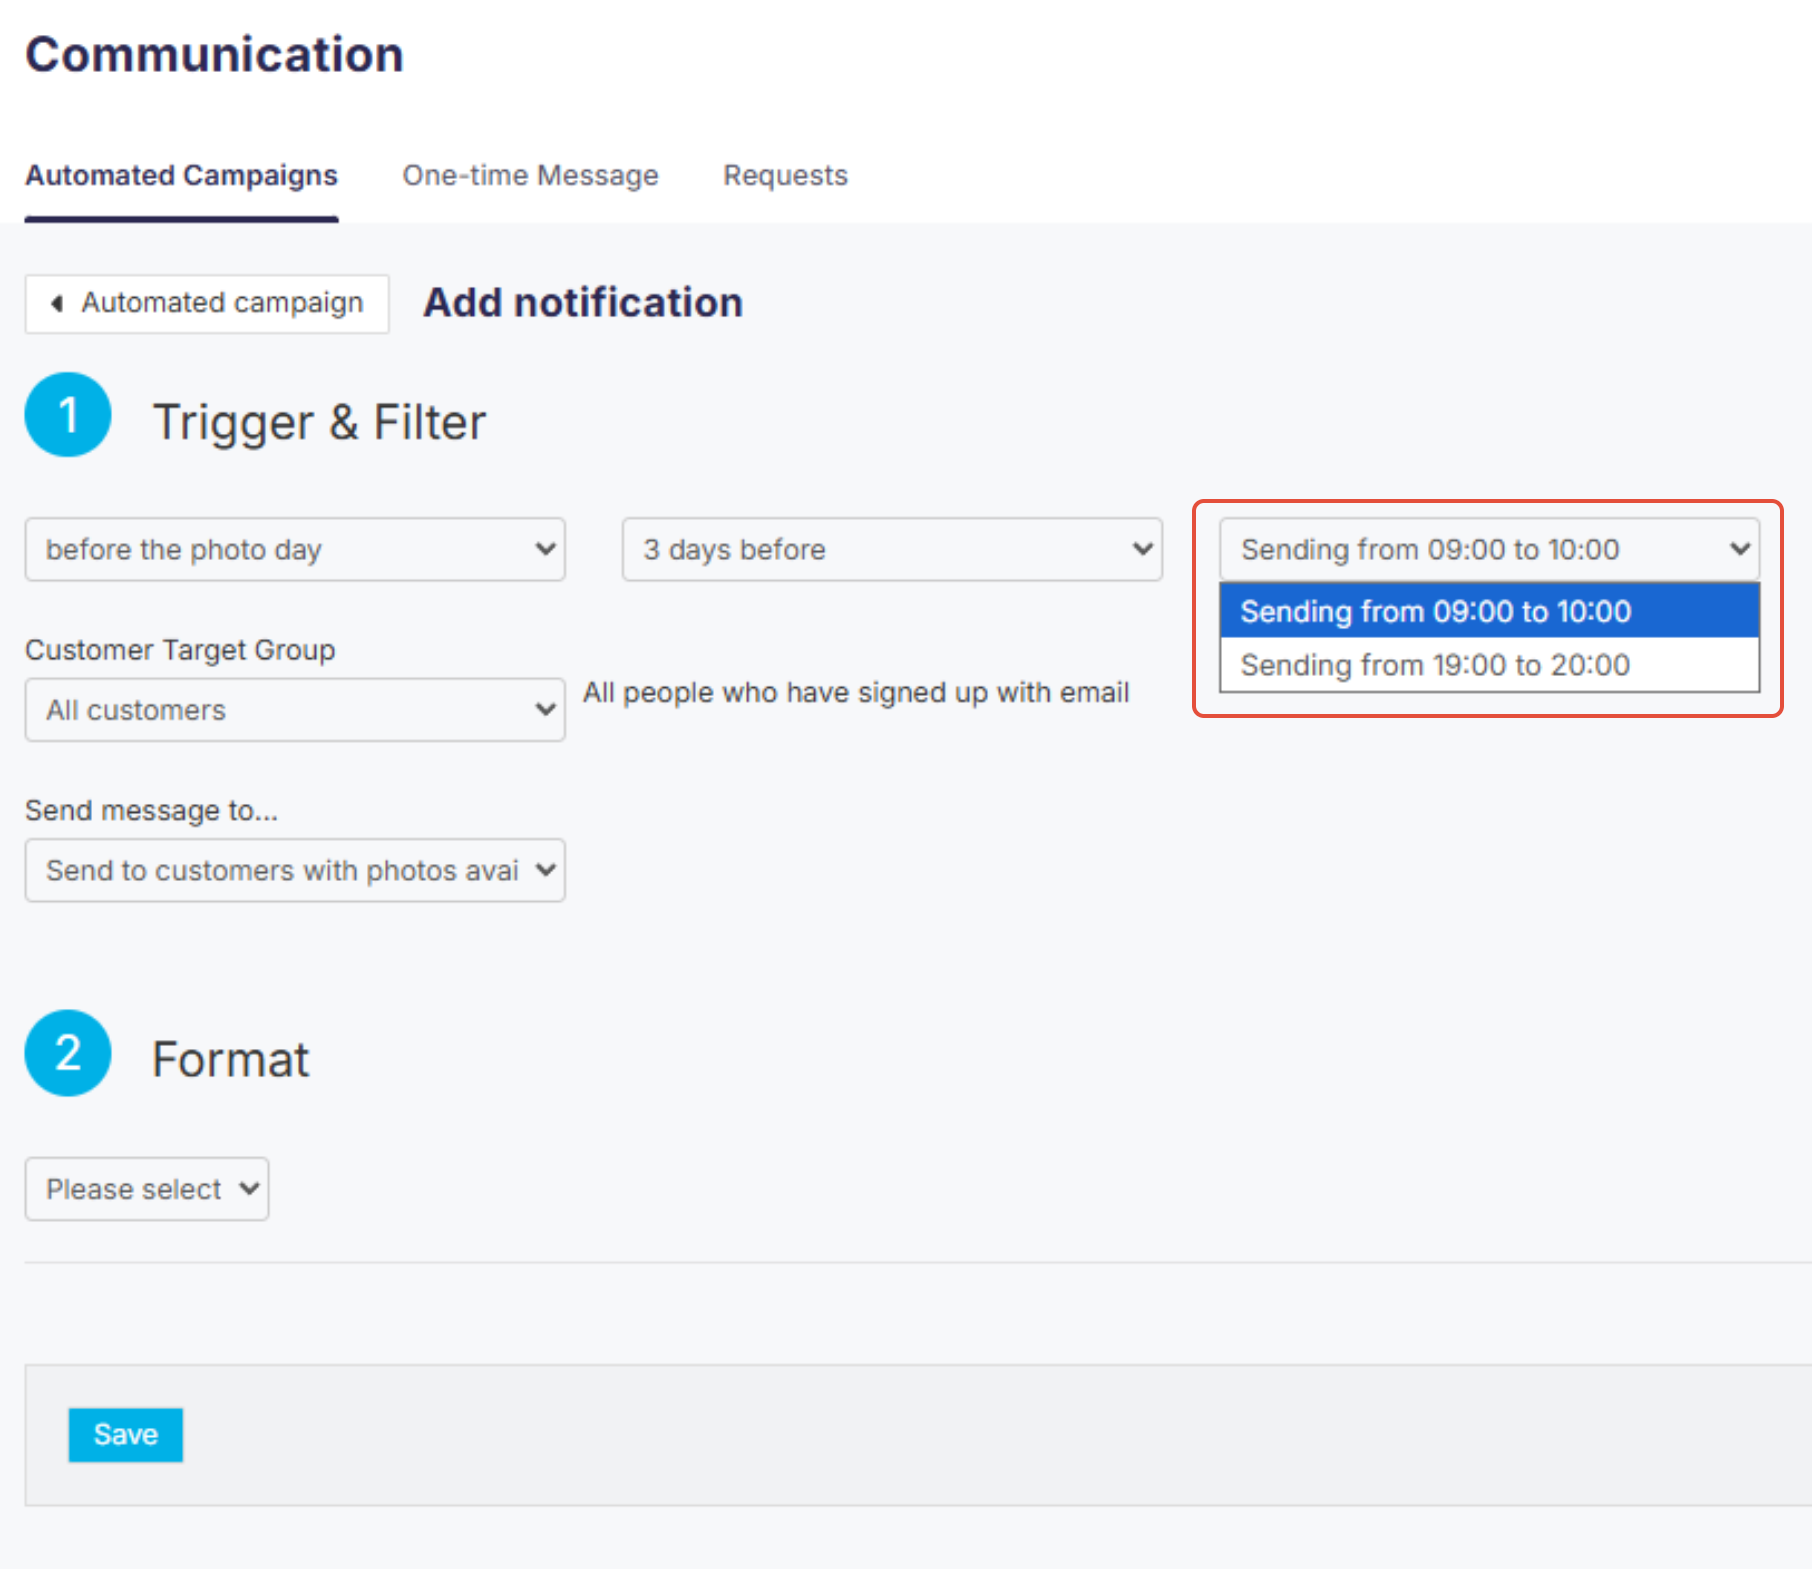
- Choose your customer target group. Send to potential buyers, buyers, or all customers (some triggers set this automatically).
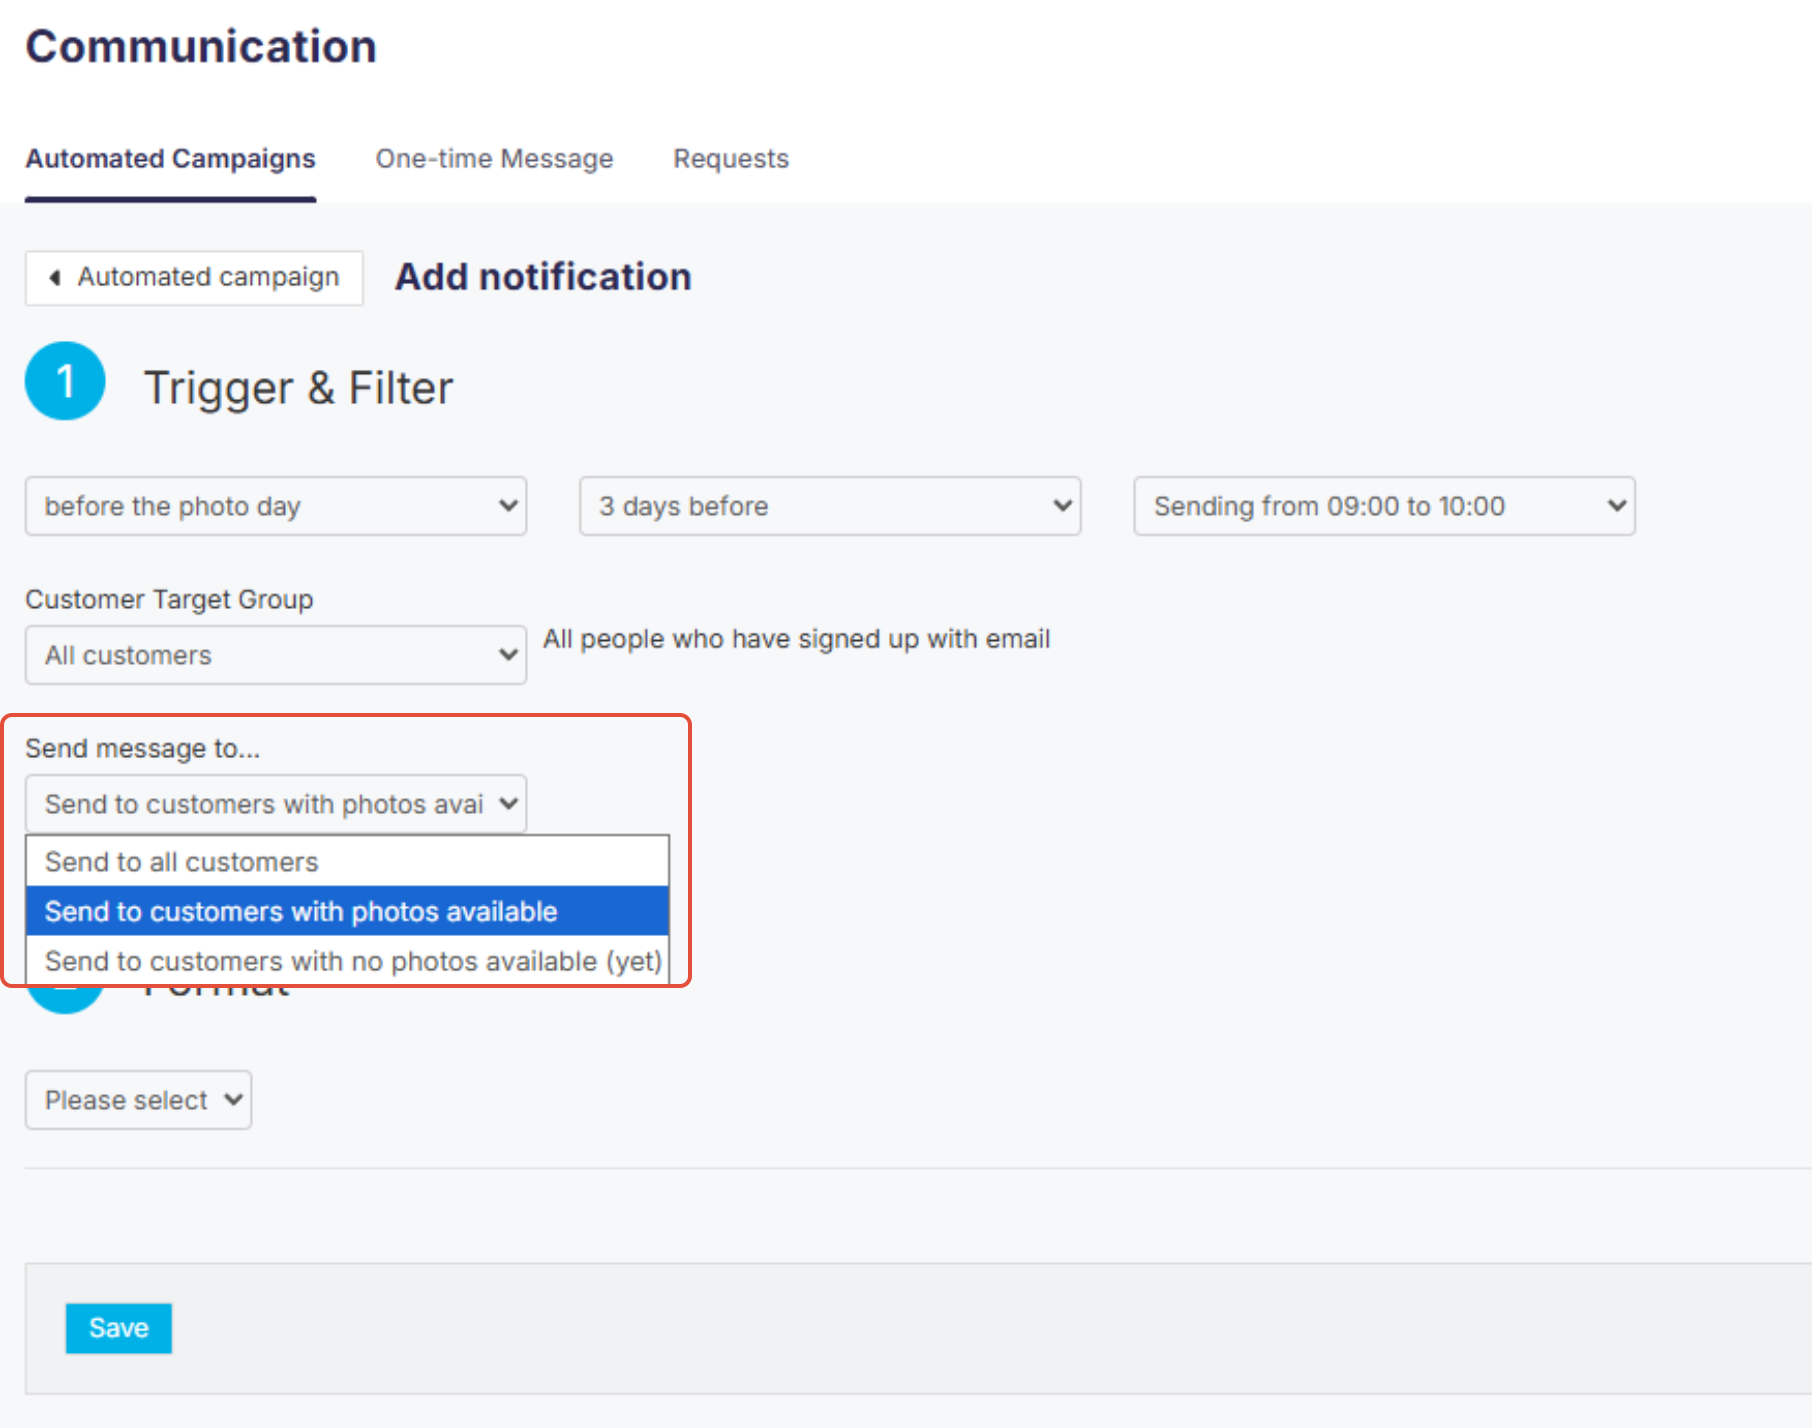
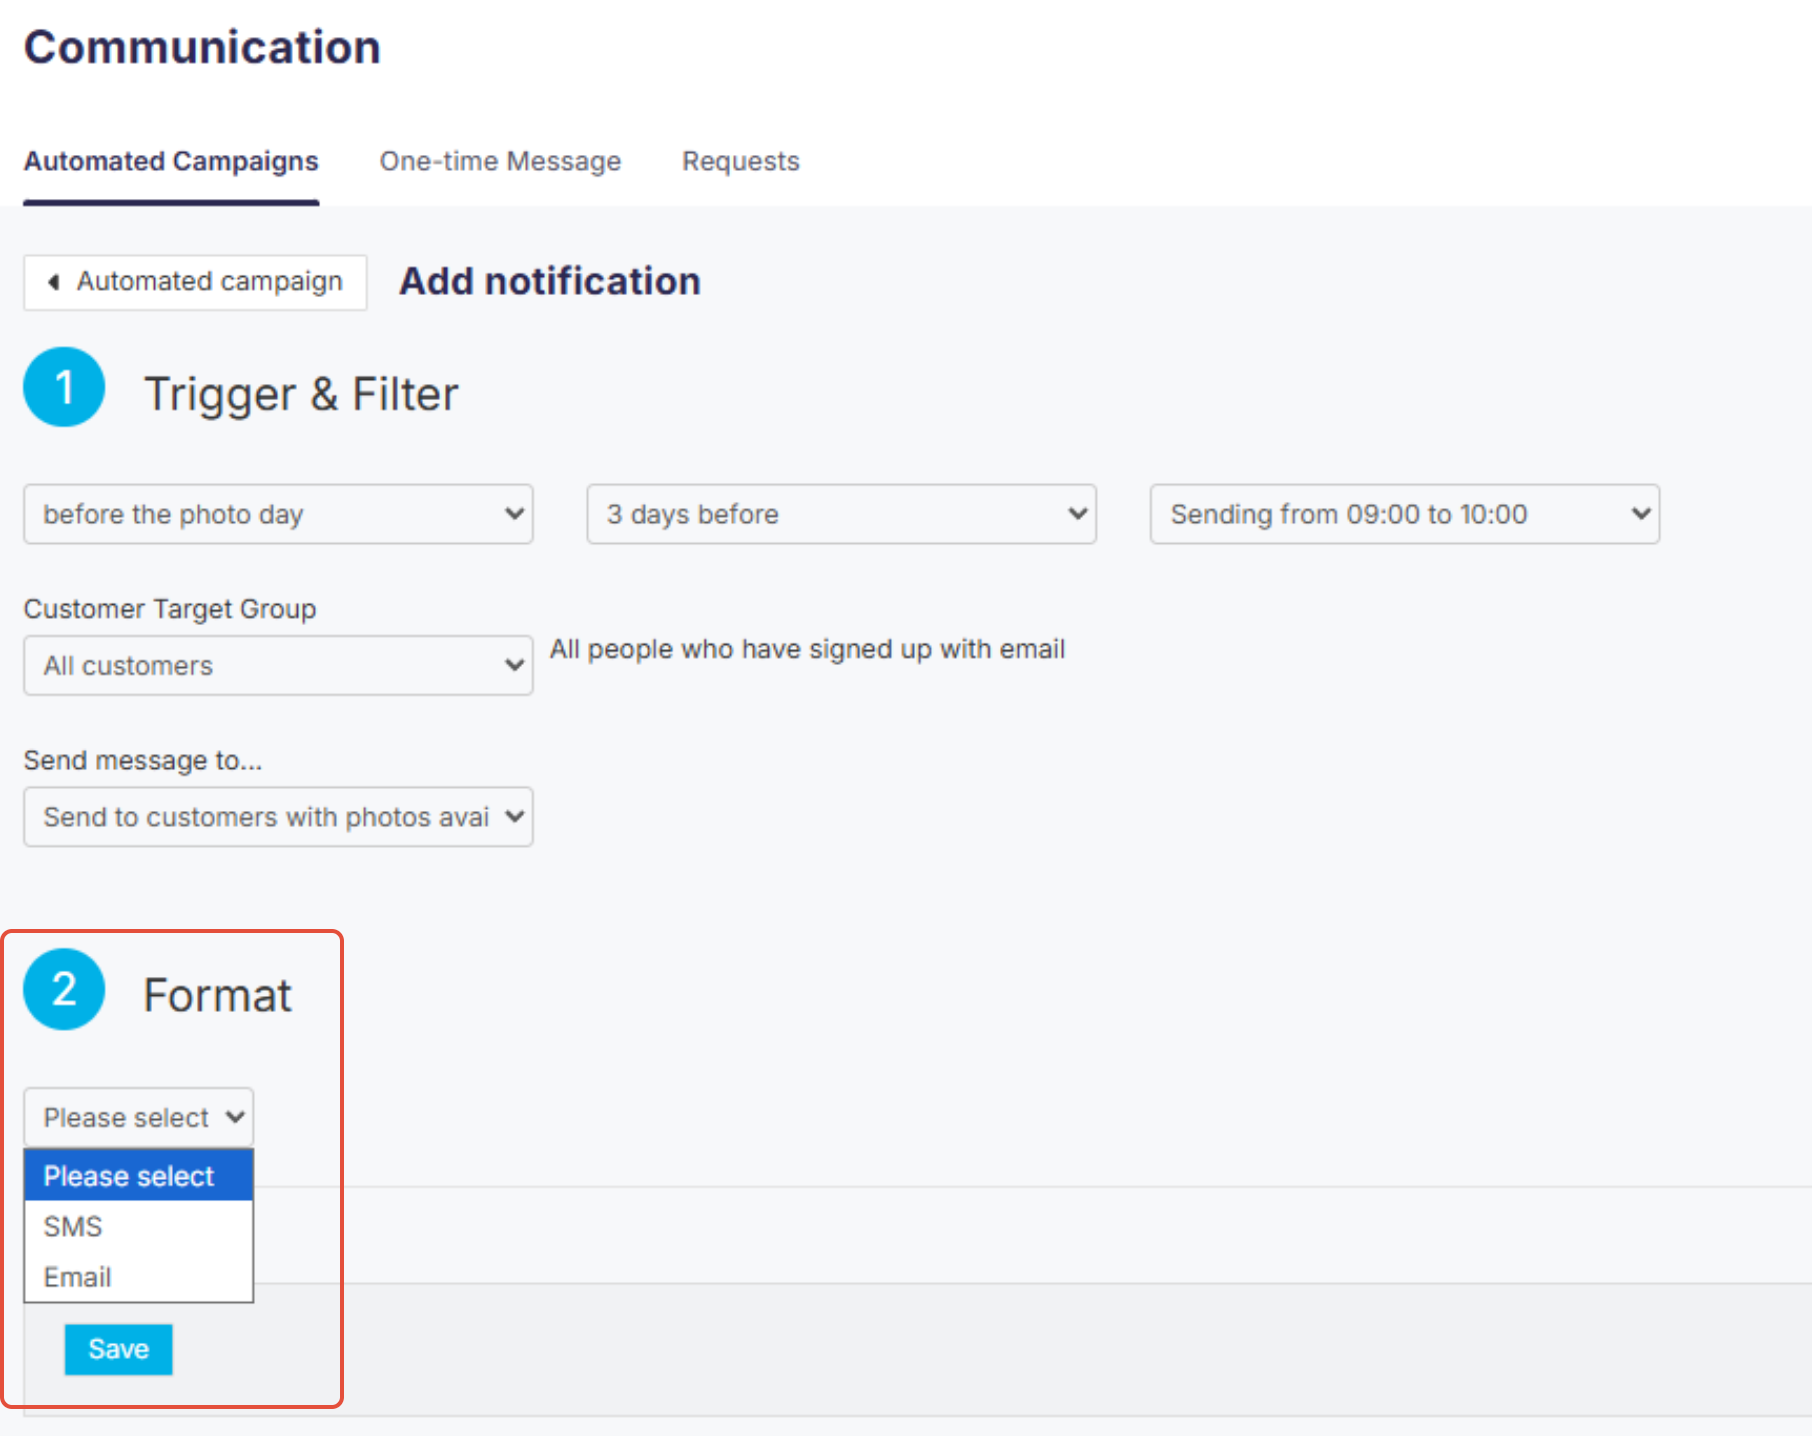
Next, choose whether to send an email or a text message (SMS). You can use both in one campaign by creating separate notifications with different triggers.
Compose an email notification
Create and format the email content customers will receive.
- Select Email as the notification format.
After selecting Email, the rich-text editor appears.
- Enter a concise, compelling subject line.
- Write your email:
- Use the toolbar to format text, or
- Select a template from the library.

- [Advanced] Add placeholders (e.g.,
[[Customer.firstname]]) to personalize messages. If no customer name is available, the placeholder populates with the email address; consider using general terms like “Families” or “Parents” when buyer data is limited.
- Click Save.
- Review the notification by clicking its name in the Automated Campaign overview to confirm trigger settings and preview the email.
Compose a text message (SMS)
Build a concise text message for timely alerts and reminders.
Availability: SMS capabilities are currently available to North American customers only. GDPR-compliant SMS for UK customers is planned for the future.

- Select SMS as the notification format, then click Save to open the text editor.

- Write your message. Aim for ≤ 150 characters to avoid sending multiple texts.

- [Advanced] To customize the text, use the customer name's placeholder, e.g.,
[[Customer.firstname]]). If no name exists, the placeholder uses the beginning of the customer’s email address; use generic greetings when data is limited. - Click Save.
- Return to the communication profile overview to verify trigger settings and View a preview.
Best practices for live jobs
When a communication profile is used in one or more active jobs:
- Adding a new notification works best when the trigger event is still in the future.
- Check other jobs using the same profile to keep timing and messaging consistent and avoid unintended sends.
The takeaway
Use automated campaigns to deliver the right message at the right time. Define the trigger, timing, and audience, then compose an email or SMS (where available). Personalize with placeholders, and review profiles used in live jobs before making changes.