
Table of contents
- Overview
- 1. For up to 3 subjects: Using the (+) button
- 2. For 4 or more subjects: Adding barcodes via editing software
- 3. For 4 or more subjects: Adding access codes manually in GotPhoto
- The takeaway
Overview
For buddy and sibling shots, you can add multiple barcodes to a single image to ensure it appears in each subject’s gallery. For groups of up to three subjects, you can do this on-shoot using the Entagged app. For groups of four or more subjects, you can choose from two workflows, depending on your editing preferences.
1. For up to 3 subjects: Using the (+) button
[Optional] This feature is disabled by default. Enable it via: Menu → Entagged (gear icon) → Your Entagged → Settings → Toggle “Disable append code button” to OFF.
- 1At the top of the Entagged app’s main screen, locate the current code or name saved to the camera. To the left, tap the (+) button to toggle appending mode:
- Yellow (+): Appending is enabled. Scanned/tapped codes will be added to the current code list—ideal for buddy or group shots.
- Black (+): Appending is disabled. New scans replace the previous code—best for individual shots.
- 2Scan codes or tap names (from the Name List) for all subjects to be photographed together. Then take the photo.
- 3To clear codes: Tap the (x) on the right, then scan/select the correct code(s) before taking the next shot.
- 4Disabling the (+) button: If not needed, disable it in settings. When off, the button will appear greayed out and tapping it will show how to re-enable.
2. For 4 or more subjects: Adding barcodes via editing software
If editing in software like Adobe Lightroom, you can manually add multiple barcodes in the image metadata.
- 1Open the metadata editor for the selected photo(s).
- 2Locate the barcode field based on your camera model:
- Nikon & Fuji: UserComment (ExifTag 0x9286)
- Canon: Copyright (ExifTag 0x8298)
- Sony: ImageID (ExifTag 0x2043, exiftool calls it Sony_0x2043)
- 3Add barcodes separated by commas, no spaces. Example:
378275558736212,992718443532654,248919066121904 - 4Save your changes and export the photo as usual.
- 5Upload your image(s) to GotPhoto.
3. For 4 or more subjects: Adding access codes manually in GotPhoto
If you’ve already uploaded your images to GotPhoto, you can still assign multiple access codes per photo directly in the platform.
- 1Navigate to the relevant gallery in your GotPhoto account.
- 2Select the image, then click Add access code on the right panel.
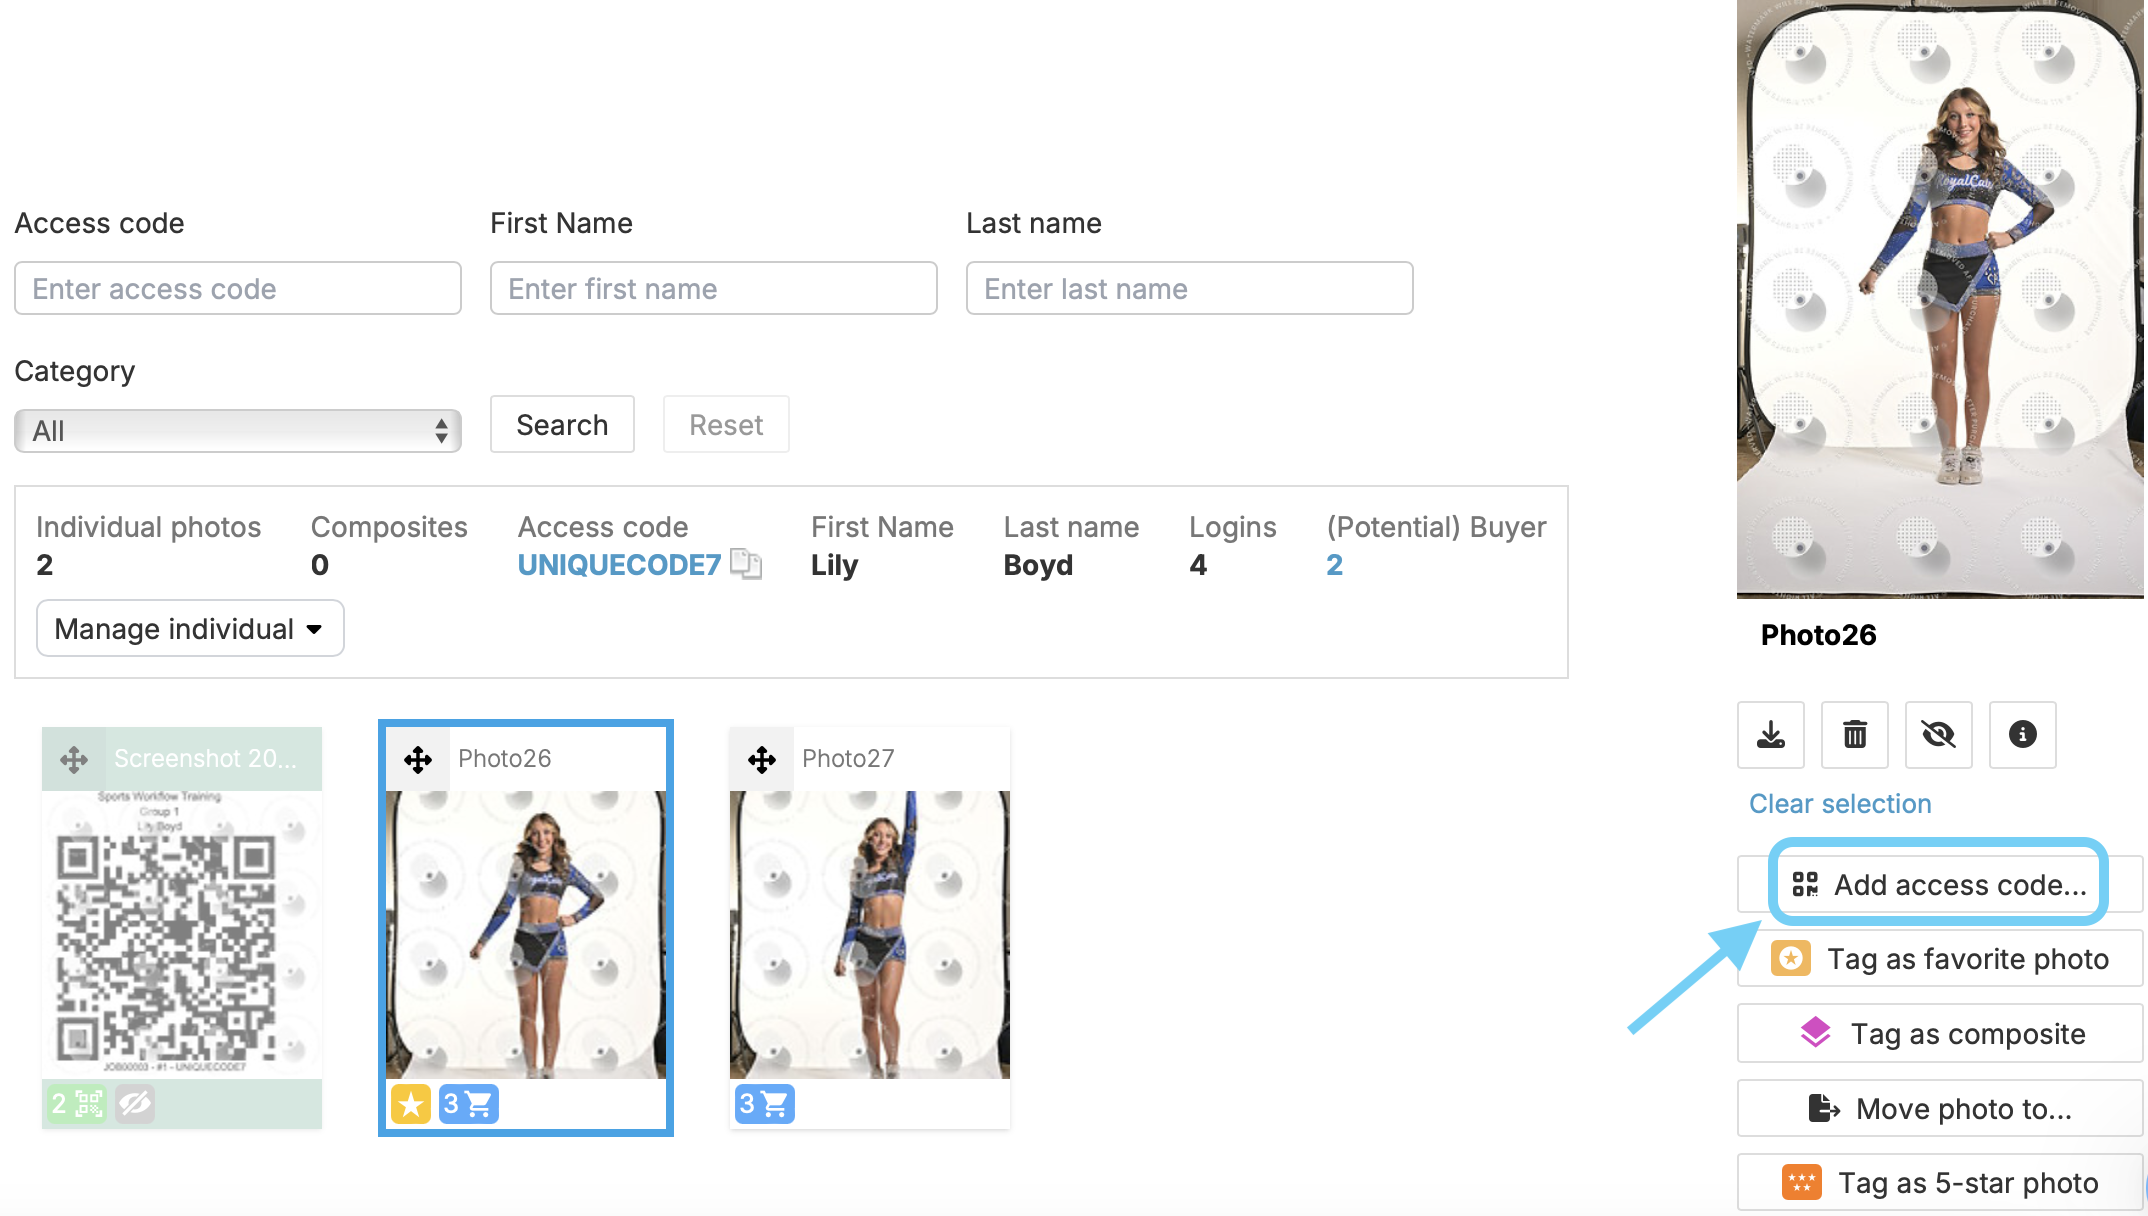
- 3Enter the additional access codes separated by commas, without spaces.
- 4Click save to confirm.
- 5The image will now appear in each subject's gallery associated with the access codes.
The takeaway
To ensure group photos appear in each subject’s gallery, use one of these three methods to add multiple barcodes to a single image - either during the shoot using the Entagged app or after, using metadata tools or the GotPhoto platform directly.