

This feature is currently only available for customers in North America.
Overview
Life happens! When students miss picture day, you may need to organize a Makeup Day. This article introduces GotPhoto's updated workflow for managing Makeup Day photo sessions efficiently.
Functionality
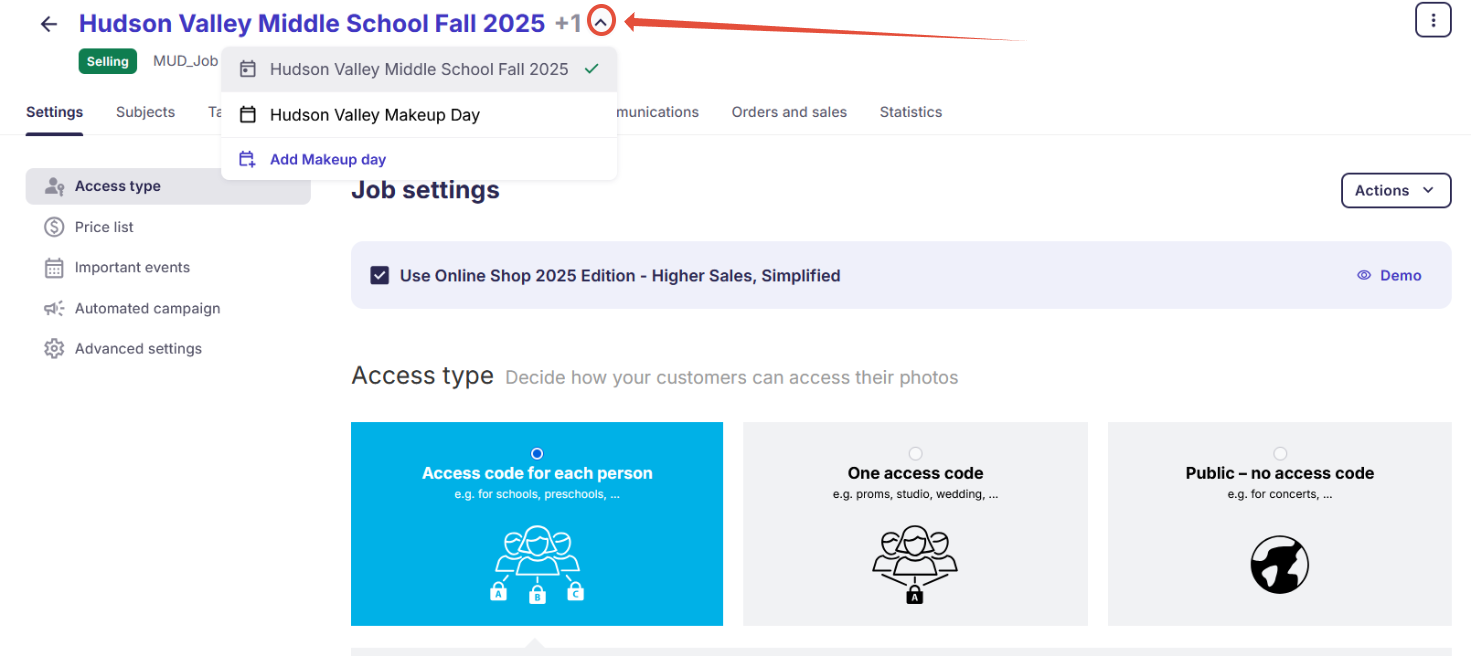
You can now add one or more sub-jobs to your main job for Makeup Day sessions. This keeps your jobs organized and provides separate tracking for orders, effort, and revenue. Makeup Day sub-jobs appear beneath the main job in your overview and can be expanded using the ˄ symbol.

Workflow
- Create your main job and upload your names list as usual.
- On the job's main settings page, click + Add Makeup day.
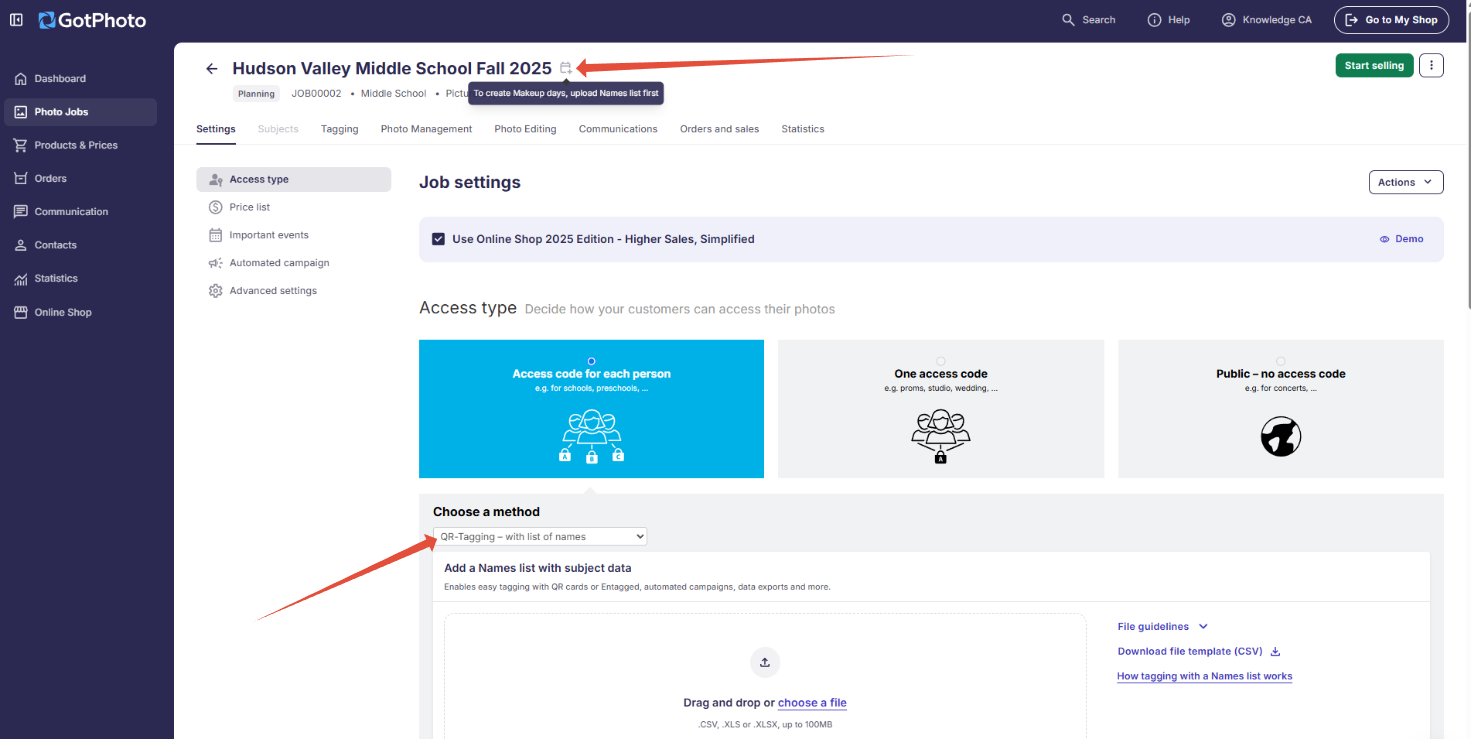
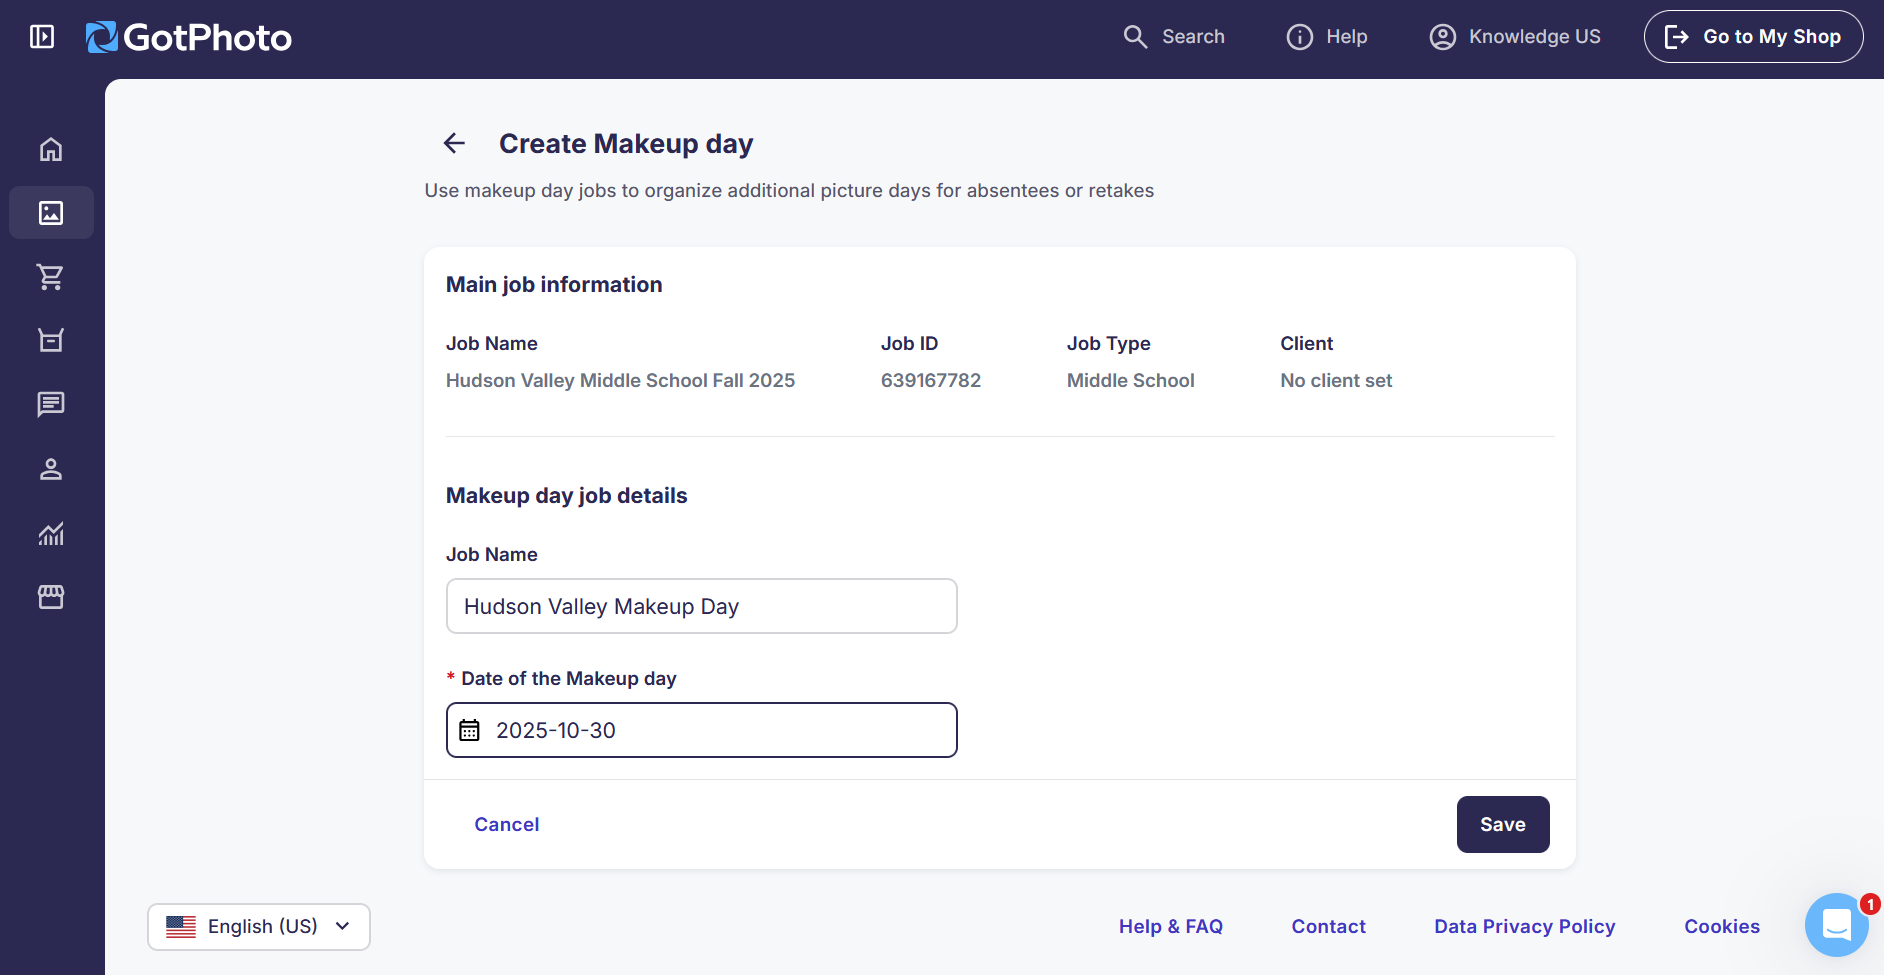
- Fill in details and name your job (e.g., "Makeup Day - Oct 20"). Click Save job.
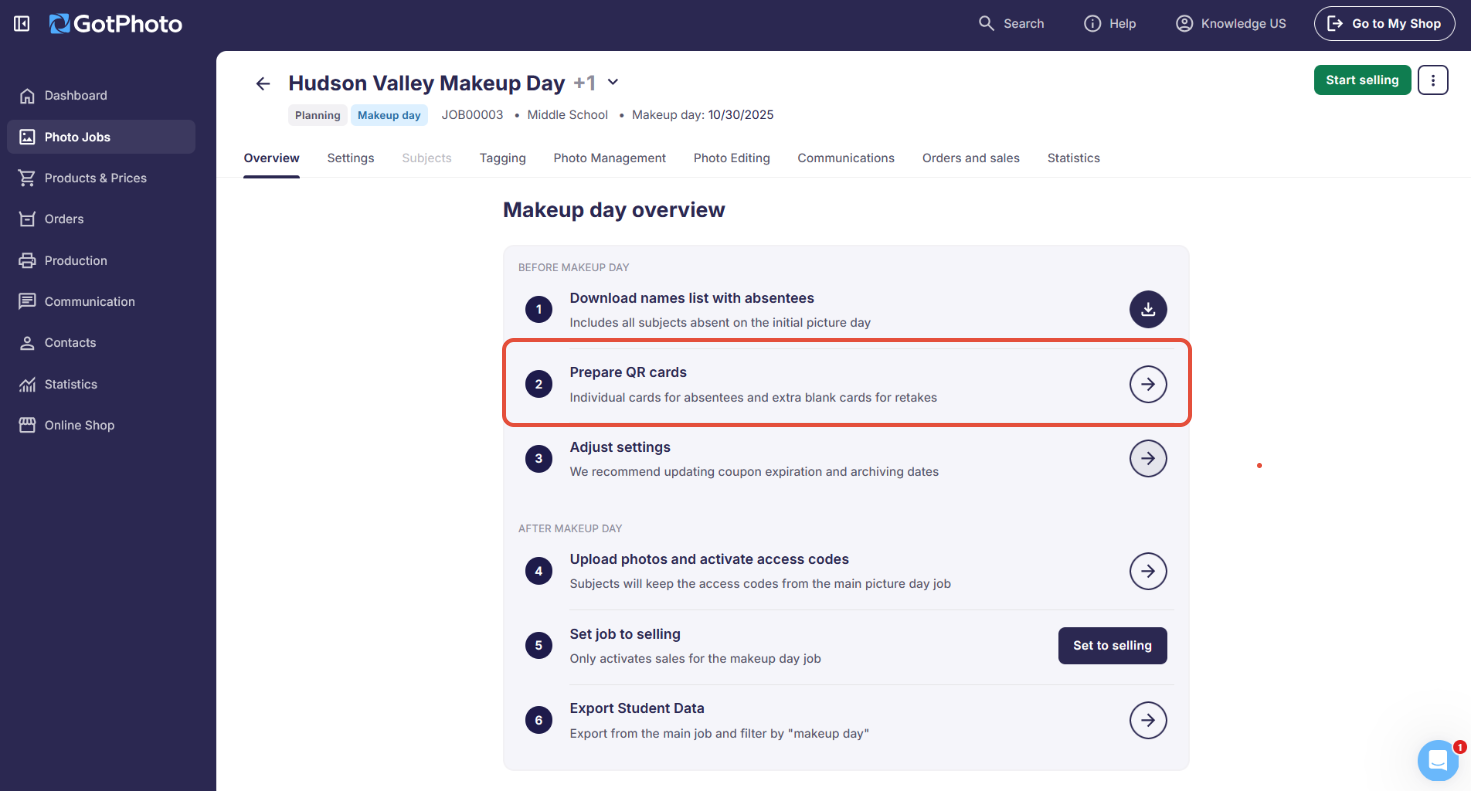
- Use the Makeup Day Starting Guide to walk through the steps.
- Afterwards, your Makeup Day job will appear in the dropdown menu next to the job name.
Simply click the chevron (▾) next to +1 to view it. From this menu, you can also add another Makeup Day at any time.
- Prepare your list of absent students:
- Entagged users: When using Entagged for absentees, use the Absentees filter to ensure you only see subjects whose photos have not yet been taken.
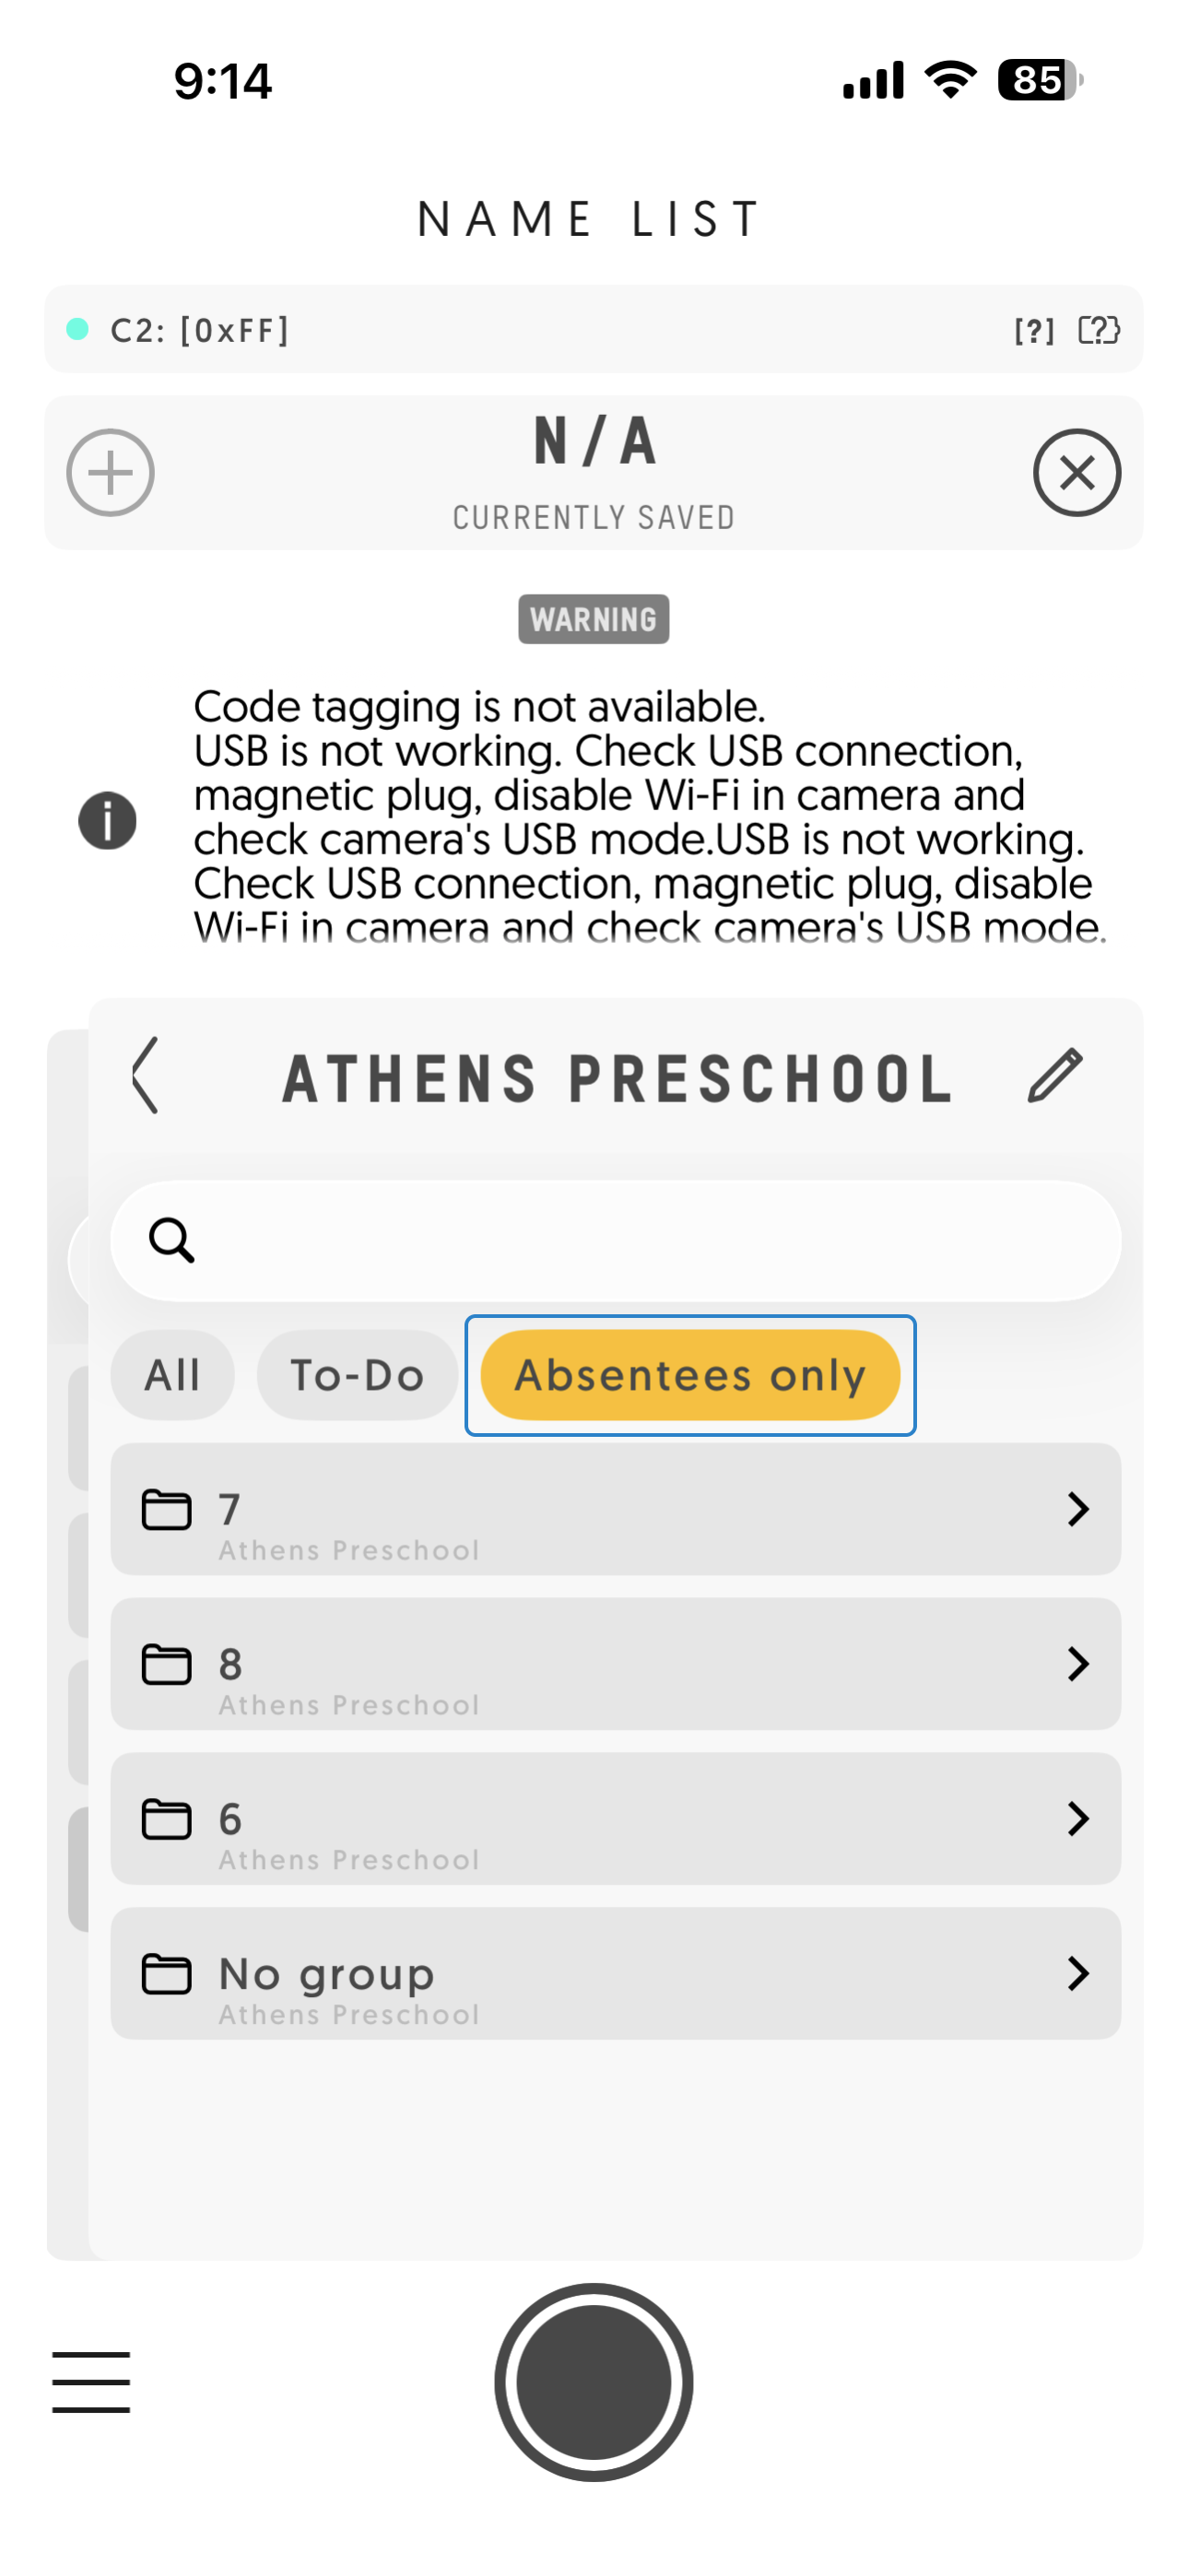
- QR code users: Prepare the QR cards for absentees under Step 2 of the overview.
- Entagged users: When using Entagged for absentees, use the Absentees filter to ensure you only see subjects whose photos have not yet been taken.
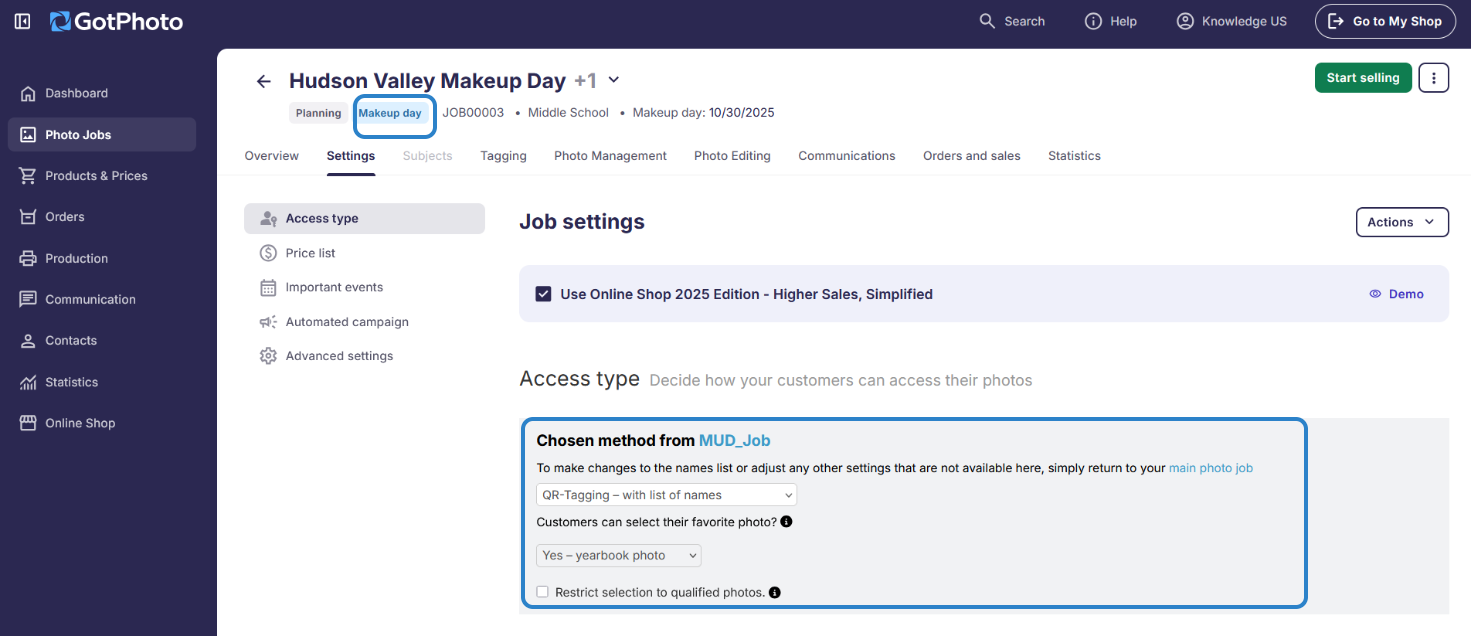
- Adjust Makeup Day job settings. Your Makeup Day job starts with the same settings as the main job. Review and adjust the yearbook photo settings, pricing, coupon settings, the automated campaign and the archiving settings as needed.
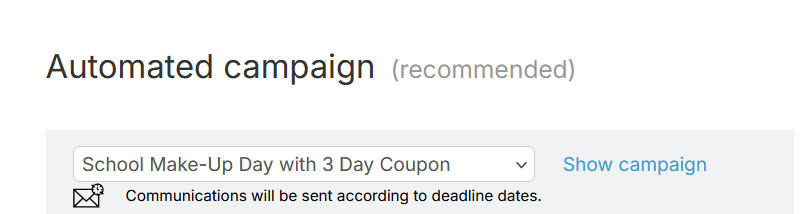
- Set up an Automated Campaign (Communication Profile) specific to Makeup Day (e.g., rename to “Makeup Day Campaign”).
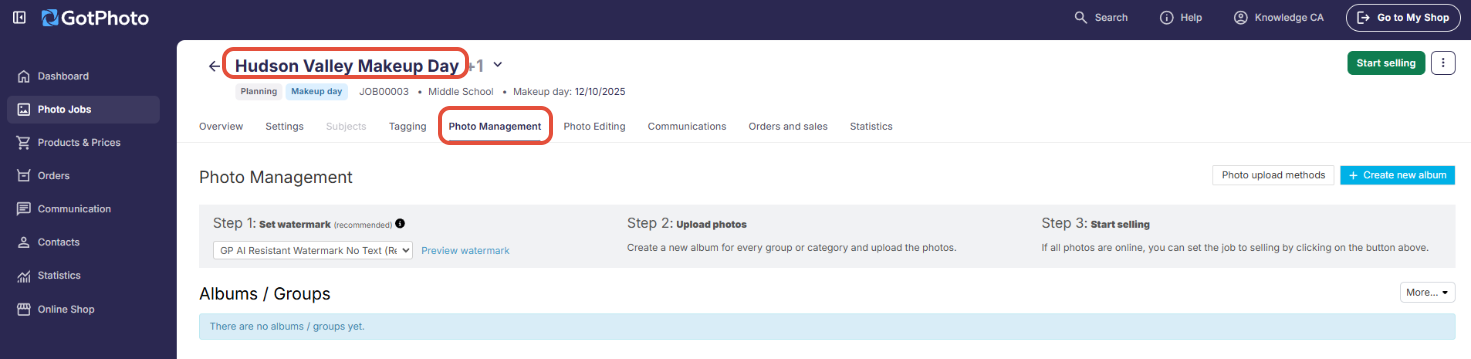
- Upload the Makeup Day photos to the Makeup Day job, not the main job. For a higher number of photos, use one of our faster upload methods.
- Set your job to Selling.
- Export student data across all jobs or separately.
FAQs
Don't see the Makeup Day icon?Upload your names list first. It appears after the list import.
Need to add more students?
Add them to the main job. If you have already generated the Makeup Day cards, delete the current ones and generate them again so the additional subjects are added. Alternatively, you can tag the additional galleries afterward in Photo Management.
Is there a limit to Makeup Days within a job?
This version is specifically designed for Makeup Days for students who missed picture day. Although we have successfully tested the feature with up to ten Makeup Day jobs, we recommend against regularly utilizing it at that scale.
There are important design considerations to be aware of, especially regarding student data exports and statistical analysis:
- Export performance: Handling 30 Makeup Day jobs can take approximately three times longer than processing 10.
- Interface responsiveness: Dropdowns and setup wizards tend to slow down noticeably with a larger number of jobs.
- Statistics generation: Revenue reports and job statistics may require additional time to generate, resulting in potential delays.
Temporarily switch to QR Tagging with List of Names to access the Makeup Day feature.
Do main job changes apply to Makeup Days?
Settings are copied from the main job when you create the Makeup Day job. Changes you make to the main job afterwards are not applied, so adjust them in each Makeup Day job manually.
Can editing services be used separately?
Yes, for both jobs.
If I set up a global access code in the main job, will it work in the Makeup Day job?
No. Global access codes are not supported at this time.
Can I select the output order for QR cards in a Makeup Day job?
No, this option is only available in the main job.
If I archive the main job, is the Makeup Day job archived too?
No. Archive each Makeup Day job separately.
Can I use prepay with a Makeup Day job?
No. Makeup Day jobs don't support prepay. Don't set a Makeup Day job's status to Prepay, because this hides its photos in the shop. When the photos are ready for customers to view and buy, set the job to Selling.
Can I use SpotMyPhotos for Makeup Day jobs?
No. SpotMyPhotos automatically pulls data from an existing job and sends it back into that same job. Because of this, the Makeup Day workflow would not work correctly.
The takeaway
Makeup Day jobs keep sessions for absent students organized under the main job, with separate tracking for orders and revenue. Settings are copied from the main job when you create the Makeup Day job. Later changes don't carry over, so update each Makeup Day job separately.